Attention Rookies: Getting Started In Elite Dangerous
Baby Steps Toward A Sun

This is our guide for absolute beginners. For more detailed advice on a particular space career, look out for our upcoming Careers and Resource Guides.
It may have its flaws but even as undercooked as it is, Elite: Dangerous [official site] still has enough going on that makes it both interesting and difficult to find your feet in the vast galaxy. Trading, bounty hunting, even learning to pilot your ship takes patience and a bit of experimentation. To make things easier as you scrounge together your first few thousand credits (and in anticipation of the upcoming 1.2 update which will finally add useful multiplayer groups), RPS has recruited me to hand out some tips and tricks to get you on your way. So strap in, Commander, and trust in some advice from a man who has learned it the hard way.
Contents (click to skip forward):
My First Sidey
The Bulletin Board
Navigation
Supercruise
Outfitting
Insurance
Buying A New Ship

You’ll begin in one of the handful of starter systems with a nippy little ship called a Sidewinder and a few pennies in your pocket (you’ll most likely have 100 credits unless you backed the game on Kickstarter, in which case, you’ve got 1000. It doesn’t matter because neither amount is going to be much use to begin with). In the galactic scale you are likely to be more or less 100 light years from Sol, which is not so far as it sounds.
The first thing you ought to understand is that your Sidey is free to replace. This means that your insurance costs are nil (however, it will always respawn you back at this beginner station - see Insurance). So don’t be afraid to crash or destroy your ship when you are learning to fly, dock and manoeuvre. Just let rip and take her for a spin outside the station. Get to know the screens, the buttons and the layout of your cockpit. Do a lap around the station, tail one of the security ships, do a barrel roll. Whatever, just have a good time learning. The only essential thing you need to know is that your ship is at its most manoeuvrable when your throttle is balanced in the blue zone.
A Note on your Setup
Piloting is going to be a far easier affair if you have a joystick or HOTAS setup, as well as being much more fun. Controllers can handle the basics surprisingly well and mouse and keyboard gives you a good spread of hotkeys. But neither beats the joy of gripping a nice phallic flight stick and doing a loop the loop like one of yer men from Top Gun. Phwoaaar.

My setup, though not perfect, works well. I have a Thrustmaster T-Flight HOTAS (a solid entry-level joystick with 12 buttons, a twisty stick for ‘rudder’ and a control for lateral thrust). Between the thruster and joystick is the keyboard, F1 to F4 bound to things like Heat Sink and Chaff. The mouse is set to ‘headlook’, while the Num Pad controls all my panel navigation. This last thing takes a little bit of getting used to, but once you’ve got it down you’ll be able to flip through your side menus speedier than a scared rat.
You can try out this setup or go with your own. The point is to be comfortable, as your hands are going to be going everywhere (he he). Half the fun of your first few hours is binding everything so that your ship feels juuuust right. You want to make it so if someone else who plays Elite were to sit down to play at your PC, they’d instantly feel weirded out by the subtle differences. Because this ship is YOURS.
Docking
Although you can spin around in your Sidey at leisure without worrying about insurance, maybe be careful not to ruin somebody else’s day by crashing into them as you come through the docking bay. Docking takes some practice but just remember the helpful mnemonic Pretty Super Brilliant Landing:
Permission - go to your Contacts tab (on left screen) and request docking permission!
Speed - slow down when coming through the ‘mail slot’ to avoid crashes
Bay number - get your docking bay in sight and line up for landing
Landing Gear - put your landing gear down!
Now it’s just a matter of manoeuvring into place. There you go. Pretty Super Brilliant Landing!
Remember: you can request docking anywhere from about 9-10km away. But go inside the station without getting permission and you will only have 30 seconds to get out before being blown up by the internal lasers.

Your Sidey is equipped with shields, two pulse lasers and a 4 tonne cargo bay. That means you can only carry 4 cannisters of goods at a time. The pulse lasers included are also pea-shooters. You’ll have trouble taking on many hostiles with those. My advice is to head to Outfitting and sell these guns right off the bat, making your ship lighter and increasing its jump range. (I’d also advise selling your as-standard Basic Discovery Scanner for the same reasons). Don’t get too worried about the Outfitting menu right now, we’ll cover that in more detail later.
Anyway, you won’t be able to make much use of it until you have some money. Note that if you do add any upgrades to your ship, you will have to pay to replace them if you crash, as they do not come included with the free Sidewinder. But again, don’t worry too much. In this case you won’t have to pay the full cost of the component, just the rebuy cost (see: Insurance).
You will likely want to make some fast bucks and change your ship. But whoa, chill out. The other ships might look cool but the humble Startwinder is going to be your best friend for a little while yet. To make some quick cash, however, you don’t have many options to start with. Go ahead and select the Starport Services and click on the Bulletin Board. This is where you are going to make your first thousands.

This board is basically a list of missions. Generally, there will be a selection of these types of jobs:
Deliver these goods from X to Y.
Go find us some X and bring them back here.
Deliver this message for us, willya.
Go kill X amount of pirates/traders/space cops.
Go kill this one Big Bad Dude for ludicrous monies.
Go find that videotape we forgot to pick up, it’s like, floating out in space or something.
Give us some money for no reason except that you want to be friends.
Give us some guns/food/meds for no reason except you like our trendy name.
Obviously you will want to avoid these last two ‘philanthropy’ missions for now (and the foreseeable future). These get you a reputation gain with the organisation that advertises them, unlocking new, bigger jobs. But there should be enough jobs available to you already without having to pay up, and anyway, you don’t have the cash.
What you are really after is some quick courier missions or goods delivery. Going on missions to find Black Boxes or Rebel Transmissions at shipwreck sites may pay well but these activities are deemed illegal by the Po-Po and you’ll have to smuggle the contraband material back into the station if you want the paycheck - something you might want to put off until you’re more comfortable in the cockpit. Right now, just take a look at some of the simpler stuff.

Above is an example of a mission you could take. It pays a decent 3000 credits and involves a trip to a system just 7 light years away - a single jump in your Sidey. This scrap mission also has the benefit of a super-low fine for failure - just 77 credits. And since it only requires 2 tonnes of cargo space, there is room to take some more stuff. If you are very lucky, you’ll see another delivery mission of 2 tonnes to the same system, or a courier mission you can stack with it. Courier missions have the advantage of requiring no cargo space at all, since you are usually carrying data or small items. (You could also pick up something loose from the Commodities markets to sell in your destination system).
For now, just go ahead and accept whatever mission you can, making sure it is a delivery mission, which looks like this:

...and not a sourcing materials mission, which looks like this:

Basically, a delivery job is a one-way drop-off. A sourcing mission means you gotta go looking for things, then bring them back. These are more time-intensive and really only worth it the material in question is expensive and highly sought, like gold.
Pro-tip for leaving the station: I usually only pull my landing gear up once I am lined up with the gateway, and no sooner. With the landing gear down, your top speed will be cut dramatically, so keeping it deployed while you are inside the bay is good for forcing yourself to stay slow. Whatever you do, don’t bind your Afterburner button close to your landing gear button. Mixing these up has cost many a pilot (including myself) their cargo.

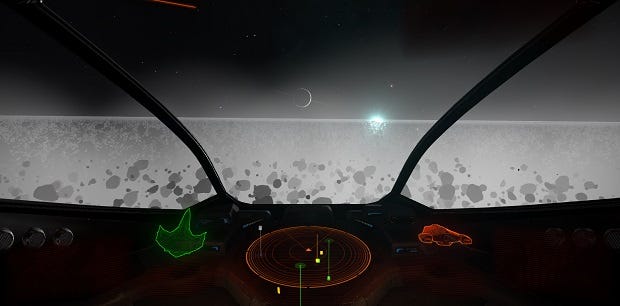
To find your destination, bring up the Nav Panel on the left-hand side of the cockpit. This lists the known objects in the system (planets, moons, outposts) and the closest stars of other systems, in order of proximity. Select the Galaxy Map from this screen to see a 3D map of nearby stars.
A few things you should know about the Galaxy Map:
- Get the Galaxy Map bound to a comfortable hotkey, because you are going to be referring to it a lot. Mine is set to the spacebar. Because I get to think the phrase “Let’s hit the Space Bar!” to myself when I tap it. Space Bar.
Okay, so let’s deliver your scrap/waste/delicious fish. You can either find the relevant system on this map (check the Transactions tab on the left if you have forgotten the name) or more simply scroll down the list of nearby star systems on your Nav Panel. Select your intended system and lock destination.
The compass directly left of your sensors will now show you the direction to turn and the system will be highlighted on your HUD. The blue pip on your compass will be hollow when you are pointing away from your destination and fill up when you face the right direction. Point yourself at the goals, throttle up and hit the key for your Frame Shift Drive.
4, 3, 2, 1. Bwwwooooooooooo!

OH JESUS STOP, THROTTLE DOWN, THROTTLE DOWN.
Phew. Okay. You will notice that you have dropped out of warpy warp in front of a giant star. This is how you get from system to system in Elite. There are no insta-warps from planet to planet or station to station. Instead, there are three modes of travel:
Normal flight: Coasting around space stations, nav beacons and other “bubbles” of localised space, sometimes at a comfortable 250 km/s or so. It is possible to go faster than this in other vehicles but know that around the 400 km/s mark you will start to black out from G-force. No, really. There’s a lot to learn about piloting in “normocruise”, including when to turn Flight Assist Off. But that’s a lesson for another time.
Frame Shift Jump: aka hyperdrive aka warp. This mode of travel is pretty much an unalterable loading screen between systems, during which you will be unable to check your screens, redistribute power or change any aspect of your vehicle. Still, looks pretty neat.

Supercruise: This is your inter-system mode. Technically still faster than light, supercruise will allow you to travel from planet to planet, approach stations as they orbit their parent body and fly away from that terrifyingly large star before it boils you alive like a sorry lobster. Travelling in supercruise can take some getting used to and it is very easy to overshoot your target. Here are the things you need to know:
Your HUD and your Nav Panel will tell you how far away your target is, be it a space station or moon or another player. Just like in normal piloting mode, planets and systems are under the Navigation tab, while other pilots are marked under Contacts. But you can only see the pilots that are also in supercruise. You cannot detect the ones in “normal” space.
Distance is measured in LS, or light seconds, dropping to a measurement of Mm (Megametres, ie. a million metres) when you get much closer to an object. For example, let’s say you head towards a station 100 LS away. When you are 0.1 LS from it, the measurement will switch from reading 0.1 LS to 29 Mm. To break this down: 1 LS = approx 300 Mm because that is how fast light travels. Three hundred million metres a second. So, 0.1 LS = approx 30 Mm. Maths! If you still want some sense of scale, the moon is about 1.3 LS from the earth.
Again, the blue zone on your throttle is a great help. If all you do is point in the right direction and get your throttle to the middle of the blue zone, your journey in supercruise will be mostly sorted, as your ship will adjust its speed automatically. This isn’t the fastest way to travel in supercruise but it is reliable.
Things will often be hundreds or thousands of light seconds from the sun you “land” at. Judging which stations are simply too far away to bother visiting will save you a lot of time. Generally, I don’t bother visiting places over 3,000 LS from their parent star, unless it is REALLY worth some cash (and it rarely is). If I could only warn you from visiting a single place, it would be Hutton Orbital in the Alpha Centauri system. It is a staggering 0.22LY away from its star and will take you about an hour to reach in real time. They sell a rare good called Centauri Mega Gin, but frankly, the galaxy can do without that pish.
When you are close enough to a target (usually within 1km) and travelling slow enough you will see a blue ‘safe disengage’ notice at the bottom of your windshield. A single press of the FSD button will drop you into your intended zone. Happy days.

Planets, moons and stars all have their own gravity wells, which slow you down measurably when you are close. So if your station is on the far side of a body, don’t try and cut corners by flying close to the planet, as you’ll often end up slowed down. On top of this each body has a sphere of proximity that you can’t enter (ANDINTHEGAME). You can see these spheres as a visible, circular line. If you get too close and pass over this line, your ship will perform an automatic stop and forcefully drop you out of supercruise. Which brings us to our last tip...
Do not use your emergency stop. Your first few trips in supercruise will likely see you going too fast and flying straight past your intended target. This is OK. When you tap the FSD button while going too fast your ship will warn you that it cannot safely stop but, if you like, you can double-tap to emergency stop. My advice: don’t.
It is tempting to pull the brakes when you think you are going to overshoot but an emergency stop damages your hull and modules and this costs money to repair, even if the damage is slight. It also takes time for your FSD to cool down and re-engage. It is much faster, easier and less costly simply to drop the throttle, loop around and get the destination back in sight, all in supercruise. Trust me. If you missed your exit on the highway you wouldn’t pull the handbrake and screech to a halt. You’d die. No, instead you would calmly find the best turning point and safely go back.
My personal method for supercruise is usually to throttle full speed toward my goal from the sun, then pull the throttle back to the middle when my speed matches the distance by a factor of ten, then slowly drop my speed as I approach. For example, if something is 1000 LS away, I throttle full speed, and when the station is about 300 LS away, my speed ought to be about 30c. I quickly drop the throttle and continue to keep my speed matched with the distance.
Remember: 1 km is the distance you will normally need to be within to safely disengage. My method is not the speediest (although still pretty fast) and it takes some mental practice to start with. But I rarely overshoot and figuring speeds and distance is pretty much second nature now. Fangrim offers a more thorough guide to pro supercruising on Frontier’s forums.
Now that you’ve got to your destination (and hopefully have not burned up in the sun), you can dock as before (Pretty Super Brilliant Landing!) and complete any deliveries using the bulletin board. Easy. Even a handful of these missions will see you on your way to making a bigger buck.
Once you’ve got some cash in the back burner, you can begin to think about upgrading the parts on your ship.

I advise getting at least 20,000 in cold, hard creds before you start to outfit the Sidey, which shouldn’t take so long. This is all you need to kit out a starter vessel capable of carry a few more goods that usual, and still have cash left for extras. You can check how much money you have, while docked, on the Starport Services screen. But while in transit you can also check your balance on the right screen, under your ranks on the Status tab. Scroll through the Status tab and you will also see your Statistics screen. This is just a beautiful screen to know. It charts a lot of stuff, but most importantly it displays your current assets. This sum is pretty straightforward:
Current assets = credits in account + value of your ship + ship parts.
Basically, everything you own. (Although any other ‘stored’ ships currently don’t seem to count towards this number).
Arguably Elite’s most obfuscated and unclear mechanic, the outfitting bay is also one of the smartest parts of the game. You just need to understand it first. Because this takes a little more explanation than everything else, we’ve done this handy video.

I advise you watch it at least until the basics have been covered. If you are strapped for time, however, here are the most important things:
- High Tech and Industrial systems are the best places to do a big outfitting job, as they generally have the biggest selection of ships and ship parts. Poor economies based on Extraction or Refinery will have far fewer parts. Check your galaxy and system maps to see what type of economic system you are in by using the ‘economy’ filter.

Insurance is super easy. While in the cockpit, look at the left panel. Underneath your ranks, there is a rebuy cost. This is how much it will cost you to buy back your ship (including all its attached parts) if you are summarily destroyed by, say, the one hundred lasers of death in any port.
This rebuy cost is 5% of your total ship’s value. Simple. Always, always have enough to pay this figure. As in EVE: Online, the rule “don’t fly anything you can’t afford to lose” is God. By covering just this small insurance fee, you will secure a huge sum of your assets, because you will likely have as much money attached to your ship in the form of parts as you do in your bank account.
With a vanilla Sidewinder with no modifications, you obviously do not need to worry about this fee, since the basic model is free to replace. However, you need to know that taking the free Sidey will always plop you back in your very first system - in the very space dock where you began all your adventures. So buying back your old model is advised if you don’t want to travel that distance again, or if you have begun to attack modules that are costly and hard to replace. Once you begin adding these better modules to your ship, it is wise to start covering your insurance.

So you reckon you’ve got enough for a new spaceship? WRONG. You most certainly do not. Although the Eagle (a nippy fighter going for 44,800 credits) and the Hauler (a basic transport van for about 53,000 credits) are affordable looking while they sit in the shipyard, you need to remember that there will be extra costs to outfit either of them with better bits and bobs. So do not consider the price tag of a ship your next goal. Realistically, you are going to want thousands of credits more.
When you do go to buy a ship, you will have two options.
1. Buy it outright and stick your current ship in storage.
2. Trade in your old ship for extra cash.
Trading in your ship is a good way to get onto the next rung early in the game but note that the money you get for it is 10% less than its total value. This is a pawn shop, after all. This 10% will be a much bigger problem later in the game, when you are dealing with huge sums of cash and fat ships. Right now, if you can get a little bit of extra cash trading in your vessel, I say go for it. HOWEVER, there is something you can do to minimise this cost: Go to the outfitting menu and strip your ship down before selling.
This means the value of the parts isn’t included in the 10%. Instead, you have sold the parts for face value, and will only lose 10% off the “shell”.
So basically, there is one rule for trade-ins: Always sell every part on your ship individually before selling the ship itself. This way you lose less money on the 10% loss when you sell or trade it in.
And there you have it, we’ve covered all the truly basic stuff. If you want some tips on how to go about preparing for a career in trading (or how best to indulge in a life of crime) read our guide to the handful of specific careers you can follow in Elite: Dangerous. I also highly recommend taking a butchers at our resource guide which is overflowing with useful tools, infographics and links, including a calculator that can discover the most profitable trade routes and a shipyard tool that lets you estimate the cost of any planned ship. For now, I hope you learned some things. Goodbye, and may your space life be full of pretty super brilliant landings.