The Flare Path: Capuzzo Counterpunch
A Panzer Battles: Battles of North Africa tussle tale

As I've never played the evocatively titled “#410616_03v_Battleaxe_Fort_Capuzzo.scn” before and Panzer Battles: Battles of North Africa 1941 screenshots tend to be a bit beige/boring, the following image-festooned combat yarn is something of a gamble. I'm hoping whatever happens during the next few hours will prove that this suntanned grandson of the Campaign Series can deliver believable battlefield thrills almost as efficiently as the likes of Combat Mission and Graviteam Tactics but won't be held wholly responsible if it doesn't.

By PBBoNA standards, 'Fort Capuzzo' is a rather parochial and brief affair. Classified as 'regiment' sized (Many of the game's 115 scenarios are 'division' or 'corps' sized. A few, like the tutorial skirmish pictured above, are tiny 'battalion' scale scraps) and set to end the moment Turn 12 completes (Sadly, the series doesn't do fuzzy finishes) I've picked it for both practical and sentimental reasons. The flat, bald Cyrenaican battlefield features in one of my favourite tank sims and the friendly unit count – approximately 25 if, as I intend to do, you play as the attacking Germans – promises not to try my patience.

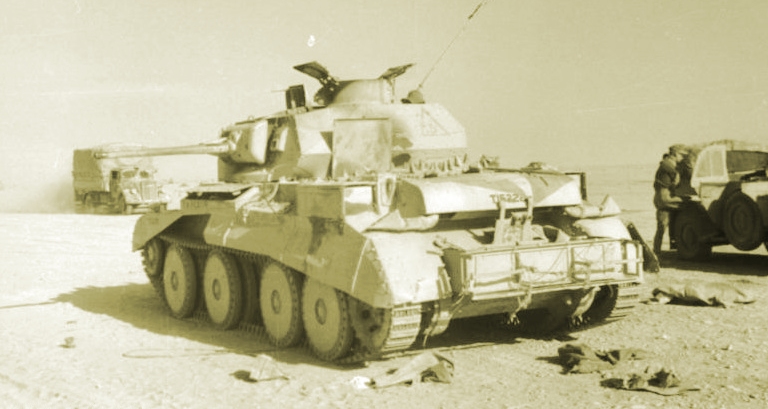
On June 15th, 1941, the first day of Operation Battleaxe (A bid to relieve the Australians cut off at Tobruk), the Allies discovered Rommel's Afrika Korps were dab hands at defence as well as attack. The capture of Fort Capuzzo was just about the only thing that went right for Wavell's men during the op's opening stages, and the following day even that modest gain was under threat. Early on the 16th, from their hastily prepared burrows close to the Italian-built fortress, soldiers of the 11th Indian Infantry Brigade heard the polyphonic roar of Panzers approaching from the northwest.

One of the only reasons the Allies made any progress in the early stages of Battleaxe was the Matilda II, an exceptionally resilient but not particularly well armed 'infantry tank'. As the briefing specifically mentioned these perambulating pillboxes, and the most potent AFVs in my starting line-up seem to be 14 Pz IIIs (I've also got 16 Pz IVs but, counterintuitively, because of their short-barreled low-velocity KwK 37 main guns, early-version '75mm' Pz IVs are actually less effective anti-tank tools than late-version '50mm' Pz IIIs) I'm relieved to find four towed 88mm flak guns amongst the column of fixed* units (Beech) behind my two tank clusters (Oak and Elm). Unless I can close with the Matildas (Unit facing isn't a factor in Panzer Battles) this quartet of repurposed ack-ack guns could find itself very busy.
*immoveable until released by the scenario script.

^ click to enlarge
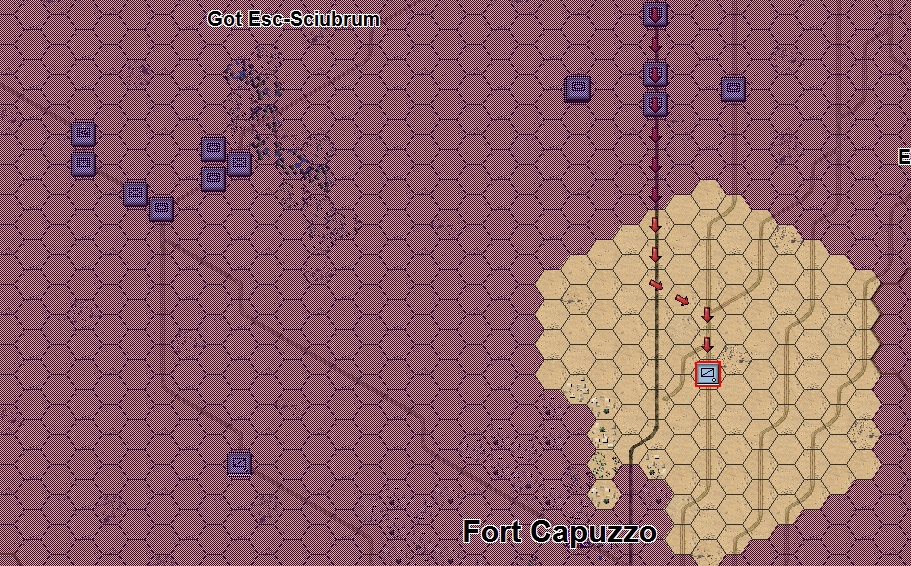
The worrying absence of ridges, wadis and scrub on the map, and artillery and aircraft units in my off-map support tab suggests surprising the defenders of Fort Capuzzo isn't going to be easy. I start Turn 1 by sending two platoons (Counters generally represent platoons) of motorcycle-mounted scouts speeding towards the eastern and southern fringes of the seemingly deserted settlement. The first biker gang, probing on behalf of Oak, exhausts its movement points without attracting a single burst of opportunity fire. Elm's recon party, heading due south, gets a slightly warmer reception - a flurry of mortar bomb detonations prompting a swift off-road detour. Encouraged (The mortars caused no casualties) and aware that time is of the essence, I decide to send the main bodies of Oak and Elm scurrying after their respective recon units. Turn 1 ends with no enemies in sight and ten blue chits tantalisingly close to the scenario's sole victory hex.

The dust-caked BMW motorcycle combinations press on at the beginning of Turn 2 scouting a seemingly unguarded route to the airstrip for Oak and flushing out a couple of tempting targets for Elm. While Elm's Panzer III platoon pauses to suppress infantry occupying trenches next to the metalled north-south road, further south its Panzer IIs and IVs - 17 AFVs in all - mercilessly pummel a revealed Allied mortar position. In Panzer Battles infantry, especially when entrenched or foxholed, are refreshingly robust but this fusilade is sufficiently fierce and accurate to trash one of the unit's tubes and instantly daub a D ('Disrupted') on its counter.

The Allies use their portion of the turn to open fire with two previously unspotted units. Luckily for me, neither the cruiser tanks dug-in close to the mortar or the unidentified unit north of Oak's now-on-foot engineers make much of a first impression.
My tanks - especially my Pz IIs - have reason to be wary of the Cruisers' QF 2-pounder main guns, but prompt, aggressive action from Oak's Pz III's ensures the advance doesn't falter. One of the 50 mm AP shells that screams low across the airstrip at the start of Turn 3 causes a fatal puncture wound (in PB every vehicle and soldier loss is reported) and others cause palpable alarm.
In the enemy phase, my decision to push Oak's Pz IIs and engineer platoon into the built-up area north of the airstrip begins to look like a mistake. The move brings them into contact with three new Allied units – static platoons of light tanks, AT guns, and Matilda IIs. The latter announce themselves by turning two of my frailest AFVs into fulminating funeral pyres. And the Pz IIIs that quelled the cruisers may be in trouble too. Fixated on armoured adversaries they failed to notice that they were approaching slit trenches tenanted by turbaned engineers!

I encourage a few of Oak's drivers to select reverse gears during Turn 4. The startled Pz IIs put adobe walls and palm trees between themselves and the Matildas, and the Pz IIIs near the airstrip put a couple of empty 250m hexes between themselves and the too-close-for-comfort Indian engineers. It's not all back-pedaling though. Another Cruiser is culled, this time by a low-velocity 75mm round flung by an Oaken Pz IV, and German HE slays several soldiers in Allied infantry hexes.
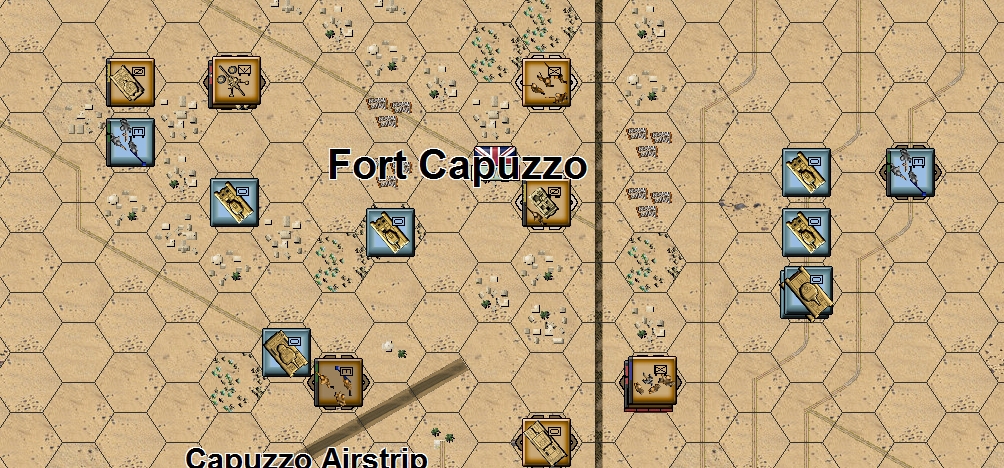
Turn 5. Improving visibility means everyone involved in the fight for Fort Capuzzo can see a hex or two further and – at last – I get the message that Beech, my 'fixed' column, has been unfixed.

Oak's engineer platoon (labelled 'A' above), reduced by two during the previous turn by chattering Besa MGs, strikes back early in Turn 5 presumably with AT rifles or grenades (Panzerfausts are still two years away from entering service). A Vickers Light Tank is stopped in its tracks amongst the white cubes on Capuzzo's western edge. Elsewhere the suppression of infantry and AT positions continues. Elm's Pz IIIs (labelled 'B') have attracted the attention of an Allied AT platoon ('C'). They're 'fatigued' by the incoming fire, but manage a telling reply. Two Indian guns - probably QF 2-pounders – are well and truly clobbered.

Aware that I can only achieve so much with HE shells, I hurry Beech's outsized infantry platoon (actually it's more of a company) southward in Turn 6. The MG platoon advancing to the west of the metalled road stumbles upon several sedentary Matildas as it disembarks and is lucky to escape with a handful of casualties. Further north, sweating Pak 40 teams scramble to splay trail legs and unpack Panzergranate 40 rounds. Their first contributions discombobulate the aforementioned Matildas – a respectable result given the range. Hopefully, my 88s, currently setting up in the NW will do better next turn. Less positive developments this turn include two Panzer II losses sustained by Elm force. Despite the attention of Elm's Pz IIIs and the approaching infantry threat, the Indian AT battery by the main road remains extremely dangerous.

Turn 7. PB's Matilda IIs really are as tough as old jackboots. The northern infantry tanks shrug off everything thrown at them this turn, including 88mm AP. The attacks aren't completely fruitless because they add 'fatigue' (one of PB's most important combat modifiers) to the target but I was hoping for more. Frustrated, I ask Beech's MG platoon to attempt a close assault despite an 'unknown odds' warning. Four panzer grenadiers perish pointlessly in the subsequent repulsed charge.

On the other side of the road, a similarly aggressive action is also rebuffed with four friendly casualties, but not before an AT gun is KOed and eleven Indians slain.

Turn 8. Although wherever you look German tanks and AT guns are nibbling away at Allied man- and willpower, I can't shake the feeling my attack is bogging down. Time to fully commit Elm's engineers I think, and do something decisive with Oak's. The former move westward towards the objective through ragged lines of friendly tanks busy suppressing. The latter, sensing the Indian light tank platoon is in trouble, go in for the kill. After an assault that's more impressive aurally than visually (PB's sound is surprisingly good) a beige counter, albeit a not very significant one, vanishes from the board.

Turn 9. It's third time lucky for Beech's main infantry component. Two Allied platoons are ejected from the assaulted hex (labelled 'H' above) the German numerical advantage combined with Indian grit resulting in unusually high Allied losses (23 men and 2 guns to 4 men). Meanwhile's Beech's dismounted scouts ('I'), all 100+ of them, aiming to infiltrate Capuzzo from the NW, are making decent progress unlike Elm's engineers ('J') on the other side of the village who are struggling to traverse a minefield. True, that 'decent progress' may not continue next turn. During the enemy phase, a third Matilda platoon appears on the map right next to the advancing aufklärers.
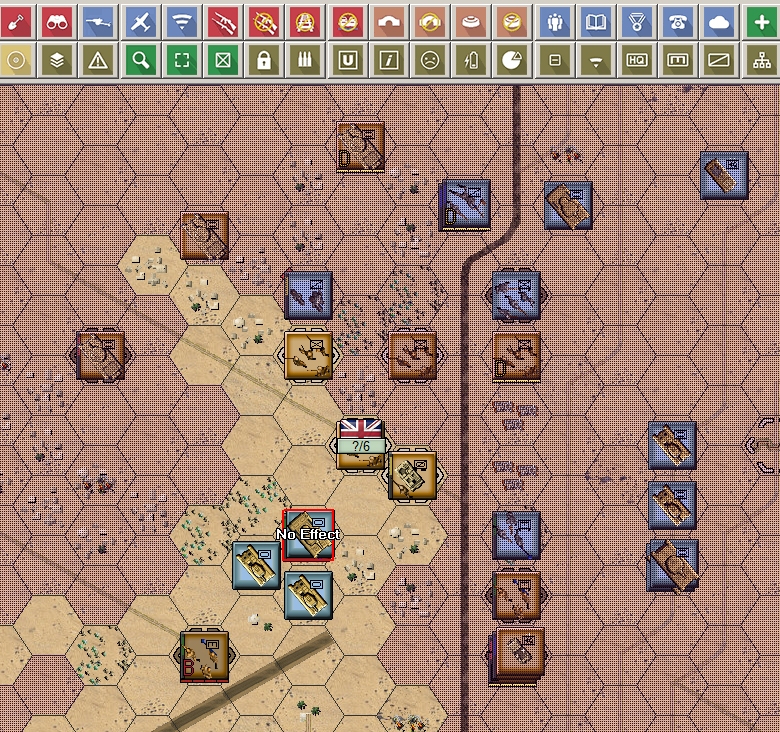
Rapidly running out of clockface, I send the majority of Oak's strength scuttling towards the VL in Turn 10 (the engineers that earlier wiped out the Vickers Light Tank platoon are sharing a hex with the highlighted Panzer IIIs in the above pic). Broken last turn, the Indians beside the airstrip show little interest in the caterpillared cavalcade as it passes. Aware that the fort itself is still in Allied hands, Elm also gets its arsenal in gear and surges for the objective.
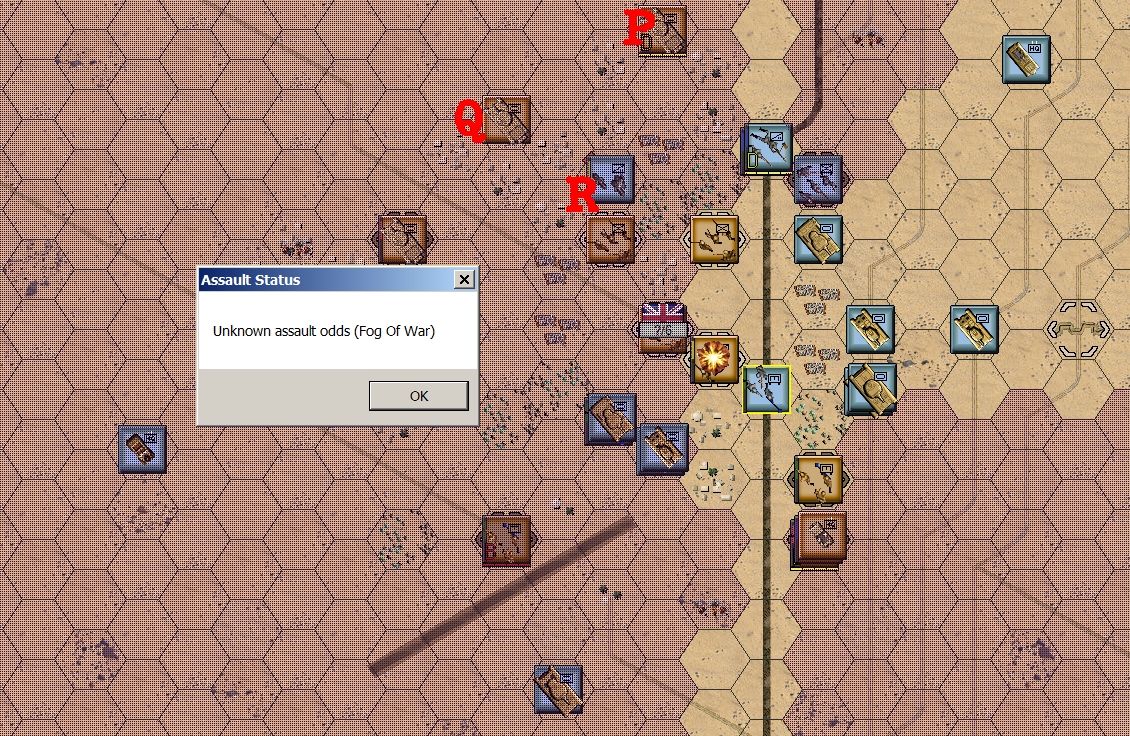
At last! On Turn 11, after several turns of patient plinking, my 88s finally achieve a long-distance Matilda kill (the victim was part of the platoon marked 'P' above). Should I have deployed them closer to Capuzzo? Perhaps, but it's too late for adjustments now. The imminent results screen may also contain tacit criticism of my infantry usage. Seeing the way Beech's scouts just wriggled past the Matilda platoon ('Q') that threatened to halt their progress (admittedly they were subsequently stopped by a combination of mines and small arms fire – see 'R') make me think I should have done more bypassing and less bludgeoning with my foot sloggers.

Not that I've totally given up hope of snatching the fort in the hour (two turns) that remains. Clear of the minefield, Elm's engineers attempt to claim the hex SE of the objective. Bren Gun Carriers lurking like deathstalkers behind low rubble walls ensure the bid fails. A stone's throw to the west, Oak's engineers, also expending MP 40 ammo like it was going out of fashion, arrive a fraction too late to assault the VL itself. That plucky push will have to wait until Turn 12.

The final turn starts promisingly. First my 88s remove another Matilda from the Allies' easily sidestepped armour screen then, aided by prodigious amounts of tank and arm-hurled HE, Elm's engineers overrun the battered Bren Gun Carrier hex. It's up to you now, Oaken engineers. Make every SMG burst and stick grenade count. The Flare Path and the Fatherland expects.

Disappointingly, when the smoke clears, a ragged union jack is still flapping over Fort Capuzzo. I've failed to evict the Indians from the VL and Panzer Battles in its wisdom decides that this failure together (perhaps) with my miniscule Matilda tally, means a Draw result is in order. Bearing in mind how the real June 16th attack on Fort Capuzzo went - “By 10:00, the 15th Panzer Division had lost fifty of its tanks, and by 12:00, they were forced to withdraw” - I'm not desperately unhappy with the way things turned out.
* * *