The Flare Path: Welcomes Combative Commenters Again
Communal Combat Mission

The Flare Path's first attempt at play-by-comment Combat Mission proved rather exciting. Over the course of five days mountains of orders were issued, multiple Shermans were slain, and numerous fingernails were nibbled. I think it's about time we had a second scrap. Anyone fancy a spot of sandy skirmishing courtesy of the olden-but-golden Combat Mission: Afrika Korps?

The Concept
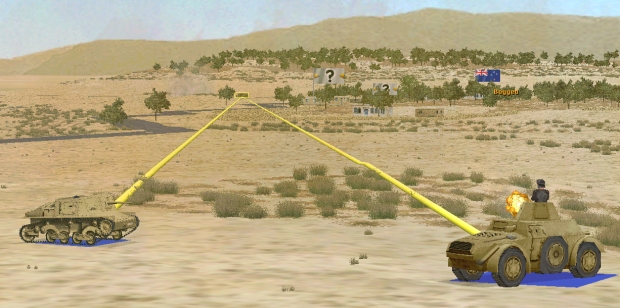
Just in case you weren't around for April's Belgian rumble, here's how PBC Combat Mission works. Every turn, via a comment along the lines of “Turn 1 orders here, please...” I solicit written instructions for friendly forces (enemy units are AI controlled). Orders are accepted on a first-come-first-served basis with individual commenters only permitted to ‘move’ a single vehicle or infantry squad per turn. One turn SteelGeranium might send the Bren Gun Carrier trundling eastward towards grid square V25, while Chartwell chooses a target for the three-inch mortar and Nichtschießen does something sly with the sniper. During the next order round, SabotBrummel could end-up in charge of the Carrier while Cudjo81 and Brexile do the honours with the mortar and the sharpshooter.
Once the orders are in for all* units, I’ll execute them then return with a brief image-accompanied account of how the subsequent sixty seconds of in-game action played out. Did you manage to sneak the HQ into that wadi without being cut to ribbons by the HMG on the hill? Did your Stuart discover something nasty behind the woodshed? It will all be revealed.
*Occasionally, to keep things moving, I may step in and issue orders for an unpopular or peripheral unit myself.

I can't promise to process orders instantly – like all GGMs (Groggy Gamemasters) I'll be taking time out to sleep, eat, stroke the cat, and dabble with recent wargame releases - but, going by Battle of Unnamed Belgian Town With Unusually Short Street Lamps, the drama should unfold at a reasonable lick. Please pop in regularly to check on progress and lend a hand with the Kiwi choreography.

The Challenge
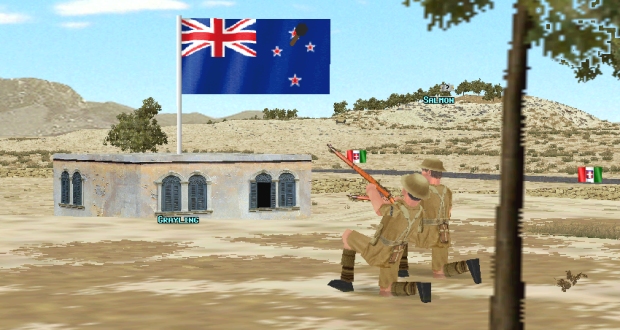
It's Nineteen-Forty-Something and the Desert War is in full see-saw. Somewhere between Benghazi and the Back of Beyond, an unremarkable hamlet is about to become remarkable for a hundred or so New Zealanders and Italians.

Approaching from the north-west (don't ask) the commenter-controlled Kiwis have their sights set on two major 300pt Victory Locations in the village itself (Carp and Kokopu) and four minor 100pt ones (Perch, Grayling, Bully and Salmon) in the surrounding countryside. Approaching from the east, with similar territorial aspirations, is an AI Italian force of unknown size and composition.
If the Allies are going to prevail today the following units will need both luck and good leadership.

At the head of the motorised NZ column is a Bren Carrier carrying the four-man HQ of 1 Platoon. Keeping Lt. Yarham close to his three ten-man squads and support teams in the coming scrap will be beneficial. Units within his command radius (indicated by a red rather than a black command link) will fight more effectively, they'll be less likely to panic, be harder to spot, and they'll have shorter order implementation delays.

Those three squads are mounted in three useful but vulnerable trucks at the moment, one of which is also carrying the force's two-man anti-tank rifle team.

Equipped with two beefy Browning MGs, our White Scout Car could well prove influential. Its armour should shrug off most small arms fire, but will provide little protection against mortar bombs and tank rounds. Talking of mortars, the only artillery available to the Antipodeans is a three-inch example currently packed into the Scout car along with its three operators.

Bringing up the rear of the column is a Portee. It may look ungainly and have some quirky characteristics (Like the Archer TD, it's designed to reverse into combat positions then speed off when threatened) but its 2-pounder has sufficient punch to deal with most – possibly all - Italian AFVs.

Lastly, there's your two tanks. Due to mechanical issues, these are running a little late. Expect them to turn up about 5 turns into this 35 turn engagement.
The Venue

(click to enlarge)
Eminently defensible thanks to its scatter of heavy buildings and clusters of dense palms, the village in the centre of the map is your primary objective (Victory locations Carp and Kokopu). More vulnerable are Perch and Grayling, the two VLs on the eastern fringe of the large olive grove north of the village.
Though tanks should be able to move about the grove relatively easily, amongst the trees wheeled vehicles may struggle. Elsewhere the terrain should pose few problems for men or machines. Apart from a few patches of rocks (grey squares in the map above) and clumps of palms (three blue-green squares in village) - areas out-of-bounds to all vehicles - our trucks and tanks can roam almost* wherever they like.
*Walls (the white lines) block trucks.
In terms of sight lines, the battlefield isn't particularly hard to read. High ground (shaded red on the first map) in the olive grove, means the New Zealanders should be invisible to prying eyes for the moment. Sizeable hills in the SW and SE provide the map's loftiest vantage points, the wadis (shaded green on the first map) either side of the longitudinal highway, possibilities for unobserved movement.

^Looking SE (Camera over Allied start point)

^Looking NW from the high ground at Salmon

^Centre of map, looking SW (Perch is the VL closest to the camera)

^Centre of map, looking N from the wadi. (VL in centre is Kokopu)

Issuing Orders
You don't need to understand the intricacies of Combat Mission: Afrika Korps or its order system to participate. Just provide a destination co-ordinate, and perhaps a clue to pace/cautiousness and I'll do my best to translate your instructions into an in-game order.
Two orders I expect I'll be using a fair bit are 'Hunt' and 'Move to Contact'. Moved with the former, AFVs will proceed cautiously, stopping to engage targets spotted en-route. Directed with a nuanced version of the latter, advancing infantry will hide at the first glimpse of a threat. If anyone decides to split a 10-man infantry squad (represented on screen with three figures) into two 5-man sections (a potentially sensible step given the Kiwi's shortage of manpower) then, to reduce the risk of administrative overload, until the squad reforms (done automatically if sections are in close proximity at the end of turn) the Comment Commander that takes responsibility for one section should also shepherd the other.
Newcomers wanting to learn about CMAK, its powerful command options and deep simulation, could do worse than check out the manual and the demo. I'll do my best to answer questions during the battle, but as it's been a while since I last indulged, my explanations may not be 100% reliable. Sadly my old graphics mod folder is nowhere to be found, so the pics adorning the following battle narrative won't show Battlefront's sun-scorched classic at its very best. Default skins, octagonal wheels and turnip-headed troops await! So too – fingers-crossed – does tension, torridness and triumph.
Good hunting, Comment Commanders!
* * * * *

TURN 1. Stirring up clouds of choking dust, most of the NZ column bee-lines for the village. As the vehicles are still some distance from their destinations when the 60-second turn ends and there's no sign of threats I click the 'Go' button again.

TURN 2. VL Carp is now in Allied hands. Slightly delayed by a bogged truck, 1 Squad have just dismounted and are making for the VL building. 2 Squad, further east amongst the palms, and soon to be joined by the ATR team, are intent on concealment. Close behind them, the HQ makes itself comfortable under a clump of olive trees.
Just to the north of Carp (to the left in the above pic) the Portee is beginning a turn to the SE, and the mortar is a couple of strides from its destination. 3 Squad (out of shot) wait in the shade of a wall next to the grove entrance at e15.
While there are no Italian units in view yet, ominous dust clouds in the SE and NE suggest they're on their way.

TURN 3. Tim and tide wait for no man. 2 Squad, the Bren Gun Carrier, and the ATR team must make do with their current positions/orders for the time-being.

TURN 4. As turn 3 ends with no enemies in sight and several movements incomplete, we press on.
On the northern edge of the battlefield the White Scout Car reaches its new position to find its view eastward blocked by a low ridge extending from the olive grove (This feature wasn't shown on Map 1 but I'm going to put this down to a 'realistic' cartographic gaffe. Period maps of North Africa were littered with errors!)

Within the grove, 3 Squad will also need to push further eastward to observe the open ground beyond. Despite cresting the ridge their view is blocked by trees.*

In the village the Portee has reversed round the corner of the building at t14 and now has excellent LoS due east. From its new position it can see the top of Salmon Hill too.

As can the cluster of Kiwi infantry units beyond Carp. 1 Squad are selected in the above shot.

'Out of command' and unsighted (a combination of factors which means it can only engage targets it can see) the mortar team's usefulness is limited at present.
Turn 4 closes with the Italians yet to reveal themselves. The NE dust cloud approaches Bully, while the SE one, last seen heading in the direction of Salmon, seems to have disappeared.
*Trees are abstracted in CMAK and the other 'CMx1' titles. Woodland/forest/grove tiles degrade LoS whether trees are visible or not.

TURN 5 almost passes without incident. There's only a few seconds left on the clock when our White Scout Car, newly arrived on the ridge north of the olive grove, spots Italian infantry on the ridge opposite VL Perch. Brownings bark. The battle has begun.
TURN 6. As the Bren Gun Carrier's scouting sortie has barely got started, and 3 Squad are still advancing to contact near Perch, Turn 6 is waved through.

Approaching its destination, a low rise at cc19, the Carrier spies enemy infantry and armour to the NE. There are four or five unidentified Italian infantry contacts moving westward past Bully, and an unidentified armoured car and tank destroyer (?) in the NE seemingly making for Perch. Have the AFVs noticed our squat scurrier? Apparently not, but those buff-coloured blighters certainly have!

On the hill close to Salmon, two Carro Armato L6/40s emerge from the Fog of War and almost immediately unleash volleys. The Carrier's response is as swift as it is gratifying. As 20mm shells whistle overhead, the tracked scout pops smoke and reverses back the way it came.

In the excitement I almost fail to notice what our ATR team is up to. Moving through the olive grove towards VL Grayling, the weary two-man team glimpses the L6/40s and lets fly at the closest.
A miss.
Unnoticed by their prey, they're lining up a second shot when the turn ends.
The situation at the end of Turn 6:
The White Scout Car is behind the ridge again (a23) having pulled back after its tentative recon sortie.

A stone's throw from Perch, 3 Squad are hiding amongst the olive trees. From their position they can see the enemy TD (a Semovente da 47/32) spotted earlier by the Carrier. The AC that was with it has disappeared.

In the village, the HQ, now ensconced in the house at t14, is too far from 1 Squad (x17, hiding) and 2 Squad (w19, hiding) to influence them, but is back in touch with the mortar team at r15.
Tired after their scamper through the olive grove, the ATR team are currently circa s23 firing at the Italian tanks on the hill.
The Portee is waiting for targets to appear in the wedge of terrain visible between Kokopu and the edge of the grove (Anything close to Salmon may also be in LoS/LoF)
Hidden by smoke and shielded by the rise, the Carrier seems safe from the tanks in the SE for the moment. What's less clear is whether it's potential prey for the Semovente once the smoke/dust clears.
Turn 7. Let's get the bad news out of the way first. Early on the Bren Gun Carrier caught the attention of the Autoblinda 41 armoured car in the NE. Hit and penetrated several times as it attempted to pivot-turn for a recce to the S, injuries to the driver eventually stopped it in its tracks in full view of the Italian AC.

The gunner got through the onslaught unscathed, but is now seriously rattled. For the moment, our broken, driverless Carrier won't respond to orders. Its prospects don't look good.

Meanwhile in the village the Portee was having an altogether better time. At the fourteen second mark, the truck-mounted 2-pounder flung the first of six or seven shells at the lead L6/40 tank on Salmon Hill. Some rounds fells short or flew over the top, but at least three struck steel. When last seen, the Axis war machine was reversing northward with neat holes in its turret and upper hull, and possible damage to its main gun.

What else do I need to tell you? At the end of the turn the HQ is on the edge of the olive grove at t20, with two of its squads - 1 Squad (house at v19) and 2 Squad (s20, enroute to r27) – close-by. Just ahead, and now in command range, is the ATR team who fired several times, apparently without success, during the turn. Slowed by wall clambering, the mortar team are presently at s15 making for the grove corner (t16).

Elsewhere, 3 Squad have eyes on the Autoblinda, an unidentified armour contact (the Semovente?), and four unidentified infantry units heading our way across the open ground between Bully and Grayling. Contact flags around Salmon indicate that that VL is now in enemy hands.
Worryingly, the Portee finishes the turn like this:

One of the L6s on Salmon Hill appears to be in the process of engaging it and our gun truck doesn't seem to have the LoS necessary to return fire.

TURN 8. During the last sixty seconds the riddled Bren Gun Carrier was fired on by three different Italian AFVs (the Autoblinda, the Semovente, and an L6) yet somehow managed to survive.

Scuttling away from the shots of the Italian AC and TD it headed for the southern end of the small rise only to find itself the target for one of the tanks on the hill near Salmon. It ends the turn in reverse gear, still broken (it won't take orders) and still in the LoF of its latest tormenter.

Further North the Portee's tactical withdrawal went smoothly (our gun truck is now sitting behind the house at t14 with views of VL Salmon but little else. The L6s are out of LoS.) The White Scout Car is approaching the village at speed on the western side of the grove.

In the grove, 1 squad has just crossed the central track and is making for the grove edge behind VL Grayling, 2 Squad is hiding at r27, and the crawling ATR team is making very slow progress towards t27. As the mortar team is still struggling to cross the wall at s15, it might be sensible to move it into the grove via an entrance or give it a new destination next turn.
This overhead pic with enlarged units and trees removed should help you visualise the current situation.
Maddeningly, there's still no sign of the tanks. Surely our luck* must change soon.
*Every turn since turn 5, behind the scenes CMAK has been rolling a dice to determine whether our armour shows up.

TURN 9. The carrier's luck runs out eight seconds into the turn. Reversing away from one threat it inadvertently exposes itself to another (the Autoblinda) and pays the ultimate price.

As a pillar of smoke rises in the south, in the village the Portee scrutinises Mount Salmon for signs of armour (the L6s are up there, but they're just out of LoS) while close-by a taxi arrives for the mortar (it will take perhaps half a turn to load its passengers) and the Scout Car pulls up on the roadside at r13.

In the north-west corner of the grove, a truck moves gingerly into the interior. In the south-east, the ATR team (lowest unit in above pic) prepares an ambush, the HQ (selected) moves up, and, near Grayling, 2 Squad nervously fingers its weapons (8 rifles, 1 Thompson, 1 Bren).

A mere 120m to the east of the VL, Italian infantry are picking their way through the stones and dessicated tussocks.
What this overhead battlefield overview image doesn't show is the two dust-caked Allied AFVs sitting expectantly in the NW corner of the map at the moment.

Our angry houses are here!
Meet Stuart the Stuart III (37mm L/54 main gun, 83HE, 23AP), and Crecy the Crusader Mk II (40mm L/50 main gun, 130AP).

Turn 10. That was unexpected.

A few seconds after starting the turn, two shells were winging their way from the NW corner of the map to the SE corner. The Stuart and the Crusader, glimpsing a mountaineering L6 in the distance, decided to chance their arms. Missed by a country kilometre but spooked, the skedaddling foe was soon hidden from view.

The turn ends with both of the new arrivals still en-route to their start lines. Near Carp, the potentially pivotal mortar has been loaded on a truck and awaits a destination. The Portee and Scout car linger nearby.

In the grove, the re-positioned HQ (selected in the above pic) now has LoS to Salmon, and is close enough to 2 Squad (r29) and 1 Squad (circa r27 - they went to ground after spotting an enemy during their advance) to share its various combat and concealment bonuses with them. 3 Squad remain in hiding near Perch.
This overhead image together with earlier turn summaries should help you make sense of unit positions at the end of turn 10.
TURN 11. Will Stuart the Stuart live to see the end of Turn 12? At the moment I'd say his chances are about 50/50.

While Crecy the Crusader was completing his advance to w12 (just behind the abandoned truck), the portee was reversing between the houses at s14 and t14 (no targets spotted yet) and the mortar truck was taking an eternity to commence its grove dash (for some reason it was subject to a hefty order delay) our Stuart was hurtling towards the NE corner of the grove (a29)

The final few seconds of that hurtle coincided with the final few seconds of the turn. Arriving at the corner Stuart spotted the Autoblinda moving down the road towards VL Grayling, and set about engaging it. His turret traverse complete he was a split-second from spitting his first shell at the unaware AC when, out of a swirling dust cloud on his one-o'clock, emerged two Italian tank destroyers.


The turn ends with the Stuart yet to fire at the AC, the closest TD (a turretless Semovente with a 47mm gun) aligning itself for a shot at the Stuart , and the second TD (type unknown at present) yet to notice the Allied AFV 350m away to the NW.
Overhead battlefield pic, close of turn 11.
Turn 12 was all about the tanks.

+1 second. The Stuart fires at the Autoblinda and misses.
+3 seconds. Alarmed, the Italian armoured car returns the greeting and begins reversing.
+8 seconds. Ignoring its 'fast move' order, the Stuart fires again. This time its aim is good. 'Side upper hull penetration'!
+9 seconds. Seemingly satisfied with its handiwork, the Stuart heads for the wadi.

+11 seconds. But the gunner in the closest Semovente is tracking it and fires.
+12 seconds. A miss!
+14 seconds. The Stuart's reply buries itself in the hot Libyan dust.
+20 seconds. Second time lucky for the closest Semovente?

Yes and no. The shot is on target, punches through the M3's upper hull armour, but causes no real damage.
+21 seconds. Another 37mm AP round speeds SE and misses.
+30 seconds. A round from the other Axis TD screams over the barrelling Stuart as it disappears into the wadi.

+35 seconds. On the road near Carp, the turret of the advancing Crusader twitches. It's spotted one of the L6 light tanks 700m to the east.
+39 seconds. Crecy's first shot only troubles jerboas and scorpions.
+44 seconds. Smoke spills from the muzzle of Crecy's 40mm L/50 for a second time. Again, no coconut.

+50 seconds. The third shot is the killer. The reversing L6 stops abruptly, its main gun droops. We nailed it.

^Four(?) Italian infantry units close to Grayling.
Overhead pic, end of turn 12. ATR team (r26) and mortar truck (g14) mid-way through moves.

Turn 13. As Crecy the Crusader speeds SE to the rise where the Bren Gun Carrier was KOed in turn 9, its gunner uses coaxial MG to hose infantry contacts beyond the southern wadi. Close to its destination the tank glimpses one of the enemy TDs and is adjusting its turret accordingly when it runs into dead ground behind the rise (The hull-down spot I'd selected turned out to be turret-down too. Cest la guerre.)

Meanwhile things are really hotting up at Grayling. At the 30 second mark the sight of enemy infantry sprinting towards the VL buildings persuades 1 and 2 Squad to spring their ambush. The grove edge crackles with small-arms fire. The Italian infantry unit in the van of the advance perishes in a hail of bullets feet from the door of the house at q31. Other pith-helmeted troops beyond the wall, go to ground.

With the firefight in full swing, Cpl. Dojcinski's weary ATR team arrive and immediately go into action. From their vantage point circa r29 they can see the Autoblinda (abandoned!) and both of the TDs. The Semovente M41 47/32 that hit the Stuart last turn is 180m away to the NE. Almost dead ahead, heading for the road at q38 is a tougher Semovente M41 75/18. It's this brute that the team choose to target.

Not encouraging. An ATR shell slams into the Semovente's upper hull and promptly disintegrates.
The situation at the end of turn 13. The Crusader is unsighted behind the rise at dd18. The Stuart is unsighted in the wadi at a36. The Portee is peering SE from s14/t14 while, just behind it at s13, the White Scout Car waits expectantly. In the grove the mortar taxi (h24) is ten or so tiles away from r24, the spot where its passengers will alight. 3 squad (f28) has abandoned its position at Perch and is making for Grayling. At Grayling 1 Squad (r28) is firing at infantry close to the wadi. 2 Squad (r29) is, almost certainly, about to select a new target from amongst the approaching infantry. The HQ is keeping its head down at s28. The ATR team is about to have another pop at the Semovente M41 75/18.

Turn 14. Blimey. What a maelstrom.
2 Squad were in the thick of it right from the start. Defending in the grove edge near to Grayling they were soon receiving fire from several Italian infantry units and the 47mm Semovente to the NE. Just behind them the ATR team continued to peck at the armour of the 75mm Semovente without effect. It was at roughly the time the TD's steel hide shattered the second on-target ATR round of the turn, that the turret of Crecy the Crusader appeared above the rise in the SW.


Spooked by the multiple threats, the M41 75/18 began reversing northward. Before the Axis AFV had backtracked ten yards, Crecy had drilled a 40mm hole in its upper hull.
In Combat Mission, jubilation can turn to dismay in the time it takes to type “In Combat Mission, jubilation can turn to dismay in the time it takes to type”. A split-second after holing the TD, Crecy herself was hit on the turret front by a projectile from heaven-knows-where. Happily, the round ricocheted. Unhappily, it was followed, in quick succession, by two more, the second of which penetrated the upper hull, fatally wounding our most capable AFV.

Was the unseen shell-slinger an L6 on or near Mount Salmon? A duel that coincided with the demise of the Crusader suggests not. The portee's patience finally paid off at around the 36 second mark. Spotting the second L6 advancing not far from where the first one was KOed, our gun truck set about spoiling its day. The task was quickly accomplished. At 47 seconds, after a front turret penetration the Italian light tank commenced a hurried reversing manoeuvre.
And what was Stuart doing while all this was going on? As instructed he was waiting then enfilading. At 45 seconds, creeping up the side of the wadi at c36, our Stuart spied the tail-end of the reversing 75mm Semovente. Two shots were fired in what remained of the turn. The second hit the target and proved too energetic for the TD's relatively thin rear armour.

The situation at the end of turn 14. The Crusader is bailing out. The hull-down Stuart is about to finish-off the tougher Semovente and, fingers-crossed, swiftly neutralise its compatriot. The Portee has just lost sight of the reversing L6 circa ee52. The White Scout Car is still being held in reserve at r13. In the grove the mortar team has finally alighted and is moving SW to get within command range of the HQ. 3 Squad (o28-ish) is approaching Grayling from the NW. 2 Squad is two men down, pinned, and bearing the brunt of the Italian assault on Grayling. 1 Squad is currently slightly too deep within the grove to take pressure from 2 Squad. The HQ is firing at an enemy inf unit between Grayling and the grove edge.
If the 75mm TD isn't already in its death throes, then its end looks imminent. Side on to the Stuart, the other Semovente's chances of survival look slim. Is the L6 punctured by the portee still a threat? I think it's unlikely, but there's definitely still something out there with sufficient punch to KO our AFVs.

Turn 15. After finishing off both Semoventes (the 75mm TD was in the process of expiring when the turn started) our Stuart turns its attention to the L6 light tank that was punctured by the Portee last turn. It's spitting AP at this plainly frightened foe when an unidentified infantry unit 175m away to the SE hits back. A round, possibly from an ATR rifle, strikes the M3's gun barrel!

Phew. Only superficial damage.

Lacking clear instructions, the Kiwi infantry remain huddled in the grove edge near Grayling for the duration of the turn. At times the incoming fire is fierce, but somehow no further casualties are sustained. Harried by the MGs of the repositioned Scout Car and targeted at close range by our HQ, an enemy ATR rifle team that decides to dash into the SE corner of the grove from the southern wadi quickly regrets its boldness.
Details that may not be obvious from this end of turn overhead pic. The trudging mortar team is still not within command range of the HQ. The Scout Car is well positioned to break up any push into the grove from the south. 3 Squad (o28) is not contributing to the scrap at Grayling at the moment and is just outside the HQ's command range.

Turn 16. The wounded L6 breathes a sigh of relief as Stuart, alarmed by nearby infantry, turns his turret eastward and concentrates on suppressing/eliminating close range threats.

3 Squad join the action at Grayling losing two men in furious exchanges that involve all the Kiwi squads and Lt. Yarham's HQ.

The Scout Car spends the turn machine gunning targets in the southern wadi. An Axis MG team that attempts to cross the road, is hosed with 50 cal and rapidly retraces its steps.

The situation at the end of the turn. The Stuart (c37) is engaging an infantry unit 50m east of its position (that unit is keeping its head down as a result). Both buildings at Grayling are now occupied by enemy troops. Our mortar team is finally within command range of the HQ but still needs approximately 60 seconds (one turn) to set up its weapon. The enemy ATR team that had infiltrated the SE corner of the grove has been eliminated. The Scout Car (u19) is well placed to break up any attacks on Grayling from the southern wadi but LoS obstructions mean it won't be able to fire on Italian forces pushing into Kokopu from the z30 area (there are several enemy units in this part of the s. wadi). The Portee lacks the HE ammo necessary to assist the Scout Car with its assigned task. Cpl. Zane (truck turning at h23) is heading east to find the Crusader killer with a heavy heart and terrible sense of foreboding.

Turn 17. The Stuart may be in a spot of trouble.
Four seconds into the turn it was hit on the turret front by something, almost certainly an ATR round, powerful enough to cause internal armour flaking. At 27 seconds, as it reversed out of the wadi and turned to face SE, it was hit again (track, no damage). Two more hits followed, the last of which partially penetrated the side upper hull armour, thankfully without causing serious harm. All the indications suggest that the Italian infantry unit at a40 (selected in the pic above) is packing an ATR.

Around Grayling the tide of battle seems to have turned in our favour. Though our two-man ATR team is now a one-man ATR team, concerted fire from all the Kiwi squads in the grove caused the enemy to flee the VL building. Most of the evicted troops were cut down as they retreated east.

Things aren't going quite so well at Kokopu. The turn ends with an Italian flag flying over the VL and two Italian infantry squads (?) very close to it. The White Scout Car spent turn 17 much as it spent 16. Currently, along with the Stuart and our ATR team, it has LoS to the surviving L6 light tank which is scurrying southward circa w60.

Pinch yourself. Our mortar team will have set up in fourteen seconds time. It's ready to take targetting instruction and a command link to the HQ means it should be able to bombard the cluster of unidentified enemy units in the southern wadi*
End of turn overhead pic with enlarged units.
*Other targets are available.

In Turn 18 Stuart the Stuart acquired three more dents and, rather worryingly, two new holes. Making good use of the area of large rocks on the eastern side of the northern wadi for concealment (our buttoned gunner struggled to identify targets) the Italian ATR team kept up their stealthy attacks achieving a penetration, a partial penetration and some spalling. Amazingly, none of our tankies were hurt by the hits, but in the smoky, sweaty interior of the little M3 nerves must be fraying.

Talk of the tide turning at Grayling may have been a tad premature. 3 Squad is currently locked in an intense close-range firefight with an enemy unit occupying the building at q31. Grenades have been traded. One Kiwi has been left badly wounded. I suspect the Italian squad sustained casualties too but right now there's no way of verifying that.

1 Squad's scamper to the south to shield the HQ proved eventful. Spotted by enemies around Kokopu and the southern wadi during their move, they lost a man and spent some time pinned before recovering and joining the Scout Car and the mortar team in a spirited demolition of the Italian southern taskforce.

Having taken an eternity to join the fray, our 3-inch mortar operators seemed determined to make up for lost time. They lobbed their first bomb into the southern wadi (the targets around Kokopu were too close) at around the 20 second mark. It landed slap-bang in the centre of a cluster of unidentified enemy units and immediately kindled a brush fire. Subsequent bombs helped spread the conflagration and increase the chaos!

Eighteen minutes in, the Battle for the Perfectly Rectangular Olive Grove looks like this. Things that may not be obvious from the overhead pic. The truck at o24 has been fired at by units near Kokopu and is in the process of reversing. There's an enemy infantry unit in the wadi at c34 that looks like it may be about to dart for VL Perch. All of the Kiwi infantry except the HQ and ATR team are currently engaged. The L6 was last seen looking sheepish at v60. In terms of victory points, the engagement is very delicately balanced at present...


Turn 19. The situation at the end of turn 19 isn't wildly different from the situation at the end of turn 18. At Grayling 3 Squad are still blazing away at the residents of building q31.

Our mortar team, with a little help from the Scout Car and 1 Squad, continue to make life extremely unpleasant for the Italian troops using the southern wadi as an out-of-LoS advance avenue.

If it wasn't for Stuart's new position, hull-down behind the ridge at a24 (screened by a self-generated cloud of dust the reversing manoeuvre went like clockwork) and a late change of focus for 1 Squad (they end the turn firing at a mortar team 250m away to the SE) this turn's overhead pic would be hard to distinguish from the previous one.
Can Stuart prevent the Italians taking Perch from his new vantage point? If the enemy infantry at Kokopu decide to push on to Carp will the Scout Car, shielded/unsighted by the building at v19, be able to stop them? Call me pessimistic but I'm going to respond to both questions with a "Probably not".
Turn 20 started badly for 3 Squad, the Kiwis deluging q31 with lead. Fire from the building opposite reduced their fighting strength from seven men to five within the first ten seconds of the turn. They can't have been pleased to see their comrades, 2 Squad, heading SW a short time later.
Repositioned as part of two-pronged attempt to break up an enemy thrust from the southern wadi, 2 Squad were given a very warm welcome by Italian infantry in the wadi and close to Kokopu. So warm in fact, they opted to spend the remainder of the turn taking cover.

The volume of fire emanating from the wadi doubtless owed something to the fact that the NZ mortar had been pivoted SE. Halfway through the turn that retasking paid dividends, an enemy mortar team crossing open ground circa dd35 taking a direct hit.
Brilliant. That's the mortar threat dealt wi...
INCOMING! INCOMING!

As the turn races to a conclusion, three Italian mortar bombs treeburst in quick succession in the vicinity of 2 Squad. No-one is hurt but the alarm on the southern edge of the olive grove is palpable.
The situation at the end of Turn 20.

1 Squad (strength 10-1, location t29) has multiple targets in SE, S, and SW to choose from
2 Squad (strength 10-2, location t27) is pinned, taking cover, and under mortar fire.
3 Squad (strength 10-5, location q29) is pinned and taking cover (Their adversaries in the building opposite also seem to be taking cover at present)
The HQ (strength 4-0, location s28) isn't involved in the fighting at the moment. Removing its short eastward cover arc would change this situation)
The ATR team (strength 2-1, location r29) is keeping its head down.
The mortar team (strength 3-0, location s26) needs new targeting instructions.
The Stuart (e23) is moving S through the grove. ETA at s24 = 40 seconds.
The Portee (t13) spent the last turn firing AP at Kokopu. The results weren't encouraging.
The Scout Car (v19) struggled to find targets during the second half of turn 20.

Enemy developments not previously mentioned. The Axis infantry concentration at Kokopu is growing and may be about to edge west. A dust cloud at v55 suggests the surviving L6/40 is heading west again.

During Turn 21 three New Zealanders perished. Both 1 and 2 Squad lost a man to mortar shrapnel and one of the White Scout Car's three-man crew had an unfortunate encounter with a 20mm cannon shell.

The L6/40 that slunk away after sighting Stuart in turn 15, has returned and appears fighting fit. From round about v50, it spotted and holed the White Scout Car which was in the process of moving to x20. The upper hull penetration killed a crewman leaving the Allied AFV shocked but still, as far as I can tell, mobile. The light tank seems likely to deliver the coup de grâce in the next turn unless the Scout Car driver puts his foot down or...

...the Portee gunner pulls off a lifesaving long-range killshot. In the closing seconds of the turn our gun truck, also on its way to a new position, spotted the L6 and stopped to engage it. A lethal (fingers-crossed) 40mm emission can't be more than five seconds away.

Other developments not obvious from the overhead end-of-turn pic. The Stuart arrived at s24 about thirty seconds into the turn and quickly persuaded an enemy infantry squad heading for Carp to hit the dirt. While it isn't currently firing on any targets, it is well-placed to disrupt other westward lunges from Kokopu.
Our mortar is pounding the wadi edge again. The detonations are close to unidentified Italian units and must be helping our cause. At Grayling, battered 3 Squad looks to have the upper hand. Six men down, the Italian squad in q31 is not returning fire at the moment. Much like 1 or 2 Squad who, cowed by the continuing Italian mortar barrage, contributed little to the Allied war effort in turn 21.
The NZ ATR team man can see the turret of the L6 but doesn't fancy his chances. The LoS tooltip implies he has a 10% chance of scoring a hit and a 0% of achieving a kill.

Turn 22 claimed the lives of several Italian infantrymen and one of Lt. Yarham's four-man HQ team, but graciously spared the White Scout Car. Hit and punctured twice before the Portee managed to drive off its attacker with a long-range turret penetration, the Scout Car finishes the turn shaken but alive at w16 (impassable palms meant it couldn't safely make w18).

In LoS just seventy metres away to the east is an infantry squad that was sprinting for Carp until Stuart intervened with his MG.

At Grayling 3 Squad feel in control for the first time in ages. The Italians have vacated the property opposite their position, leaving our most grievously mauled squad (10-5) with little to do but pick on a Breda MMG team bullied earlier by the Scout Car.
The rest of the Allied infantry spent the turn praying and pressing themselves into hollows in the olive grove. The enemy mortar/artillery bombardment continues.

Look closely at the end-of-turn overhead pic and you will see a new tricolore contact flag at g29. Our halted 'scout truck' has spotted a knot of enemy infantry moving S? SW? through the grove from Perch.
Three other developments possibly worth bearing in mind: our mortar team has just 21 HE and 9 smoke bombs left, the reversing L6 has disappeared behind a ridge, and the Portee has already endured some rifle and SMG fire from the Italian infantry moving westward from Kokopu.
Turn 23's good news:

3 Squad's dash to the house at Grayling went well. Choosing the southern building rather than the northern one (counter-intuitively the small N. structure apparently built of stone is a 'light' building while the S one is 'heavy') they quickly made use of their new digs, driving off one knot of infantry and suppressing another.

Meanwhile, 1 Squad and Stuart were performing similar feats from their positions on the southern edge of the grove.
Even the Portee had a pop at distant infantry targets as it deftly distanced itself from the pith-helmeted foes closest to Carp.
Cpl Norseman and a companion scampered past the Portee as it manoeuvred. While CMAK doesn't let players separate truck drivers from vehicles (sorry Cederic) the revolver-armed two-man crew of the abandoned truck at w13 was doing nothing so has been sent into the centre of the grove to watch for/engage enemies approaching from Perch.
Talking of which...
Turn 23's bad news:

We're down to our last Bedford OY. The lorry sent on the aborted scouting trip encountered two enemy infantry squads as it attempted to reverse back to the track and, raked by small arms fire, exploded in spectacular fashion.
2 Squad end the turn as they started it – pinned and praying the artillery barrage will soon be over. Any chance of them executing their assigned movement order was dashed by the same shell blast that reduced their fighting strength from seven to six (Turn 23's third Allied casualty; neither of the truck crew got out alive).
And I'm starting to hear “We're running low on ammo” now and again. 3 and 2 Squad are the parties concerned. Infantry in CMAK will never stop firing completely but those with 0 ammo points (3 Squad = 0, 2 Squad = 6, 1 Squad = 28) probably won't fire more than once a turn and then the shots are likely to be in self-defence.


The situation at the end of turn 23.
Turn 24. The barrage may be over. Our HQ was rocked by a blast at T+48 seconds; apart from that, nothing nasty fell on the olive grove and its denizens during the turn.

1 Squad took advantage of the peace and quiet to leg it to t25. Their redeployment and the Scout Car's timid advance may have sealed the fate of one of the enemy squads near Carp. Receiving fire from the W and the NE, the sandwiched foe looks doomed.

Stuart too, has been happily hosing foes in the village. The enemy push from Kokopu to Carp is well and truly stalled at present.
Which is good news for the Crusader survivors, Sgt. Hutchison and companion, who are still 50m from the threshold of the westernmost VL.

A lack of ammo doesn't seem to be cramping the style of hard-fighting 3 Squad. The four-man LMG squad they've been targeting since they arrived at Grayling, was on the receiving end of at least two Mills bombs this turn, the second of which claimed a victim.

Our last Bedford is heading west through the grove as ordered, but progress, as the end-of-turn recon image illustrates, is painfully slow. Cpl Norseman and companion are now a stone's throw from both the struggling truck and our currently idle mortar team (21 HE, 9 smoke). Their Webley Mk VIs and Eyeball Mk Is are at your service.


Turn 25. As the Italians' bid for Carp disintegrates in a hail of MG and rifle rounds (both the squads making for the westernmost VL have been put to flight by the combined firepower of Stuart, the Scout Car, and 1 Squad) the enemy springs a surprise NW of Grayling.

Using the grove as cover, a contingent of pith-helmeted infantrymen get within 50m of the building occupied by the ammo-short 3 Squad before being detected.

The clock stops with 3 Squad in the process of turning to face the new threat, 2 Squad (selected in the above pic), sent north on a timely screening mission, having just spotted the interlopers through the undergrowth, and our startled ATR 'team' busy having kittens. The HQ is currently about 20m too far south to participate in the firefight that's surely just about to erupt.

In other news (see overhead pic) the Portee is back at its post on the SW corner of the grove (If the L6/40 tries its luck again, we'll be ready for it), Sgt Hutchison's team has made it to Carp, Cpl Norseman's team waits inconspicuously next to the track at p24, and the mortar team remains idle (minimum range and LoS issues mean it can't target the party-poopers newly arrived from Perch).

Turn 26. Before dashing North to assist 2 and 3 Squad, 1 Squad briefly joins Stuart, the Scout Car, and the HQ in the merciless harassment of broken squads fleeing from Kokopu.

By the time 1 Squad arrives at its new position deeper in the grove, 2 Squad (on left) has lost a man and all but exhausted its ammo, and 3 Squad (in the VL building) is taking cover from a new threat. If a third enemy unit appears amongst the gnarled trunks next turn, we're in real trouble. As things stand, the two forces clashing near Grayling are probably fairly evenly matched – our apparent numerical superiority offset by our parlous ammo situation.
In other news, there's no sign of the L6/40 in the east, and no suggestion that the mortared troops in the southern wadi are planning another assault on Kokopu and Carp.

Turn 27. Crikey. That was brutal.
Pestered by Kiwi lead, one of the enemy squads NW of Grayling went to ground early in the turn. Unsupported, the other one pushed on into a world of hurt, confusion, and loss.

By the time Yarham's HQ arrived at r29 and added its two Lee-Enfields and one Webley to the havoc, several Italians had already fallen to the rifles and Brens of 1 Squad and 3 Squad.

The Mills bombs that began flying at around T+35 claimed two more of the attackers, and the olive-sprinkled Stuart, joining the fray at T+50, came very close to finishing the job.
This turn's Allied losses = 0
This turn's Axis losses = 7 or more

Was that the enemy's final fling?
Turn 28 in pictures.

^The lone survivor of the squad shot to pieces last turn, moments before he was cut down by the Kiwi Crescent of Doom near Grayling.

^The Scout Car assists the Portee with some suppressive fire after the gun truck is plinked from afar while moving east.

^2 Squad draw fire from a unit close to the Portee pesterers while making for the building next to Kokopu. They arrive unscathed, as does Cpl Norseman's team which has been sent to the VL itself. (The brush fire in the background was started by tracer from Stuart's MG a few turns ago and has been growing ever since)

^As Stuart beetles up to VL Grayling, an enemy ATR team – the same one that punctured our light tank near Perch on turn 18? - emerges from the undergrowth close to the spot where earlier Italian interlopers still lurk/cower. The response from 1 Squad, 3 Squad, and the HQ is quick and concerted.

^At T+60 the Portee and the Scout Car are still moving east. Cpl Norseman's team (w24) is relatively safe in Kokopu but is being sniped at by a unit due east in the wadi.
Overhead pic. Three Axis units are currently under fire – the ATR team, an MG team (u34, Stuart), and a possible infantry squad (x31, Scout Car). Our mortar has finished setting-up (see last turn's comments for valid targets).
In Turn 29...

Stuart bothers and bullies from a new vantage point beside VL Grayling. (All visible Italian movement is eastward this turn)

1 Squad, 3 Squad and the HQ break the will of the ATR team and eliminate another (presumably depleted) Italian unit that makes an optimistic dash for the VL building at T+50.

Our mortar scarifies the southern wadi, kindling a new brush fire in the process.

And the Scout Car and the Portee ensure the enemy is left in no doubt that further attempts on Kokopu are futile.

(Overhead pic). As the enemy appears to be in disarray, I think it's safe to run two turns consecutively from here-on. Bear in mind that 120 rather than 60 seconds will pass before there's an opportunity to tweak or countermand the next set of orders.

Turns 30 and 31.
Has anyone got a pack of cards?

It seems the Battle of the Perfectly Rectangular Olive Grove intends to go out with a dreaming-dog whimper rather than a thunderflash-in-a-dustbin bang. As our ATR man trudges towards Bully (being a conscientious sort he's decided to take his horribly heavy tank tickler with him) and Sgt Hutchison & pal slog towards Salmon (Sorry, weelillad, Emily tasked him first) Stuart and the Scout Car let fly at anything that moves in the southern wadi (precious little) and the ammo-short Kiwis at Grayling reach for canteens and smokes as the one or two surviving Italians NW of the VL, slink away or cower.

The victory display looks like this at the moment, the scale of our hard-won triumph somewhat distorted by the absence of an Allied unit near Carp, and the Italian stragglers (?) probably lingering at Perch, Bully, and Salmon.

Is there still time for a little tactical magic? Does anyone have enough energy left to go revenge poor old Crecy?
Turns 32 and 33.
“A half dead scorpion is also half alive.”
(Old Bedouin proverb that I just made up)

Thirty seconds into turn 32 our knackered ATR man found himself under fire from Perch. Hitting the deck smartish, he managed to escape injury.

Not so lucky was Lt Yarham's HQ. When this three man, ammo-short team ran into a swarm of bullets while moving north through the grove, it looked for a terrible moment as if extermination was imminent. One Kiwi fell in the initial close-range exchange, leaving two Allied soldiers within spitting distance of four Axis adversaries. What followed was one of those CM moments that linger long in the memory. The sound of blows and blood-curdling cries indicated that melee was in progress (CMAK doesn't do H2H animations). After a brief scuffle during which the Italians lost one of their number, the remaining pith-helmeted brawlers put up their hands!


Meanwhile, further north, Stuart and 1 Squad's simultaneous arrival at Perch proved too much for the five enemy infantrymen guarding the VL.

Although the Carcanos and MAB 38s of the defenders drove off the foot component of the NZ force, a few bursts of coaxial from Stuart quickly convinced the Italians to throw down their weapons.
Stuart was so busy pacifying Perch he failed to notice a 'new' presence in the SE.

The last L6/40 lives! Whether it can still fight is another matter. Despite having Stuart's vulnerable back-end in view for a good twenty seconds, the light tank's turret has yet to move.
A vulture's eye view of the battlefield at the end of turn 33. Our mortar is now in a position to independently fire on Bully, Salmon, and areas of the southern wadi (but it will need around 55 seconds to set-up after its move). The truck has finally escaped from the grove and is making for Carp.
Turns 34 and 35.

Picked on by Stuart, the Portee, and the Scout Car (at one point even our mortar team looked as if it was going to have a go) the L6/40 finally succumbed in the closing seconds of turn 34. Amazingly, considering the half-dozen (?) times the light tank had been ventilated, one of the two crewmen escaped with his life.
Meanwhile in the village, ownership of Carp was formalised.

...and the Scout Car encouraged some last-ditch Kokopu assaulters to scurry back to their last ditch.

For a long spell during this double turn the NZ flag fluttered over four VLs (Kokopu, Carp, Grayling and Perch). Here's the reason it's no longer visible over Grayling.

Three never-say-die Italians, the remnants of an LMG squad, are currently engaging 3 Squad at close range. The Kiwis in the VL building shouldn't have any trouble dealing with this threat on their own, but nothing is certain in war and CM.

And what of Stuart? As the latest overhead pic reveals, he's on the verge of cresting the ridge in the NE - the ridge that we believe hides Crecy's killer. I estimate he'll have eyes on the dastardly AT gun? Portee? TD? in less than five seconds. Let's hope the enemy's shiest/deadliest unit isn't expecting him.
Turns 36 and 37
The fog-of-war in the NE corner of the map lifts to reveal...

A truck with a 45mm Brixia mortar team on board?
Stuart immediately starts dousing the vehicle with lead. The passengers bale out. The truck lurches forward heading who knows where.
It takes Stuart fifteen seconds to realise that the truck is not in fact alone. An Italian 'light gun' (type impossible to discern) tucked in roadside brush at e61, draws attention to itself by slinging a shell at the Kiwi tank. The shell misses but Stuart seems to have got the message.

Our M3 is reversing at speed when the second round from the AT gun arrives. This round bores through 38mm of front turret steel before finding something softer to mutilate. The NZ light tank that comes to a halt on the safe, west side of the ridge at T+36 seconds is 'shocked', blood-spattered, and one crewman short.

After perforating Stuart, Crecy's killer turns its attention to our ATR man. He survives four near-misses before perishing 100m from his goal.

And that isn't the last Allied death of the double-turn. At Grayling, despite the best efforts of 3 Squad and the mortar team, those stubborn LMGers mentioned in the last summary succeed in eliminating one of the occupants of the VL. 3 Squad exacts swift revenge and with the arrival of the White Scout Car, any chance of an eleventh-hour Italian upset at r31 has probably vanished.

The situation at the end of turn 37.
Turns 38, 39 and 40.

The vast majority of the lead loosed during turns 38, 39, and 40, is .303 and .50 calibre. Stuart joins 3 Squad, the Scout Car and the mortar team in keeping the enemy LMG squad at Grayling securely pinned.

The only Italian emissions are directed at Sgt Hutchison's team which, reaching the foot of Mount Salmon, finds itself under desultory rifle fire from above. Tired, dehydrated, and ill-equipped for heroics, the ex-tankers do the sensible thing. Pressing their bellies into the hot Libyan dust they refuse to go another inch.

With Bully and Salmon clearly out of reach, Carp reclaimed by the Portee, and Grayling safe, the invisible CM ref decides to inspect his watch and blow the final whistle. The few vehicles still in working order lapse into silence. Men lower weapons... discard steel helmets... savour survival.


It's all over. Forty turns of hard fighting – four weeks of communal Combat Mission: Afrika Korps – have ended in a deserved 'Tactical Victory' for the Comment Commanders!

While the AAR panel makes satisfying reading, it's the kill lists for individual units that tell the story of the Battle of the Perfectly Rectangular Olive Grove most eloquently. Stuart's tally sheet is particularly impressive...

What's striking about the NZ infantry stats is just how important each of the five core units was to Allied success....
1 Squad - 17 infantry casualties caused
2 Squad - 15 infantry casualties caused
3 Squad - 13 infantry casualties caused
HQ - 6 infantry casualties caused, 3 captured
mortar - 19 infantry casualties caused
Everyone pulled their weight. Everyone soldiered their socks off.

On the Italian side the stars were unquestionably Crecy's killer (Don't click this link if you'd like the precise identity of the AT gun to remain a mystery. I'll be making the scenario available at the end of the week), the arty spotters on Mount Salmon that made life so unpleasant for the denizens of the grove from turn 20 to 24 (5 kills) and the LMG squad that ended the battle a grenade's throw from Grayling (4 kills).

A massive thank you to everyone who has Comment Commanded during the past month. Without the likes of alh_p, Boronian, Cederic, ElementalAlchemist, emily riposte, Hydrogene, khamul, nastydisease, Rituro, Tarfman, and weelillad this fascinating/fraught Combat Mission: Afrika Korps clash would never have gone the distance.
* * * * *