Ark Survival Evolved Beginner's Tips For Surviving
How to get started

So, you’ve just woken up on the shores of a deadly dinosaur-infested island; everyone is trying to kill you (or randomly offer you berries), and you don’t know what to do next. Don’t worry! We’re here to help! This small collection of internet pages will guide you from the preliminary stages of your prehistoric survival adventure in ARK: Survival Evolved right through to the, well, point where most of your deaths won’t usually be your own fault.
For more Ark Survival Evolved advice, check out our island guide, resource, recipe, and crafting guide, base building guide, and Ark taming guide.
Choosing Your Server Type
You’ve one crucial decision to make before you even begin your ARK adventure for the first time: namely, should you join a PvP or PvE server (that’s Player versus Player and Player versus Environment if you’re not familiar with those terms)? The basics of survival in ARK are roughly the same, whichever option you choose. However, you’ll have to contend with people - not just prehistoric creatures - intent on killing you if you opt for PvP. As such, you might prefer to start your ARK career on a PvE server, until you’ve got to grips with ARK’s sometimes confounding systems.
Choosing Your Starting Location
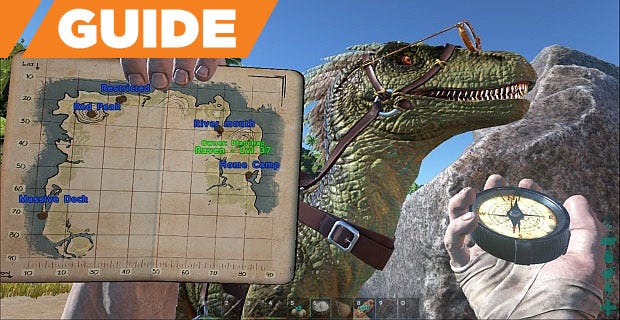
Once you’ve selected your server type and gone through the character creation process, it’s time to get stuck into the game proper. That means that you’ll need to choose a location to begin your adventure. ARK’s default island map is a vast place, with many distinct, deadly habitats - meaning that your starting location can make all the difference between a successful first few hours in ARK and instant, repeated death. Generally speaking, if you’re new to the game, you’ll want to begin your adventure on the south coast, where resources are plentiful and deadly predators are less of a concern.

How Death Works
If (or, more accurately, when) you die in ARK, you’ll have the option to either create a new character or continue on with your current one, maintaining your accrued levels, skills, Engrams and privileges. Next, you’ll need to choose a place to re-spawn on the island. Early on, you’ll have to rely on the game’s random re-spawn feature and track down your possessions manually - which can be a tortuous endeavour. However, once you’ve crafted a Bed or Sleeping Bag, you can re-spawn there directly, making life considerably easier.
Incidentally, once you die, you’ve around 20 minutes to return to your corpse and loot it for any items that you were carrying previously. If you’re too slow (or, worse, manage to lose your corpse in the undergrowth), your items will be gone forever. Don’t dawdle!
Your First Few Minutes On The Island
ARK can be a thoroughly overwhelming experience initially. Once you awaken for the first time on the island, blinking into the sun, you’ll likely be disorientated, hungry, and confused. The good news is that your first steps are pretty straightforward.
First and foremost, you’ll want to get to grips with ARK’s basic survival systems. Primarily, you’ll need to understand levelling and experience (XP), and how to stay watered, fed and protected from the island’s extreme elements. Next, you’ll want to get to know your surroundings, ensuring that you’re able to hunt, forage, build and, eventually, tame without getting lost, ambushed or exposed to unnecessarily harsh climes.
Finally, you should get stuck into ARK’s crafting system; start with a Pick to defend yourself with, before moving onto other tools and weapons, clothing, and bits of your base.
Engrams And Blueprints
To build an item in ARK, you’ll need access to its corresponding Engram (or Blueprint variant). Essentially, Engrams and Blueprints are recipes that can be turned into items once you’ve gathered the required resources. Blueprints are found at Beacon cargo drops, while Engrams (which you’ll be using much more frequently) are unlocked as you level up, and must be purchased using the Engram Points that you earn each time you reach a new level. Check out our Ark crafting guide for more details on Engrams and Blueprints.

Levelling Your Character
With Engrams being so vital to your survival, you’ll want to start earning XP and levelling up as quickly as possible. Luckily, you earn XP by doing pretty much anything in ARK - by hitting things, killing things, farming resources, crafting items, expanding your base, even sitting quietly on a dinosaur. What’s more, if you’re in a tribe, you’ll earn a small amount of additional XP as your tribe-mates perform tasks too.
Tribes And Allies
Speaking of tribes, there are some very good reasons why you’ll want to be in one. Alongside the previously mentioned shared XP and the obvious safety in numbers, there’s the simple fact that many of ARK’s core systems - such as taming, breeding and resource gathering - are incredibly time consuming. Progress is much easier if you’re able to work together, performing tasks in shifts where necessary.
Don’t expect to join an established tribe immediately, however; most tribes (regardless of server type) will want to be sure of your trustworthiness before welcoming you in. When starting out on a new server, build a few starter bases, learn the ropes and get to know your fellow survivors through in-game chat. Hopefully, once you’ve proven your usefulness, the tribe invites will come flooding in. Alternatively, get a few real-life friends together and start your own tribe - you’ll receive all the benefits, with far less faff.
Also, remember that in-game allies can be just as valuable as tribe mates; strike up conversations, build trust, offer your services, and, in return, you just might make a friend or two. If you’re lucky, these new buddies might sell you dinosaurs at a knocked down price, or offer resources when you’re in a pinch. Don’t be selfish though - one way relationships won’t last long, so you’ll need to be willing to help others out too.
Ark's In-Game Chat
As a quick aside, there are three main ways to talk to others in ARK (excluding voice chat): through global chat, local chat and tribe channels. Hit the ‘return’ key before typing to make your comments visible to the whole server, press ‘/‘ first to chat to your tribe mates, or hit ‘insert’ to be heard only by those in your immediate vicinity.

Levelling, Upgrade Points And Stats
So, let’s talk about levelling; not only do you get Engram points each time you reach a new level in ARK, you’ll earn a single upgrade point too. These upgrade points can be spent on improving any one of your numerous character stats from the inventory screen.
Many of these stats are represented visually on your HUD - specifically, on the status bar running down the right-hand side of your screen. Alongside these core, visible stats, however, ARK also features a number of other (slightly less crucial) attributes - which can be found on the character details panel of your inventory screen.
It’s vital that you understand each of these stats and attributes, and how they’re affected during your island adventures, if you want to stay alive. Luckily, we’re here to help!
HUD Status Attributes
Oxygen
Your Oxygen stat serves a dual purpose - it dictates how long you can hold your breath underwater, and it influences your swimming speed. Unsurprisingly, your Oxygen level only appears on your HUD when you’re submerged underwater. Its icon gradually depletes while you’re submerged and, once its empty, you’ll begin to suffocate, losing Health. To restore your Oxygen levels, simply return to the surface. Your default Oxygen levels should enable you to remain underwater for around 30 seconds.
Upgrading your Oxygen stat will increase your lung capacity and swimming speed, enabling you to explore deep beneath the ocean’s surface. It’s worth noting, however, that you’ll eventually be able to craft items (such as the Lazarus Chowder and SCUBA gear) that dramatically improve your underwater abilities, making Oxygen less vital to upgrade.
Weight
Weight is a measure of how much you can carry before you become encumbered. Every item in your inventory has its own weight value and encumberment occurs once your load equals around 85% of your weight stat. Your movement speed is severely reduced when encumbered and, once you exceed your weight stat, you won’t be able to move at all.
Needless to say, encumberment is a pain. For starters, it makes you vulnerable to attack from other players and creatures. More seriously, however, it can severely hamper your ability to transport heavy materials around, even if it’s just from your pack animal to your storage units. Given how much material gathering you’ll be required to do in order to craft the tools of your survival, upgrading your weight stat is a must.
Water
Water is a measure of your hydration level. It gradually, naturally depletes over time, but will do so more quickly when your stamina is exhausted, when you eat a Stimberry or if you get too hot. Once your water meter is empty, you’ll become dehydrated, draining your Health and increasing your Torpidity (which, eventually, will cause you to pass out).
Thankfully, it’s easy to rehydrate yourself: simply drink from, or submerge yourself in, a nearby water source - be it a stream, a river, the ocean or even the rain. If there are no water sources near your base, you can craft a network of reservoirs, pipes and faucet to supply your water. Alternatively, you can carry a portable water source (such as a Waterskin or Water Jar) in order to stay hydrated in particularly arid climes.

Food
Food is a measure of your hunger and, just like water, will gradually deplete automatically over time. As with Water, your Food meter is tied directly to your stamina gauge and will deplete more quickly as you exert yourself. Your food level is also adversely affected by cold temperatures. Once your Food gauge is empty, your Health will begin to deplete and your Torpidity levels will increase. Unsurprisingly, you can restore your food levels by eating - and the island’s various food sources (from berries and vegetables to grilled meat and jerky) all provide different levels of nourishment. Needless to say, you should carry food on your person and stay adequately fed at all times.
Stamina
As you exert yourself - whether through running, jumping, swimming, resource gathering or attacking - your Stamina level will gradually deplete. Unsurprisingly, the more demanding an activity, the more Stamina it will use. Once your Stamina gauge is empty, you’ll become Exhausted and your movement speed will be dramatically reduced.
To refill your Stamina gauge naturally, you can either stand still or walk slowly - although your Stamina will refill more slowly while moving. It’s also possible to restore Stamina quickly by consuming Stimberries or Stimulant, although both of these will cause you to dehydrate. As your Stamina is restored, Food will be consumed at an increased rate.
Early on in the game, you’ll probably find that you’re starving an awful lot of the time. Partly, that’s because berries (the most readily-obtainable food source when you’re starting out) only provide limited nourishment unless they’re consumed in large doses. More likely though, your perpetual hunger will be a result of pushing yourself too hard. As tempting as it might be to sprint everywhere in your eagerness to explore the island, slow things down a little until you’ve poured more upgrade points into your Stamina.
Health
Your Health bar, unsurprisingly, offers a visual representation of how not dead you currently are. Your health can drop for all sorts of reasons - including dehydration, starvation, extreme temperatures, falling, drowning or being attacked. Once your Health reaches around 25% of its total, you’ll become Injured, severely reducing your movement speed. Thankfully, your Health will restore slowly over time - but you can speed up the process by eating Cooked Meat or by consuming Blood Packs. If your Health ever reaches zero, you’ll die; needless to say, upgrade your Health stat to stay alive for longer.
Torpor
Torpor is a measure of your consciousness. Your Torpor meter starts off empty, and slowly fills as you suffer the effects of tranquillising items and attacks. Its icon will only appear on your HUD once your Torpor level begins to rise. Consuming Narcoberries and Narcotics will increase your Torpor level, for instance - as will being attacked by a scorpion (AKA the Pulmonoscorpius), or being hit by fists, clubs, slingshots, tranquilliser darts and tranquilliser arrows. Once your Torpor level reaches 50%, you’ll fall unconscious.
When this happens, you won’t be able to move or use items until you regain consciousness - leaving you vulnerable to attack. Worse still, in PvP, enemies can continue to inflict Torpor-increasing attacks, effectively incapacitating you permanently.

Other Stats And Attributes
Alongside the attributes listed above, there are a number of other stats which don’t appear on your main HUD. These are listed in your inventory and can be boosted with upgrade points in exactly the same way as your other stats.
Melee Damage affects the amount of damage your fists, tools and weapons will do in a single hit. Unsurprisingly, the higher the stat’s value, the more effective your attacks against creatures (and other players in PvP) will be. You should note, however, that Melee Damage doesn’t affect the performance of ranged weapons. Additionally, upgrading this stat can also increase the effectiveness of resource gathering.
Movement Speed dictates the speed at which you’re able to walk or run across the world. Higher movement rates let you move faster while consuming less stamina. As an added bonus, increasing your movement speed allows you to swim faster in water - although increasing your Oxygen stat yields better performance gains in this area. Note that encumberment will always affect movement speed, regardless of level.
Fortitude is your natural resistance to extreme weather conditions. As such, the higher your Fortitude, the less likely you are to suffer from dehydration or starvation as a result of the hot or cold. Unsurprisingly, your Fortitude can also be affected by the type of clothes that you wear. As a bonus, Fortitude also improves your resistance to Torpor-increasing elements such as Narcoberries, Tranquilliser Arrows or Scorpion stings.
Crafting Speed, unsurprisingly, dictates the amount of time it takes to craft an item. For the most part, this isn’t a stat you’re likely to worry about too much, given the relatively brisk time it takes to craft most objects in the game. If you’re planning on crafting a ton of items, however, you might consider giving this stat a boost.