How to install an SSD or HDD
All your desktop PC storage needs covered


Behold, the final piece of actual hardware installation work you’ll need to perform on your custom PC build. In this section we’ll walk you through how to install SSDs of two different types, as well as how to install an HDD, if you’re including some mechanical storage as well.
None of these are particularly tricky, though it’s worth stressing that any NVMe SSDs should be compatible with the PCIe interfaces that your motherboard supports. If the board supports PCIe 4.0, great – it will work with megafast PCIe 4.0 SSDs while providing backwards compatibility with PCIe 3.0 SSDs. If you’re equipping an older motherboard that only features PCIe 3.0 support, however, PCIe 4.0 SSDs won’t play ball. Our best SSDs for gaming guide includes recommendations for both.
This may also be the only time you need to break out the tiny screwdriver, either for removing heat spreaders covering your motherboard’s M.2 slot (the small, horizontally-facing slot in which NVMe SSDs live) or for securing the SSD itself in place. This will vary by motherboard, though, and on some models you may not even need tools at all.
Lastly, for systems with multiple drives, you'll need to know how to initalise your secondary storage and create the partitions they'll need to function. All of this can be found below, so hit these links for the section you're after:
- How to install an SSD: NVMe SSDs
- How to install an SSD: 2.5in SATA SSDs
- How to install an HDD
- How to initialise and create partitions on an SSD / HDD
- PC storage FAQ

How to install an SSD: NVMe SSDs
Step 1: Find an M.2 slot on your motherboard – all modern mobos have at least one. If it’s covered by a heat spreading cover, you’ll need to remove this first, so use your small screwdriver to loosen any screws holding it down, then pull the cover away.
.JPG?width=1920&height=1920&fit=bounds&quality=80&format=jpg&auto=webp)
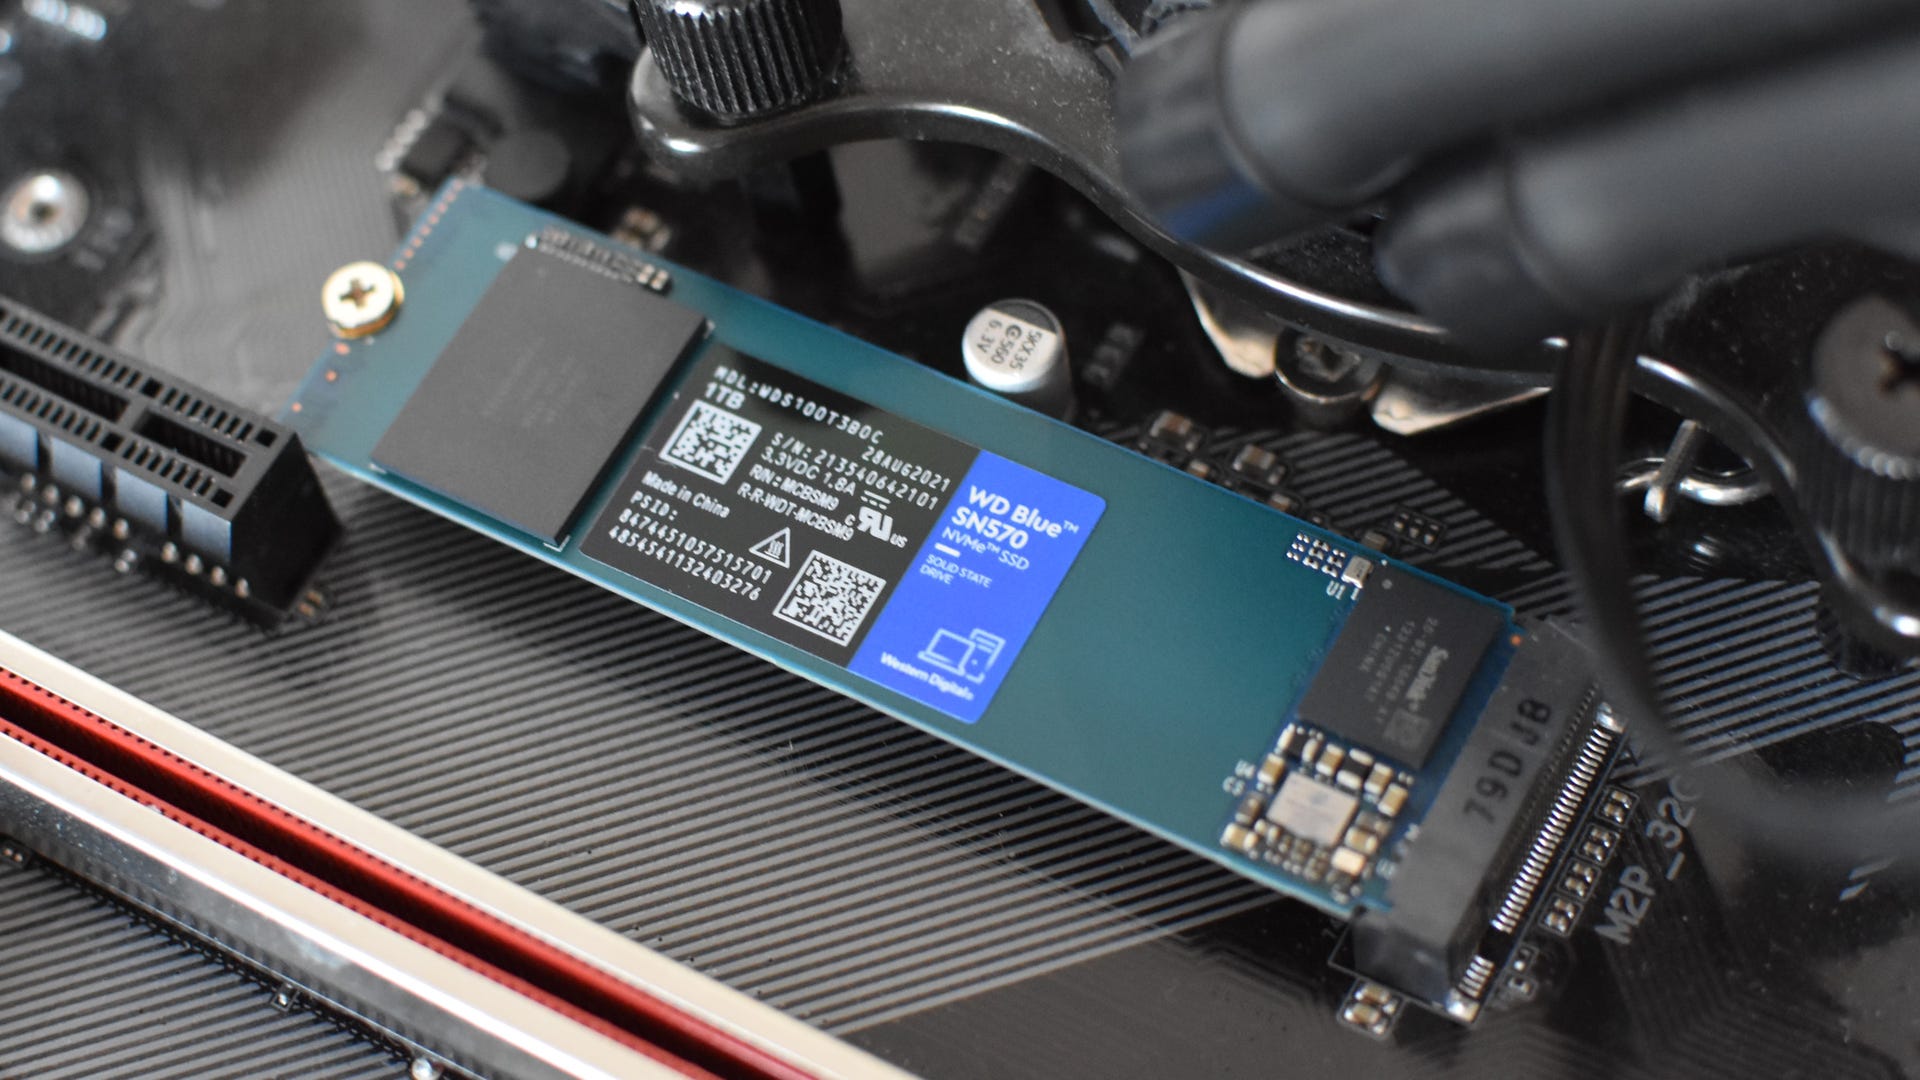
Step 2: Take your NVMe SSD and slide it sideways into the M.2 slot until it clicks in place. If you’re not sure how to orient the drive, look at the copper contacts: see how they’re split into one long section and one smaller section? You can check on the M.2 slot where each section will fit, so it’s impossible to install it, say, back to front. Even if my WD Blue SN550 apparently likes being upside down:
.JPG?width=1920&height=1920&fit=bounds&quality=80&format=jpg&auto=webp)
Step 3: At this point the SSD will be in the slot, but kind of... jutting out at a weird angle. Time to pin it down and secure it in place. At the other end of the drive will be a little semicircular notch – this should align with a standoff on the motherboard when you press the SSD down flat.
There are two common mechanisms for securing the SSD at this point. One is a rotating plastic clip on top of the standoff: if you rotate this so that it’s out of the way of the SSD, you can press the SSD down until it makes full contact with the standoff, then rotate the clip over the SSD, holding it down.
.JPG?width=1920&height=1920&fit=bounds&quality=80&format=jpg&auto=webp)
The other is a baby screw - honestly, just the smallest damn screw you’ve ever seen – that either comes in a small bag inside your motherboard box or is already in the standoff. In the latter case, use your most diminutive screwdriver to remove it first. Then, press the SSD down so the notch sits flush with the standoff, then re-insert and tighten the screw to secure the SSD in place.
How to install an SSD: 2.5in SATA SSDs
Step 1: Find a 2.5in drive mounting point in your case. Common spots for these are behind the right side panel (essentially on the underside of the motherboard tray) or on top of the PSU shroud. Unless you have an absolute bottom-end PC case, for which you probably just need to screw the SSD directly onto the internal chassis, you should get removable mounts like these. Use a medium screwdriver to remove one.
.JPG?width=1920&height=1920&fit=bounds&quality=80&format=jpg&auto=webp)
Step 2: Using the screws that came with your case, attach the SSD to this mount.
.JPG?width=1920&height=1920&fit=bounds&quality=80&format=jpg&auto=webp)
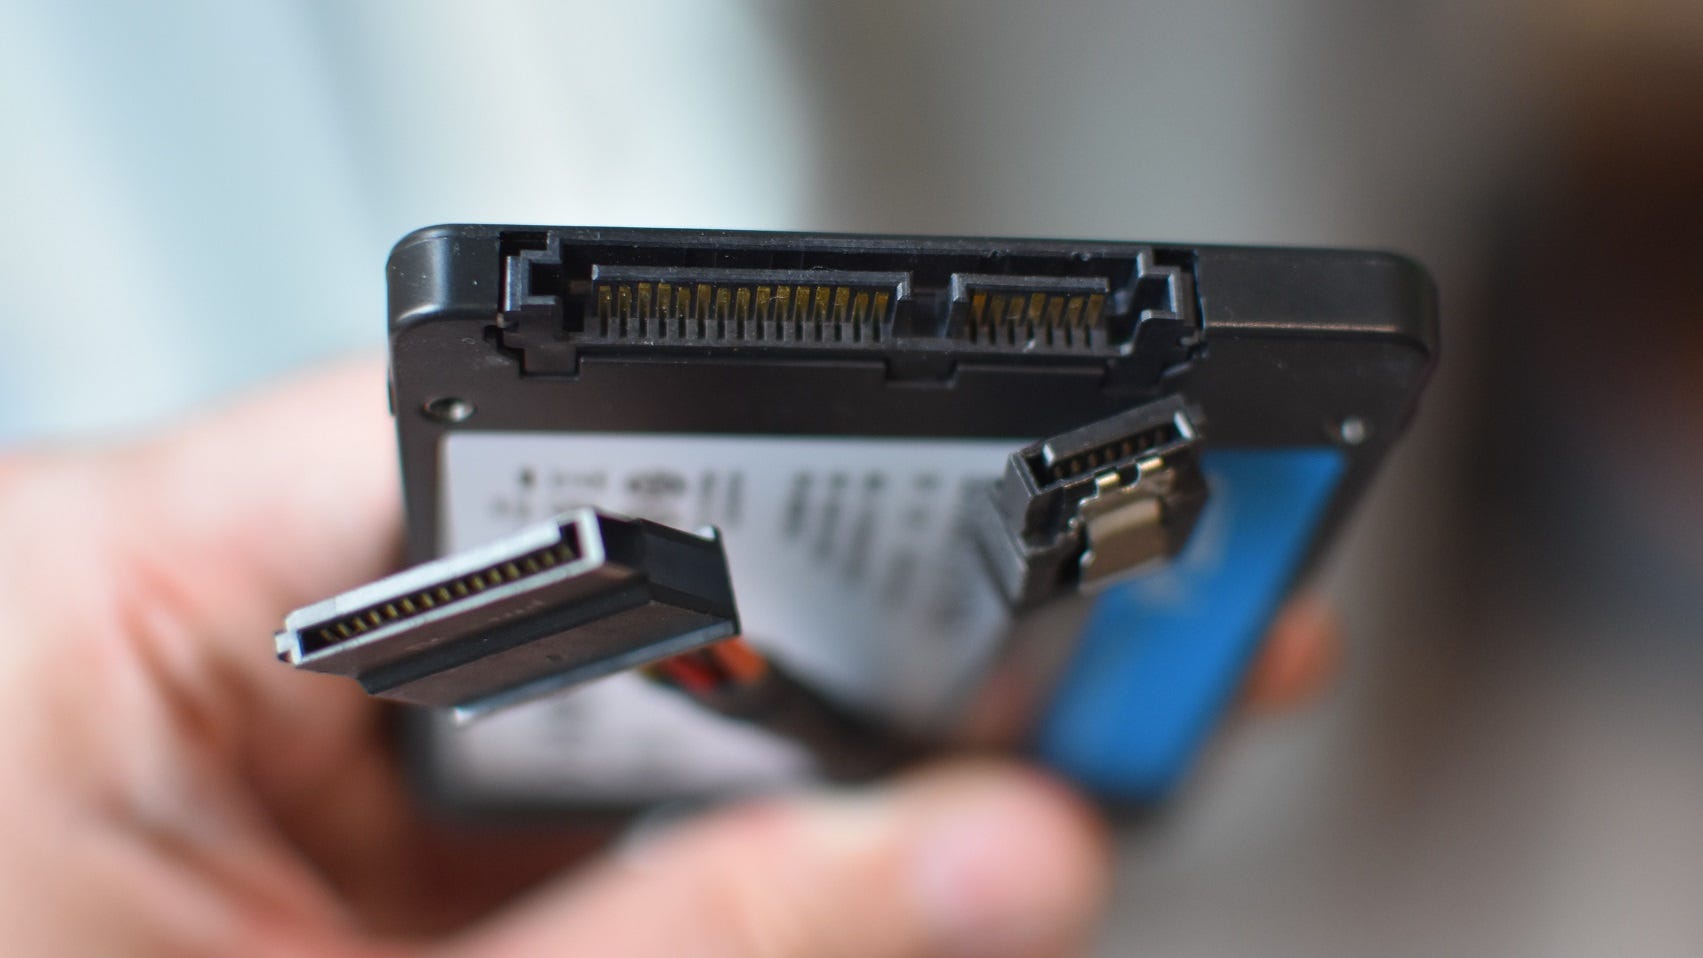
Step 3: Replace the mount, now containing your SSD, on the case using the same screws and/or clips you loosened to remove it. Finally, connect the SSD to a SATA power cable from the PSU, as well as a SATA data cable running to the motherboard.
.JPG?width=1920&height=1920&fit=bounds&quality=80&format=jpg&auto=webp)
If you followed the how to install a motherboard section to the letter, you should already have the latter cable plugged in at the mobo end, but if not, look for the L-shaped connectors either on the right edge or bottom-right corner of the board.
How to install an HDD
Step 1: Installing a 3.5in hard drive is broadly similar to installing a 2.5in SSD, though the added bulk of the former means it's often housed in a special drive cage. This is usually found at the front of the PC, underneath the PSU shroud.
PC cases vary in how exactly the hard drive comes to rest in this cage. Sometimes you can simply pull out a removable tray, click the HDD into it, and slide it back in, all without needing tools. Others may use removeable trays, but need the HDD to be secured inside those trays with screws. Or, as you can see in these photos, the HDD must be attached directly to the cage itself. This requires removing the cage entirely, and assembling everything outside of the case.
If you do need to take out the whole cage, look on the underside of the PC case for any screws holding it in place. Remove these screws, keeping them aside for now, then pull out the cage.
.JPG?width=1920&height=1920&fit=bounds&quality=80&format=jpg&auto=webp)
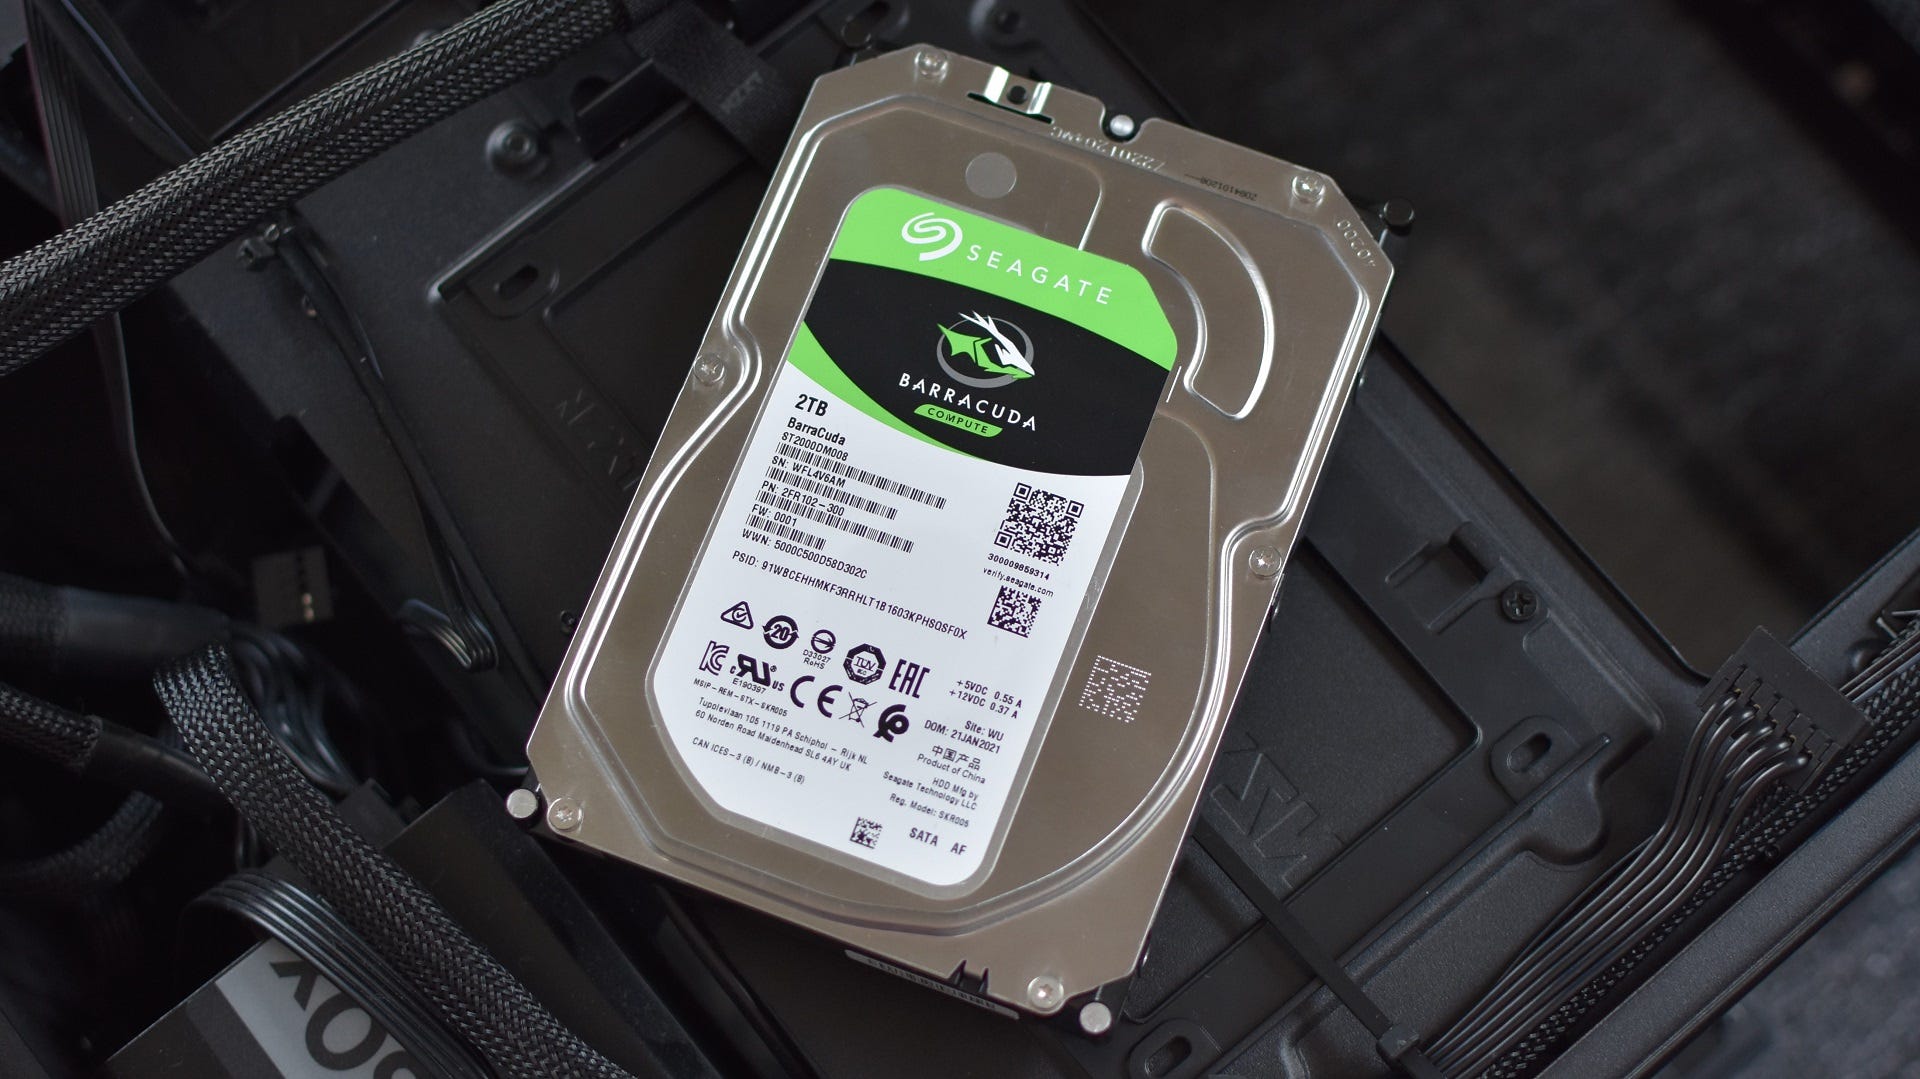
Step 2: Slide your HDD into one of the cage’s bays and, using a separate set of screws included with the case, affix the drive in place. Remember that the SATA power and data ports should face out towards the right side of the case, once it’s back inside, though the irregular positioning of these side screws makes it impossible to install it the wrong way round anyhow.
Alternatively, if your case uses removable trays, just secure the HDD in the tray, either with the case-provided screws or with tool-less clips. Then just slap the tray back in the cage, and skip the next step.
.JPG?width=1920&height=1920&fit=bounds&quality=80&format=jpg&auto=webp)
Step 3: Place the cage (now holding the HDD) back in its original position inside the PC, and use the same screws you removed in step 1 to re-secure it.
.JPG?width=1920&height=1920&fit=bounds&quality=80&format=jpg&auto=webp)
Step 4: Connect the HDD with a SATA power cable from the PSU, as well as a SATA data cable. The latter cable should, at the other end, be connected to a SATA port on the motherboard.
.JPG?width=1920&height=1920&fit=bounds&quality=80&format=jpg&auto=webp)

How to initialise and create partitions on an SSD / HDD
Disclaimer! You don’t have to worry about this right now, assuming you’re still building a PC from scratch. And you won’t need to do this for the drive on which you eventually install Windows, as Windows’ installation process handles everything there. But, for any secondary drives you might have, or may want to install in the future, you’ll need to manually set them up before installing anything on them. Since this is already a big old guide to prepping PC storage, let’s cover that here; feel free to continue with your build for now, and come back to this later.
Once you have Windows 10 or 11 up and running, you’ll be using its Disk Management tool to initialise and create usable partitions on any extra storage drives. You can open Disk Management by hitting the Windows key and typing “disk management” until "Create and format hard disk partitions" appears. Click on this or press Enter to open the tool.
Immediately, Disk Management will detect that a new drive is connected, and will ask to initialise it. Check "GPT (GUID Partition Table)", then click OK to initialise.
You’ll see any connected storage drives in a list at the bottom; your newly initialised SSD or HDD will be the one with a black outline, and will be listed with "unallocated" space. Next up is creating a partition on the drive so Windows can read and write data to/from it.
Step 1: Right-click on the unallocated space on the drive, then click "New Simple Volume" followed by "Next" once the wizard opens.
Step 2: Leave the volume size as it is – the size value defaults to the maximum available space on your SSD or HDD in megabytes, in other words making full use of the capacity. Click "Next".
Step 3: Assign a drive letter from the drop-down list, or just go with whichever is listed by default, then click "Next".
Step 4: By default, "Format this volume with the follow settings" should be checked. This is what you want. The File system should be NTFS and Allocation size should be set to Default. You can optionally give the drive a name by typing it in the Volume label field; I like to name my drives according to their make and model, but you can name your drive whatever you want. Or just leave it blank! The SSD/HDD will still be identifiable from its drive letter. Finally, make sure "Perform a quick format" is checked, then click "Next".
Step 5: Click "Finish", then "Format disk" when prompted. And there you have it: one storage drive, ready to serve.
PC storage FAQ
What is a solid state drive?
An SSD is just a storage drive that doesn’t include any moving parts. Whereas hard disk drives (HDDs) access data using a mechanical read/write arm that flits across a spinning platter, almost like a record player (sort of, ish), SSDs use much smaller modules of flash memory that are accessed through purely digital means. Nothing is actuating or spinning, hence "solid state".
What are the advantages of SSDs over HDDs?
Speed, mainly. SSDs are significantly faster than hard drives for both read and write speeds; even a basic 2.5.in SATA SSD can be more than twice as fast, while NVMe drives are faster still. This makes the solid state option far better as your PC’s 'main' drive, as booting up Windows will take a lot less time, and it’s the same story for loading times in games: Katharine once found that an NVMe SSD could launch Anthem up to 70% faster than a hard drive. Less waiting, more playing, and this performance gap is going to widen further in games with DirectStorage support.
SSDs also run silently, without the scritch-scratching of a mechanical drive, and M.2 drives show how they can be much more compact and power-efficient as well. SSDs are also more shock-resistant than HDDs, though this is less useful in a desktop PC than, say, a laptop. Or the Steam Deck.
How can I pick the right storage for my gaming PC?
Your primary concern should be: "Will this fit in my PC?" Before you go shopping, make sure that you’ve actually got a spare M.2 slot, 2.5in mounting point OR 3.5in HDD bay to install the new drive in. If you’re willing to pay more for a PCIe 4.0 SSD (or a PCIe 5.0 model, once they’re more readily available) check as well that your CPU and motherboard combination both support the desired interface. PCIe 3.0 drives are slower, but are still drastically faster than SATA drives, and should work with any M.2-equipped motherboard.
With the boring techy stuff out of the way, start thinking about capacity. I’m a big advocate for just buying the largest SSD you can afford, but generally speaking you should aim for at least 1TB if this is going to be the one and only storage device in your rig. If you have other drives that can provide backup capacity – an HDD, maybe, or older, slower SSDs – then you could get a smaller 500GB or even 256GB SSD, and just use that for Windows and a few of your favourite games or apps.
Right now, PCIe 3.0 NVMe SSDs arguably provide the best value for money, though it can be worth upgrading to PCIe 4.0 to secure yourself the best speeds. Indeed, if you’ve already invested in a CPU and motherboard with 4.0 support, it would almost be a shame to not take advantage of it. SATA SSDs are still good for budget builds, though try to aim higher (i.e. faster) if your cash situation allows.