How to take screenshots on the Steam Deck
How to take, find, and manage your screenshots on the go
The Steam Deck is all about transplanting the pleasures of PC gaming to a handheld. But, if you’re exclusively accustomed to mouse and keyboard controls, even simple actions like taking a screenshot can require learning a new language of button combinations. Luckily, in this specific case, snapping a screenshot on the Steam Deck is as easy as a couple of presses – or to be more specific, a hold and a press.
This guide will also show you where to find your screenshots once you’ve taken them, and how to upload them so that your friends and other Steam users can admire your Deck photography. Only if you're in a sharing mood, obviously; there's nothing stopping you from snapping your Steam Deck games and uploading them privately.
How to take screenshots on the Steam Deck
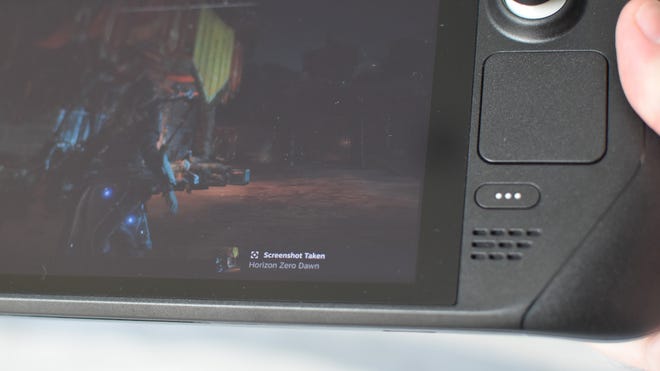
Hold down the Steam button, then tap R1. That’s all it takes, and a notification will appear in the bottom-right corner of the screen to confirm a successful screengrab.

This is one of many Steam Deck shortcuts that aren’t made explicit unless you’re already holding down the Steam button, which will present the full list. For instance, hold down Steam + L1 and you’ll toggle the magnifying tool, which is perfect for zooming in on hard-to-read text in strategy and management games. Holding down the Steam button and tapping X will also bring up the onscreen keyboard at any time, while flicking the left thumbstick up or down while holding the Steam button will raise or lower the display brightness.
These are useful tricks to know, and taking a screenshot with Steam + R1 is among the quickest and easiest of the bunch.
Where are my Steam Deck screenshots saved?
If you don’t fancy digging through system folders, you can view, upload and delete your Steam Deck screenshots any time through SteamOS. Start by pressing (not holding) the Steam button, then navigate to Media. Here, you’ll find all your saved screenshots, including any you’ve previously uploaded to Steam on a different PC.
To upload a screenshot, highlight it, then press the Menu button (the little three-lined button above the right thumbstick) and select “Upload”. Confirm the upload, which will add the shot to your private library only. To make it public, viewable to friends only, or unlisted, find the same screenshot under the “Private” tab then highlight it, press the Menu button and select your favoured visibility setting.
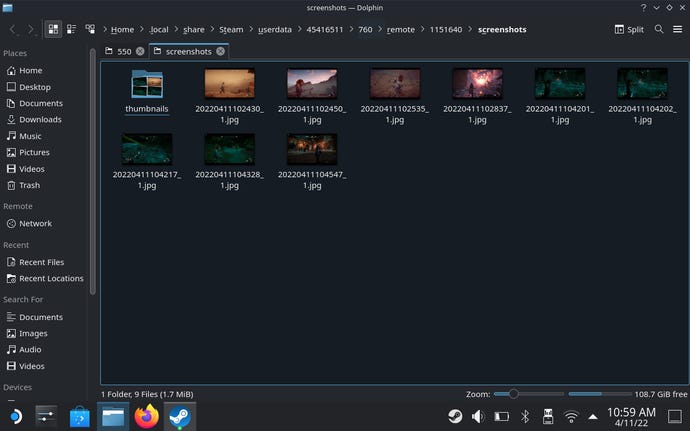
For bulk copying/pasting/deleting/general management of your screenshots, head to the Dolphin file manager in the Steam Deck’s Desktop Mode. Once you’ve entered this mode by holding down the power button and selecting it, fire up Dolphin, click the “Open Menu” button in the top-right corner, and check “Show Hidden Files”. Then, just follow this path:
Home > .local > share > Steam > userdata > [Your Steam account ID] >760 > remote
The screenshot folders for individual games will be named by their app ID, not by the actual game name (annoyingly). Still, unless you’ve been capturing shots in dozens of games it shouldn’t be long until you find the right one.

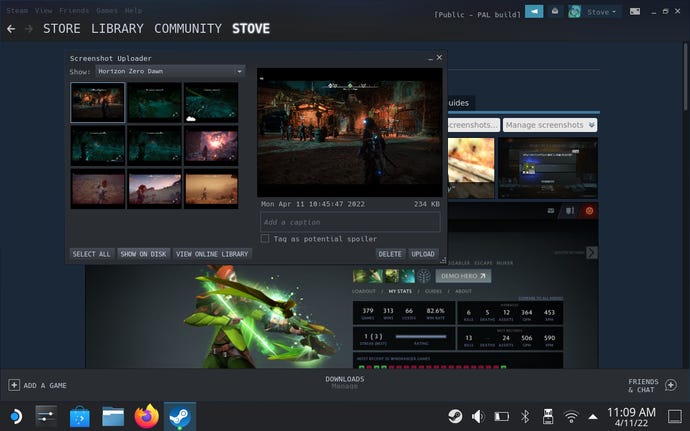
Alternatively, you can use the Steam app itself to jump to a certain screenshot’s save folder, just like you can on Windows. Open the app, click “View” in the top-left, then select “Screenshots”. This opens up the Steam screenshots manager, from which you can upload your shots, or find them in Dolphin by highlighting one and clicking “Show on Disk”.

For more on getting the most out of your Steam Deck, have a look at our battery life guide: it includes both quick tips to boost your Deck's endurance, and battery life test results for a whole bunch o' games.

