How to uninstall Windows 11 and go back to Windows 10
Upgrader’s remorse? Read this guide

Change isn’t for everyone: just ask the 5% of Steam Hardware Survey respondents still using Windows 7. Sadly, even the most eager of early adopters might be looking to find out how to uninstall Windows 11, the very latest of Microsoft’s operating systems. It could be the newly centralised Start menu; it could be the lack of DirectStorage support among games making the best SSDs perform below their full capability; it could just be a single unsquished bug, which remains a risk with the infant OS. Fortunately, if you decide to want to switch back to Windows 10 within 10 days of installing its successor, it’s possible to roll back in just a few, mildly regretful clicks.

I should stress that this method only works within that 10-day time limit; a kind of trial period, if you will. Beyond that, your best hope is a completely clean Windows 10 install, which would cost any files, games and apps you hadn’t previously backed up. If you do decide to switch back in time, you can might lose some apps and settings changed made after you first installed Windows 11, but anything you brought over from Windows 10 should return intact.
Note also that while there’s a limited grace period for switching back to Windows 10, the only limits on later reinstalling Windows 11 are the existing system requirements – and if you’re rolling back, your PC has presumably met those already. In other words, don’t think that by switching back now you’re giving up your right to try the free upgrade again later, perhaps when Windows 11 is a little more stable and feature-rich.
How to uninstall Windows 11 and go back to Windows 10
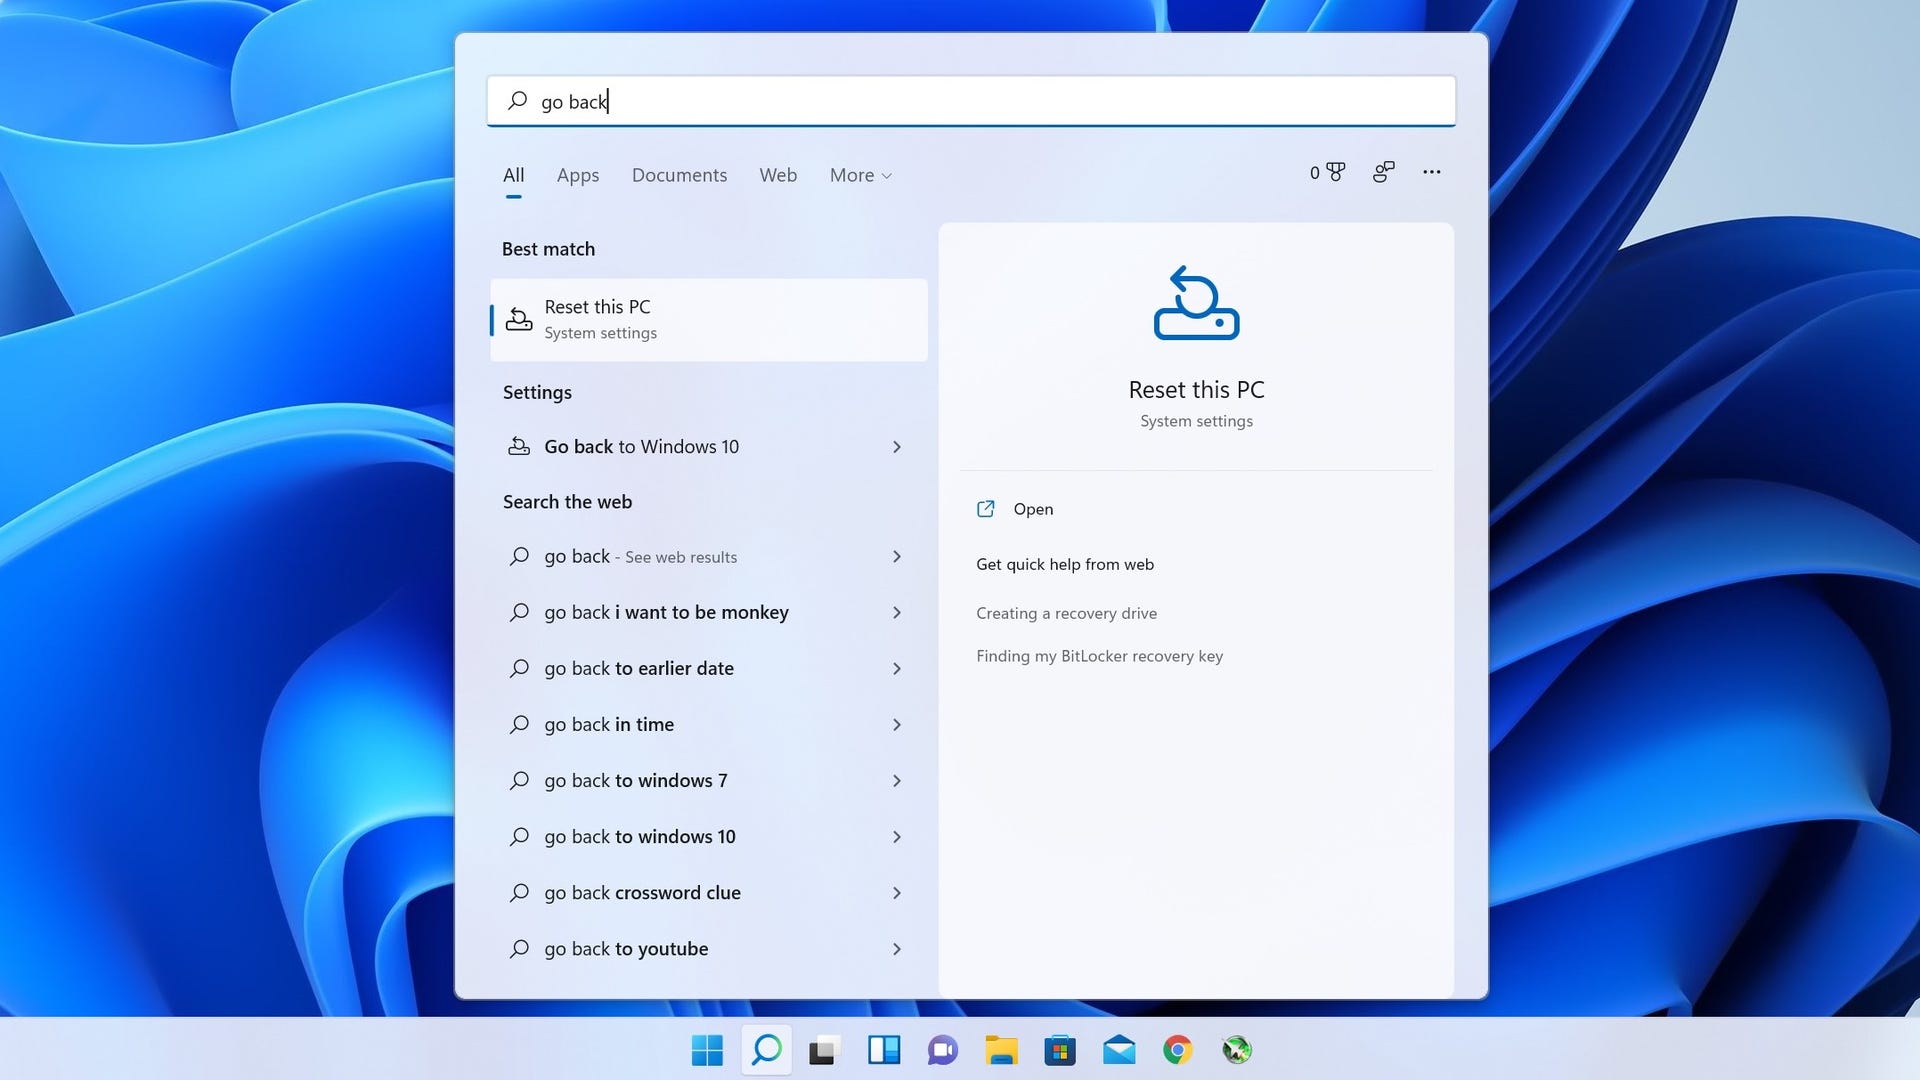
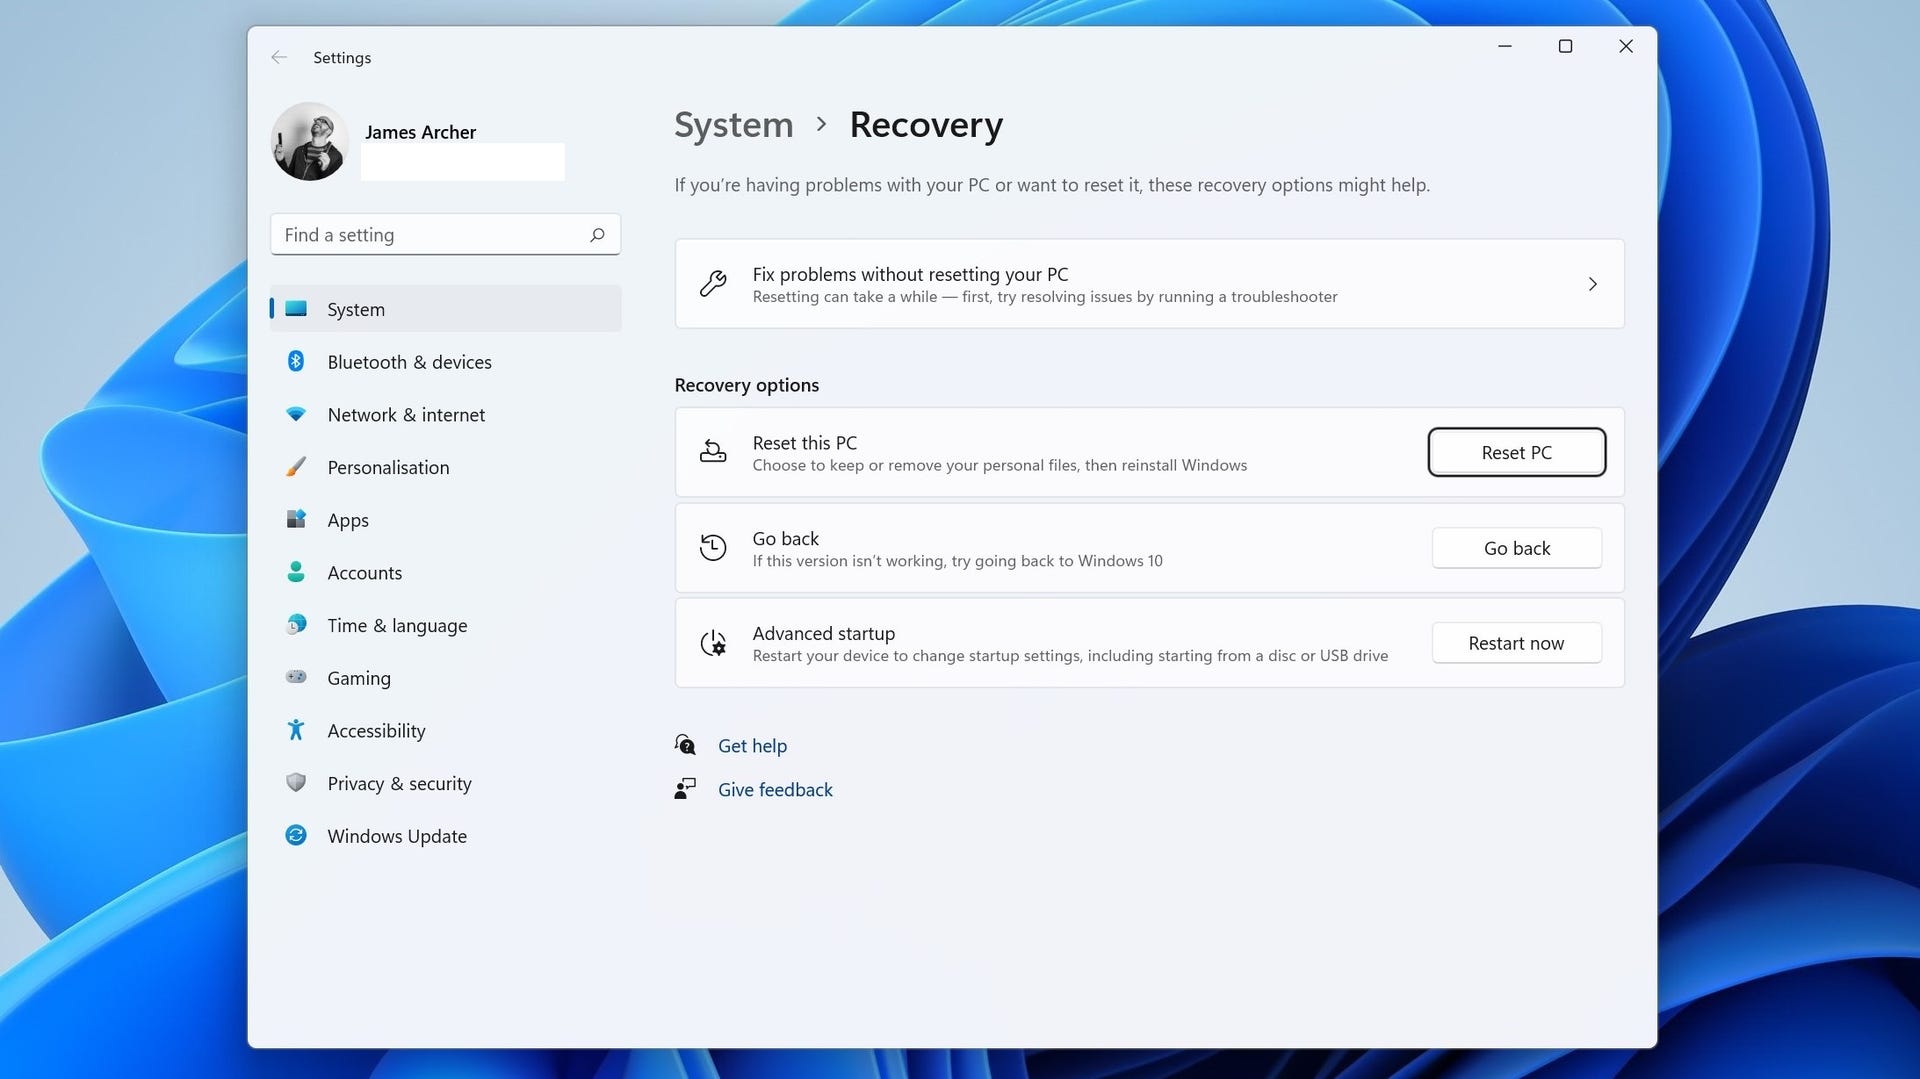
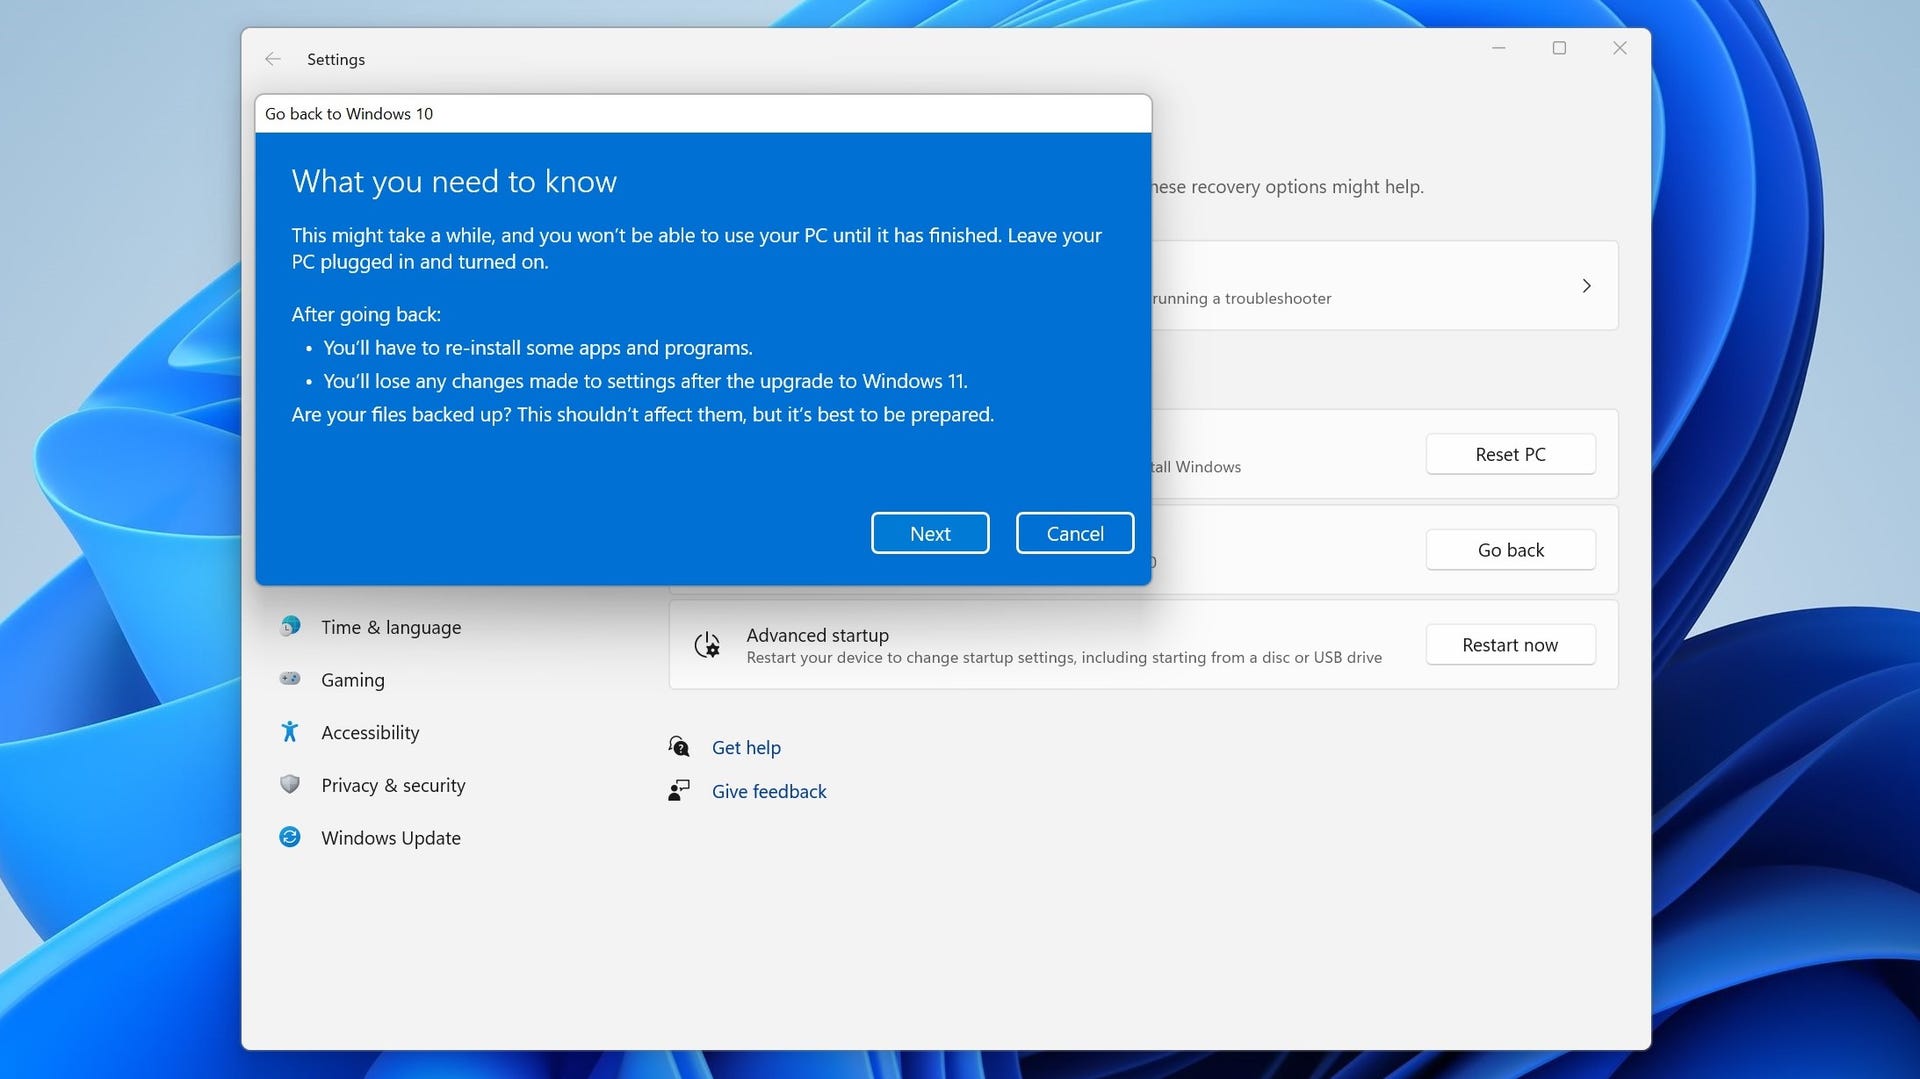
Step 1: Type “go back” in the Windows 11 Start menu’s search bar. This should bring up the Reset this PC shortcut, so open it up. You can alternatively navigate to System > Recovery in the main Windows settings, but this search method is faster.
Step 2: Assuming you’re within the time limit, a “Go back” option should be listed within the Recovery options section. Click the Go Back button.
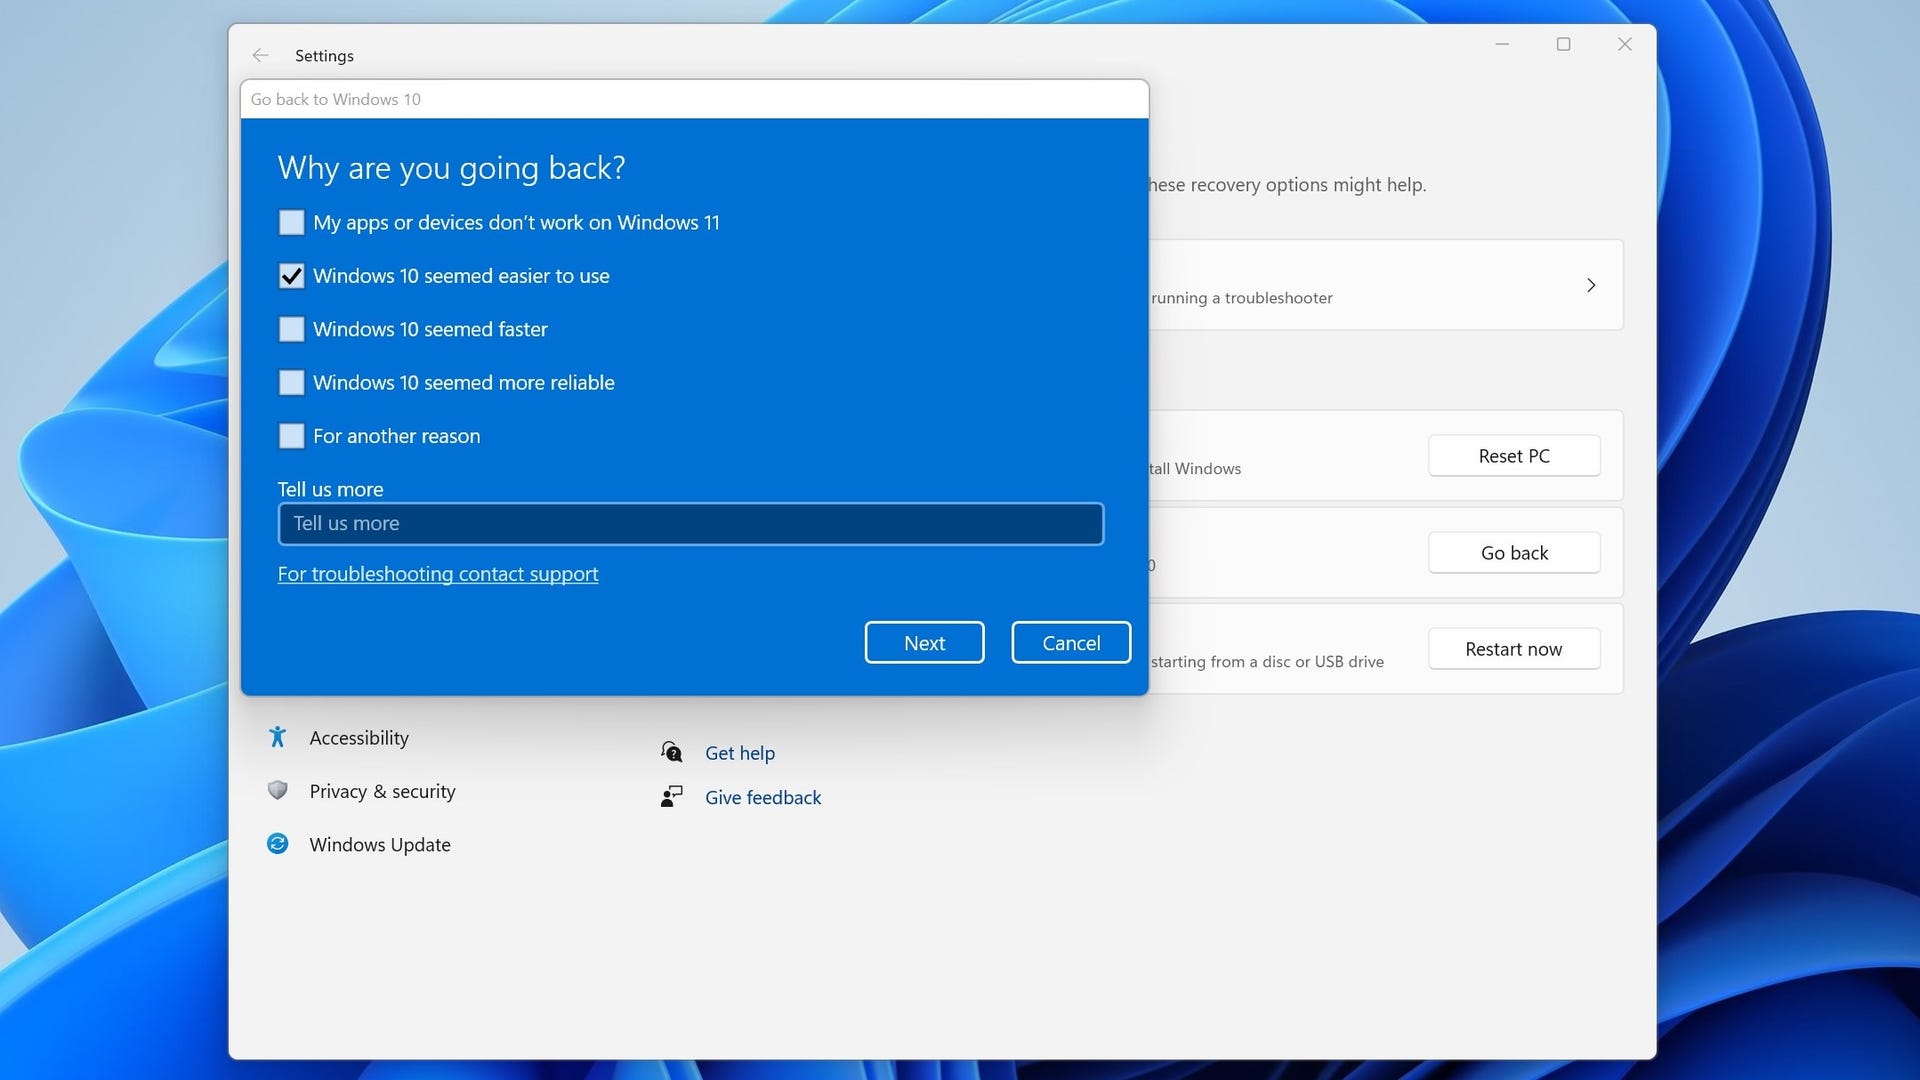
Step 3: Select a reason for going back (or just check ‘For another reason’ and leave the field blank), then click Next. Windows will try to sweet-talk you into checking for updates to fix potential problems instead, but you can just click No Thanks to proceed with the rollback.
Step 4: On the “What you need to know” screen, note the warnings about potentially losing apps and settings, then hit Next. On the following screen you’ll get a reminder that you might need your Windows 10 password – a somewhat odd reminder, given Windows 11 uses the same login credentials as your Windows 10 account when upgrading – so hit Next here as well.
Step 5: At last, click Go back to confirm you want to switch. After a short wait, including a reset, you’ll be back on Windows 10.
