The Secret Ending To Inside: How To Find All The Orbs
I finished Inside [official site] recently and then started reading about it to see what other people had to say. One of the things they had to say was a discussion of a secret ending which I then resolved to seek out - here's how that went and how you can do it too...
So first things first, I used the guide over on Prima Games to find a couple of orb locations because I didn't get all of them solo. If you're after "just the facts" I'd say their guide is really clear but there's definitely a pleasure to the seeking process. This guide is my facts (not least because I'd actually discovered a pleasing number of the orbs you need to activate for the ending) but also a bit about the process of seeking out Easter Eggs in games - something I tend not to do simply because there are so many games and it takes up so much time. I used to be a completionist and then the sheer number of these mysterious collectibles designed to keep you coming back to a game long beyond when you'd naturally finished seemed to explode in number as well as plummet in rewardingness.
Inside felt manageable. It's a game of manageable length - maybe 3 or 4 hours for a first playthrough and less when you know all the puzzles. It's also a game of manageable puzzling. I didn't think I'd be gated from any orbs because I wasn't fast enough at a button combo or anything. It's also a game where I think I'd found at least half of the 14 orbs myself so the majority of the "work" was already in place. Sometimes it was through reading environmental cues, sometimes just by obeying that scrolling game rule where if you're seeking Easter eggs try heading left instead of right. The game also keeps track of whether you found an orb so if you do another runthrough any that you've already found will be deactivated already so you don't have to do the busywork of re-finding them*.
Onward to secrets!
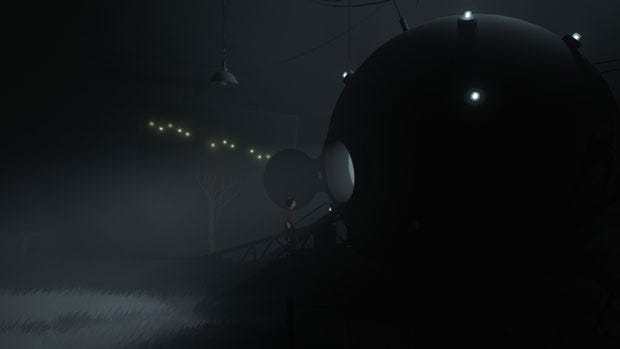
#1
The first one is relatively well signposted in terms of Inside. You get chased by a pack of dogs and drop into water where you see a yellow cable leading off to the left. It's a game so steeped in dark greys and shadows that colour really pops and sparks a curiosity response. Anyway, you follow that to a little cavern with an orb on a ledge. To reach it you have to rock a pole from side to side until the momentum topples it and you get a bridge to the orb. Yank to deactivate then hop back into the water and continue...


#2
The next one is accessed through a cornfield. This one is another which you might just find through suspecting an exciting-looking space like a cornfield isn't just for running through and is prime secret-hiding space. I'd say the trapdoor is hidden a little over halfway through the space. I found it by pressing the grab key as I wandered the field, although I should point out that if you've doubled back on yourself in the hunt and find a point where you can grab something but not do anything with it you're actually standing ON the trapdoor. You just need to move to the left a bit and try again when facing right. After that it's just a case of climbing down a ladder and heading right into a little darkroom where the second orb is hiding.


#3
This is another that's signposted by the presence of another one of those yellow cables which runs across the farm roof and then drops down to a room you can't reach from inside the barn.
Instead you need to jump down from the roof then pull the cart of pig carcasses over to the left where you can climb on it and pull out one of the wooden slats. The newly-opened gap give you an access point to the pig pen. I took a moment to run around amongst the pigs but maybe you'd prefer to get on with things. If the latter just clamber up the rope and swing until you can jump onto the rafters on the left. You'll know to head left because when you swing you can see the yellow cable. There's nothing on the right, I checked. Yank. Continue.


#4
This one is one of the super-easy ones as you're just following an obvious yellow cable. When you get into the factory section you shove a safe off a plank and create a hole in the floor. When you drop down into the hole a cable leads off to the right through a vent. Even if you haven't encountered any of the previous orbs I'd say few people would miss this one as the game kind of presents it to you as the next place to go rather than hiding it. All you need to do is open the vent and head through.


#5
This one is kind of hard to describe. It's a few screens on from when you use two zombies to stand on two pressure plates at the same time and open a doorway. You get to a point when you're by a rooftop sign that still has a C in place. You skid down the roof and end up clutching a drainpipe. Hurrah! A new yellow cable! Jump from the drainpipe to the ladder on the opposite wall to follow it downwards to the orb. Yank! Deactivate! Onward!


I make it sound like we're on an orb roll now but actually there aren't any for AAAAAAGES.
...
AND AAAAAAAAAAAAAAAAAAAGGGGGGGES.
...
Seriously, I did so much attempting to walk left in the next sections and being excited about cables then realising they were grey and not yellow. It was the worst.
This is the point where I was checking the guide, like ARE YOU SURE THERE'S NOTHING HERE?
I mean we're talking nothing until after you get the submarine. That's how long it is.
#6
Okay, SO! You've got the submarine and you've just done the section with the Indiana Jones bit where you're chased by things rolling out of a doorway which you open. You're back in the submarine and you've just had the first glimpse of the long-haired underwater creature who likes to drown you, although it's not actually attempting to kill you yet. You move right through the water and through red underwater doorways. Just after one of the doorways you'll see those telltale yellow cables. This time they're easy to miss though so the best thing I can suggest is that after each doorway have a look and see if you can see those cables. If yes follow them downwards and then to the left where you'll find what looks like a cove.

At one point it looks like a box is blocking your way so you'll need to charge up the submarine and ram the box. It took me a few moments to figure that one out as the box has handles and I was so convinced it needed to be pulled.
Anyway, the actual puzzle bit has a really neat solution so skip forward to #7 if you want to solve it yourself.
If not:
You wear the mind control hat on the left platform and take control of the zombie guy. He can now jump into the water and drive the submarine. That was pretty fun. I advise playing with that for a bit before solving it. Anyway, what you want is to pop the zombie on the roof of the sub. You then take off the mind control device and get back into the sub yourself, using the charge up power to boost the zombie into the air and into the second mind control helmet.

That activates the hard-to-see second zombie and you can put your own mind control hat on again and get the now-activated second zombie to deal with the orb. Neat, huh?
#7
This one comes just after you've met the long-haired zombie who wants to drown you. You bust the wooden bar to release a red door and lock her out of your current room and then break through some planks in the ceiling using a couple of submarine barges. Once you've done that head up and left. You'll reach what looks like a ship with a lader on the side you can't possibly reach. You need to ram the ship a few times to destroy the apparatus in such a way that the ladder is now accessible.


Full disclosure: I discovered that by attempting to launch myself into the air to try and grab the ladder while the sub was in mid-flight. You can't actually do that so my solution was wrong but it accidentally led to the correct result. I'm still calling it a win.
The orb is just on the ground at the top so yank, disable and be on your way!
#8
You'll likely encounter this one while fiddling about on the section which requires you collect multiple zombies in order to activate a pressure plate. Towards the left on the bottom layer is an area you can access by riding on top of a mining cart pushed by some of those zombies (they might not be zombies but that's the easiest way of referring to them). When you get to that section you'll see a wooden wall you can climb with a plank it looks like you can pull off. There's also a yellow cable feeding into that section. You're not strong enough to pull the plank away alone but if you climb the wall and free the men you find at the top you can.

Squeeze through the gap in the wall and go down a ladder and... get eaten by dogs if you haven't picked up the torch on the wall. Then use the torch to keep the dogs at bay while you head left and deal with the orb. There are no screenshots for this part because DOG STRESS.
#9
At this point I was a bit "Who cares about orbs? Why am I doing this? Are there any Cornettos left?" I think that's mainly because I wasn't looking forward to scouring the next bits of the game for secrets and re-doing the puzzles. ANYHOODLE! Head to the part of the flooded factory/warehouse where there's a circular hatch on the wall. Just before you get to that you'll actually see a yellow cable going into a vent so that's your clue that you'll have to double back on yourself.


The long-haired drowner is there though so you'll have to be crafty and use a variation on the solution you normally employ to get to the next room. What you want to do is drop into the water from the hatch and immediately make for land. Then you tempt the drowner over to the right of the screen by dipping yourself int he water as bait. Just don't get drowned while doing so. Once she's on the right and you're out of the water head left, jump in and swim as fast as you can to the left. Yay! ORBTIME!

Then escape through the vent you saw earlier.
#10
After the drowner catches you and takes you deep underwater you'll find a yellow cable leading into a wall. Head upwards and into the flooded office complex and keep going right until the section with - and I can't think of a better description - there's a big metal sphincter to swim through. Don't swim through it just yet but go down and left instead until you find a hatch. Tug down on the central handle and then pull on the one at the top of the hatch. The orb is at the end of a corridor so just deactivate it and move on...


#11
This was another I'd done on my first playthrough, fiddling about with controls and generally faffing. You wade through some ratty water and get to the section with the wheel and the spotlight. Turning the wheel moves some platforms. One offers you a hiding place from the spotlight and helps you get to the next section but the other is in a room below. If you did what I did you'll have already found out where the orb is because there's a section in the wading room where the water suddenly gets deeper. You swim downwards there to find the entrance to that other room and you'll spy the orb. Now you just need to move the wheel in that other room to reposition the platform and make the orb accessible. I just put it so the platform that blocks the spotlight was directly over the wheel you're turning and that sorted out the placement of the other platform. Swim. Yank. Onward.

#12
This one uses the yellow box you bring up to the room where the water is upside downa nd corpses are floating towards the ceiling. Instead of trying to get into that grim water, push the yellow box to the right. Hop on, activate the box, then hit the red switch while you're in the air. This brings down a platform to the right, sort of like a spaceship letting down an entry point. You can reach it using the box but to get op to the room with the orb you'll need to press the red switch again before you hop to the platform. That raises it with you aboard. Yank. Leave.


#13
This took me the longest time. The orb in in the section which is an office with a lift shaft and a yellow cable dangling from the office ceilng. When I tried it in my first runthrough this was one I decided to come back to in a later playthrough. I hadn't realised you can split the group of zombies which are following you at this point because the zombie behaviour I'd encountered previously made me think you only completed actions once all the zombies were in position. That meant I was able to get onto the dangling yellow cable which you see in the office area but wasn't able to do the next part of the puzzle.
To actually solve this puzzle you need to have some zombies in the lift with you and some on top of the lift. To do that is a simple enough task but it needed me to shake off the assumption I'd made about how the zombies behaved. You just shut the lift door to separate some of the group. My groups were pretty unbalanced. I only had about 3 or 4 in the group with me and the rest on the roof but they were still strong enough to throw me so it was fine.

When you've done that move the lift down a floor and the remaining zombies will board the top of the lift trying to follow you. Return to the office floor and use the group that's in the lift with you to throw you up to the cable. The next group are ready and waiting when you reach the top to chuck you at the final orb. Yank and leave!


#14
This is the last bit. You'll go past the scientists huddled around the circular opening to the giant tank and drop down through the mesh floor via a grate. Head right and you'll start to see yellow cables. When you reach the ladder on the far right wall climb upwards and follow them. Eventually you'll come to a board with lights on and a gigantic orb. Head into the orb and when you're over to the right you wan't be able to see what you're doing but grab and pull for the final orb.


THE ENDING
When you leave the giganto-orb you'll see that only one of the lights is still illuminated. Given you have as many lights as you had orbs up til that point it's reasonable to assume the game wants you to head back to the location of the second orb which was the one in the cornfield. You can do that pretty easily by escaping to the main menu then hitting "load" to select a checkpoint.

Descending into the cornfield bunker you'll see the lever which you can press up, down, left and right. This is the part where I had to seek help and when I found the answer I wasn't surprised. I'm horrendous at puzzles with a musical element. There was one in Lumino City which required me to remember a tune and I actually had to write the thing down because I couldn't hold it in my head and would have been stuck there for the rest of time without doing so. Anyway. This one is solved by paying attention to the tones coming out of two speakers within the game. This GameInformer video explains it in more detail.

Frankly, if I'd had to do that part alone you'd be waiting for this solution until the end of the universe. It's Up, Up, Up, Right, Left, Left, Left, Up, Up, Right, Left, Right, Right, Right. Not as catchy as the Konami code but it does open the hatch. From there you head right until reaching a wall. Raise the panel to reveal a yellow cable and yank for the secret ending.

If you go through all of this (or if you watch a video of the ending) you'll see why it felt like a punchline. This was the the game I decided to try and fetch all the Easter Eggs for and unlock the secret. I actually couldn't stop giggling.
*You can see that in these screenshots actually - I didn't start screenshotting orbs until after my first runthrough so #4 is already dead by the time I take a picture of it!