Far Cry 5: Lost On Mars mission walkthrough
Mission start


The new Lost on Mars comes with its own set of missions set on the desolate, arachnid infested surface of Mars. It may be tough out there, so we created this guide to each of the missions, whether they're story missions or some of the various side missions available to complete.
Far Cry 5 - Lost on Mars mission walkthroguh
Missions are broken down into four different types, namely Story based missions, ones that unlock terminals, those for Hurk, and side missions. In the list below, we will break down each mission into its own dedicated page so all you need to do is click the mission you are on. Since these are just for the missions, for more on the collectables such as Hurk's body parts that are required to leave Mars, then check out our main Far Cry 5 Lost On Mars guide that also has information on where to find some of the items and upgrades to help you survive on Mars.
Far Cry 5: Lost On Mars story missions
- Lost on Mars
- Control Center Antenna
- Dismembered
- Brobot
Far Cry 5: Lost On Mars Terminal Missions
- Transference Center
- Midnight Mountains Antenna
- Midnight Mountains Mine
Hurk Missions
- Coming Soon
Far Cry 5: Lost On Mars Side Missions
- Coming Soon
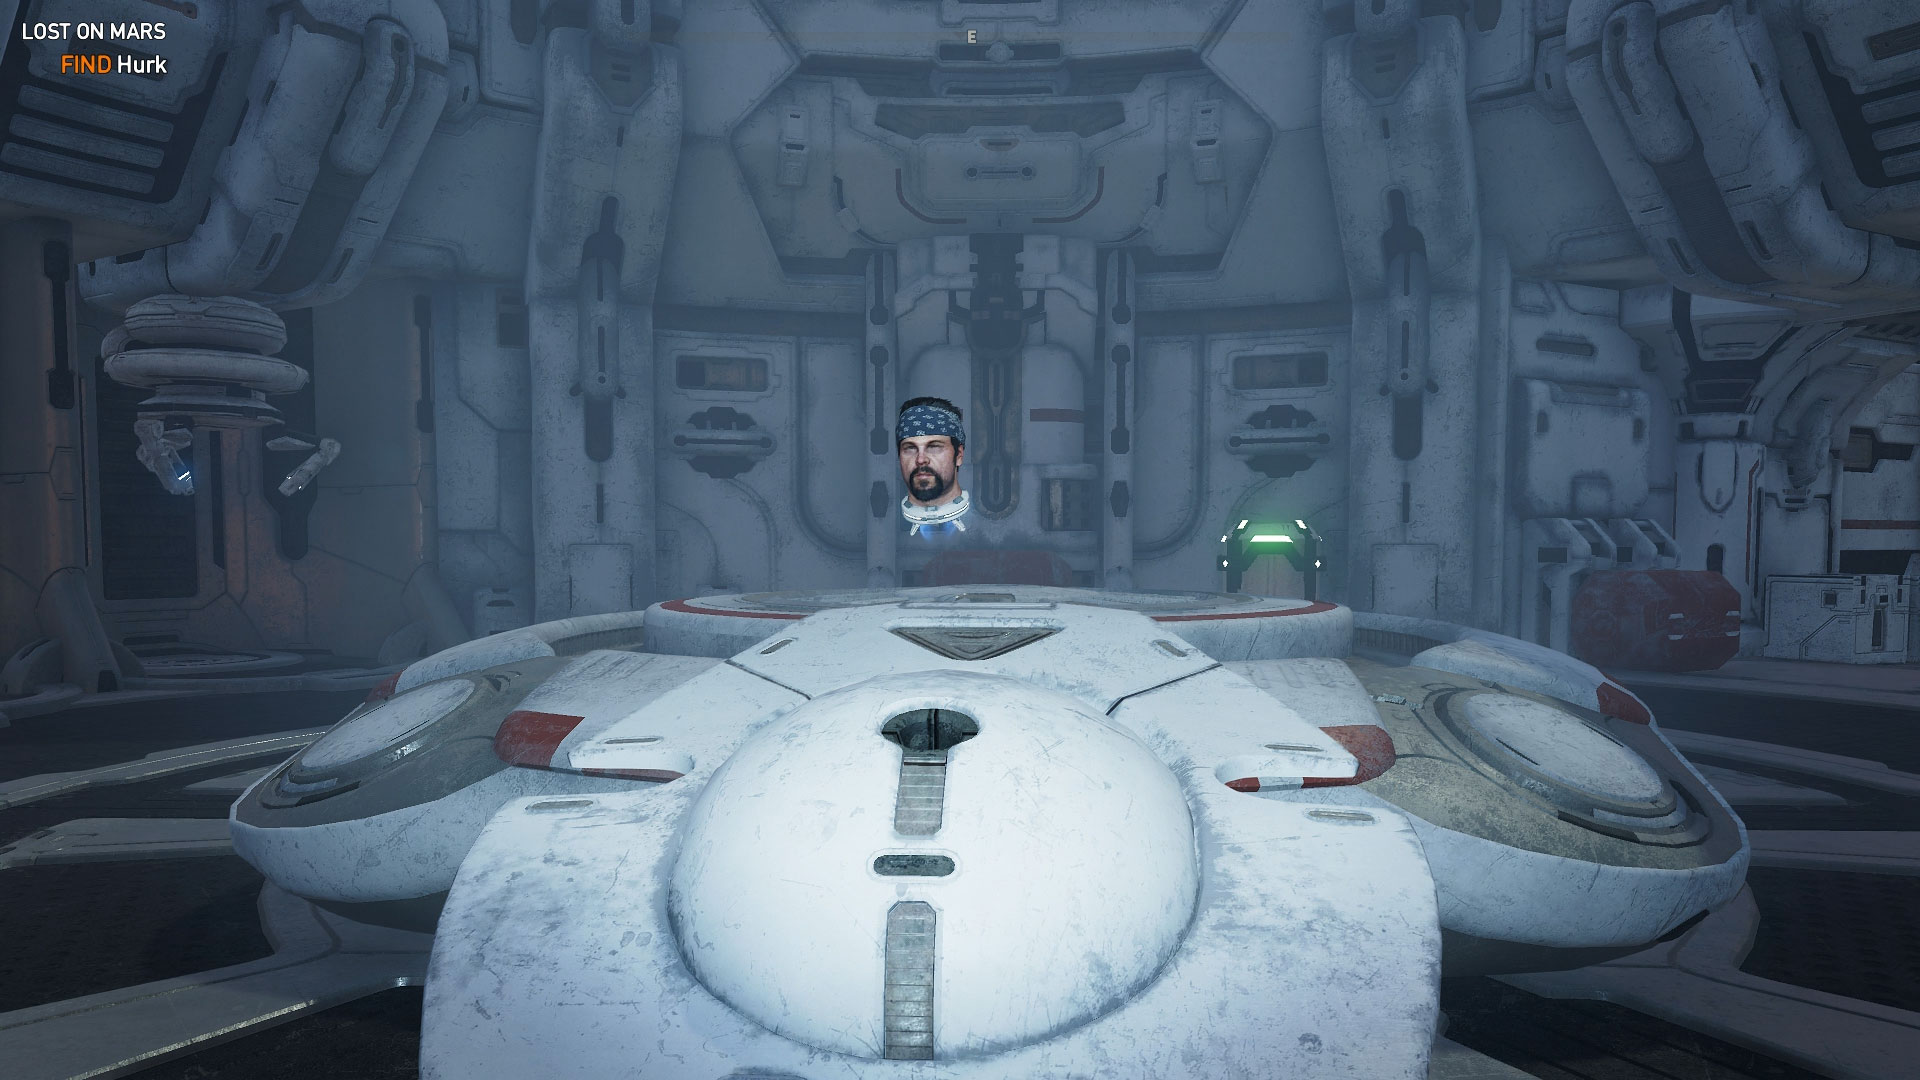
Lost on Mars
As you gain control of Nick, just walk straight forward and jump. Gravity is not as strong here, so your jumping is a bit higher than normal. Continue walking through until you pass through some doors to find Hurk's floating head.
You will then be directed to two energy cores in the room behind you and to the left as you exit Hurk's chamber. Once you've collected them, head back to Hurk and place one of the energy cores into the slot shown. This will revive the AI that Hurk has the hots for.

Control Center Antenna
After awakening the AI, you'll be instructed to collect some materials from barrels. This is so that you can 3D print yourself a new gun. This pistol-like weapon doesn't have an ammunition count, but it does have a cool down time if fired too often. Upon completion of this new weapon, it's time to venture into the great outdoors, and by that I mean the desolate arachnid-infested wasteland of Mars.
Hurk warns you not to walk into the sand. This is invaluable advice, as this attracts the arachnids that can spawn from underneath you. Keep to the rocks for now, but should you need to engage any arachnids, aim for the red vertebrae as that's their weakest point.
Unfortunately, Ubisoft are going to make us climb this tower the hard way, so you'll need to jump up each platform. None of the platforms are particularly tight, but it's important to plan your jumps ahead. At this stage, fall damage is a thing, so a mistimed jump can be fatal. Once you reach the top, plonk that energy core in to complete the mission. This will unlock the rifle for construction in the printer, as well as health packs.
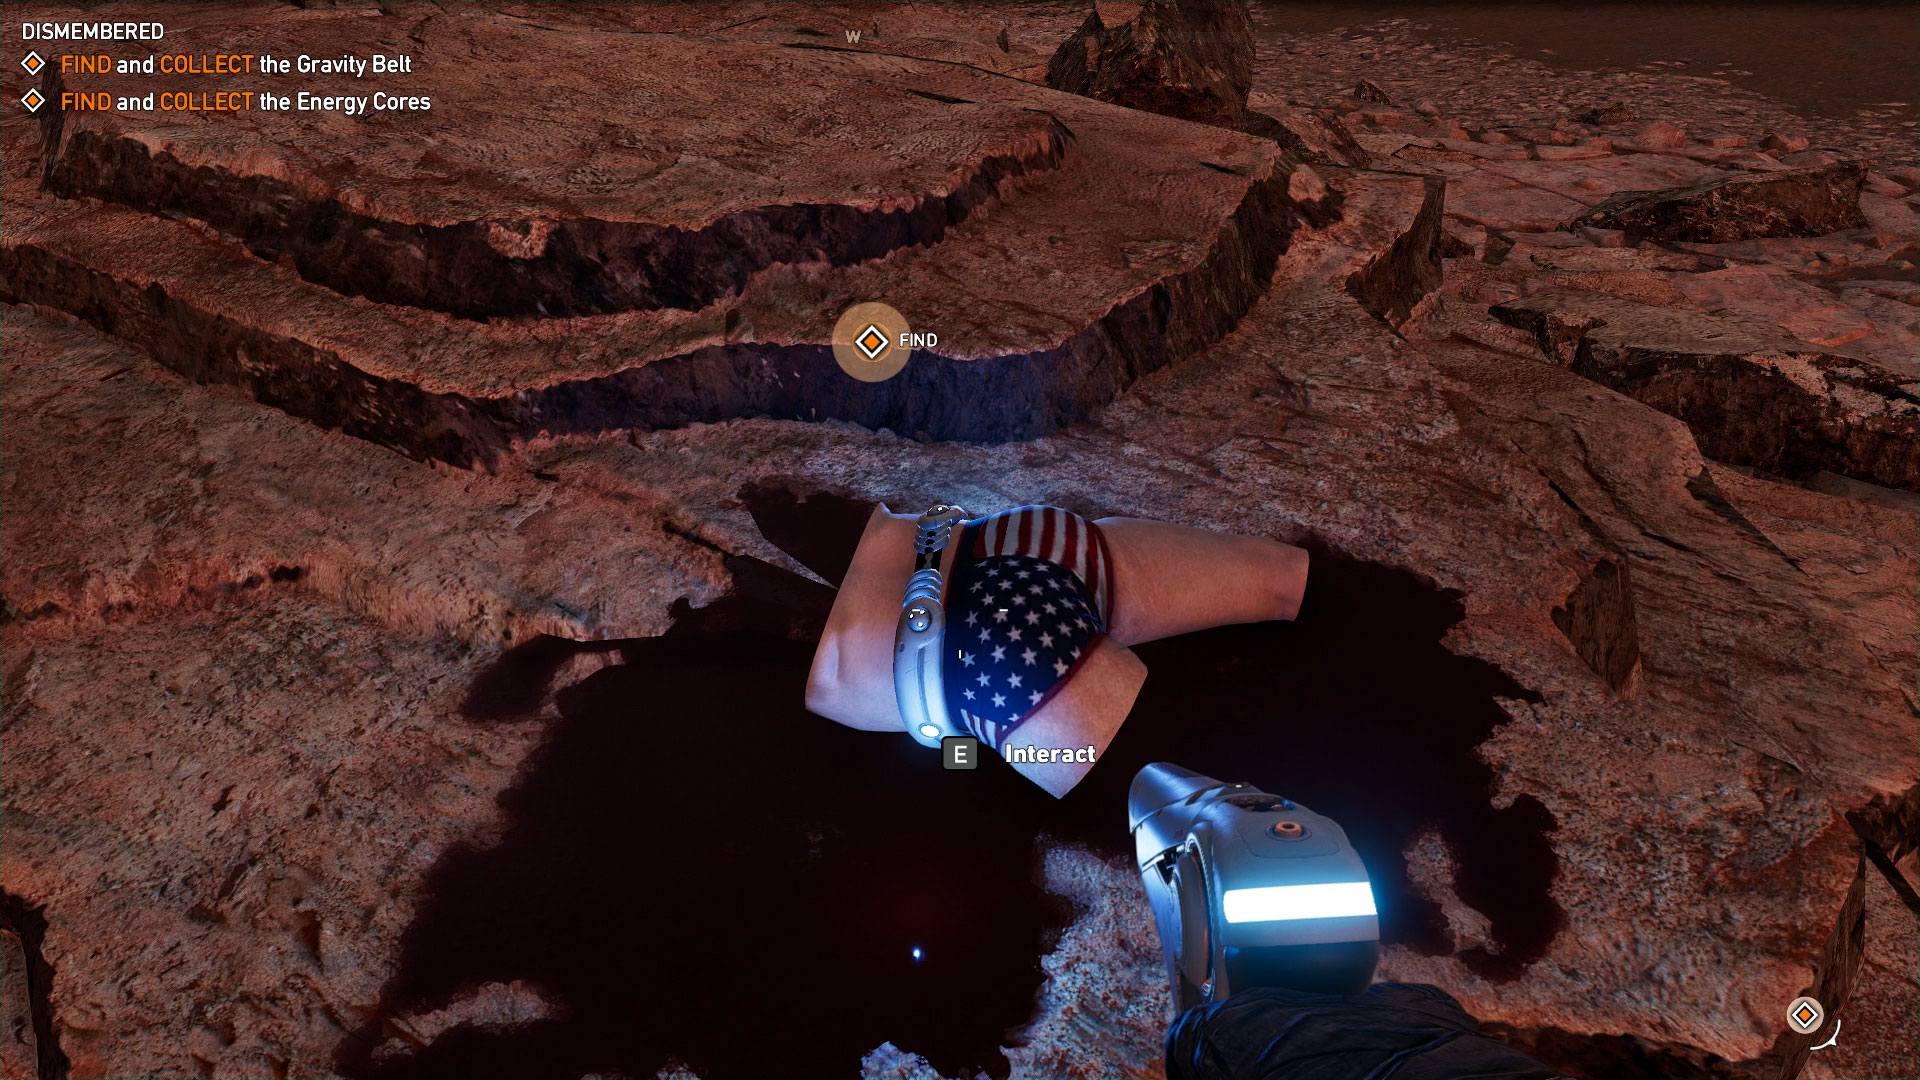
Dismembered
What goes up must come down, so carefully make your way back down the antenna. You may take some falling damage along the way, so be wary of that. Once you've descended, head to the waypoint indicated on the map. Upon reaching the doors, you will be prompted to collect Hurk's right hand, which is the first body part you need to get off Mars.
The doors will soon open up and there will be a huge expanse of sand. To avoid any fighting, leap over the sand onto each of the safer ground spots. As you edge closer, Hurk will notice his pelvic region in the distance, so head over there to collect his pelvis. This unlocks the gravity belt which can make you float, hover, or descend rapidly. It also makes you finally immune to fall damage.
From there, hover over to the next waypoint to find the next Energy Core to complete the mission, as Hurk complains about a lack of junk on his pelvis.
![]()
Transference Center
Hover above the structure ahead of you to climb over the precipice. You'll likely encounter some more of the arachnids along the way to the massive Transference Center up ahead. There are some sand pits nearby, so be wary of where you land. If you have been killing aliens and looting containers, you may have already unlocked the rifle, so be sure to switch between the pistol and rifle once one gun becomes drained.
Eventually you'll come up to the structure. There are two side entrances on the ground level, so head in and to the back. Then do a u-turn and hover to the floor above to find the terminal to restore the Transference Center. This will unlock another gun to make, as well as armour for crafting in the printer.

Brobot
Welcome to the first boss fight of the game, though to call it that would be a bit of a disservice to bosses. When the mission starts, head over to the transference chamber marked on your HUD. Upon trying to plonk Hurk's head onto the device, a "space crab" will rise from the ground in front of you.
On top of this, three more arachnids will appear in the pit behind you, meaning you have four targets. Firstly, since you know the weakness of the standard arachnids, try to take care of them first by shooting up their red abdomen. As long as you don't fall into the sand, you should then be able to unload into the space crab.
This isn't a particularly difficult fight as it only has close range attacks. If it gets too close, hover away to safety. It can bury under soil and ambush you, so be prepared for that. Eventually it will explode, leaving behind some materials for you to obtain. You can then place Hurk's head onto the transference chamber to unlock the Brobot as a companion. He acts just like your companions in Far Cry 5's main campaign, so will need to be revived if he takes too much damage. Collect Hurk's head once more to complete the mission.
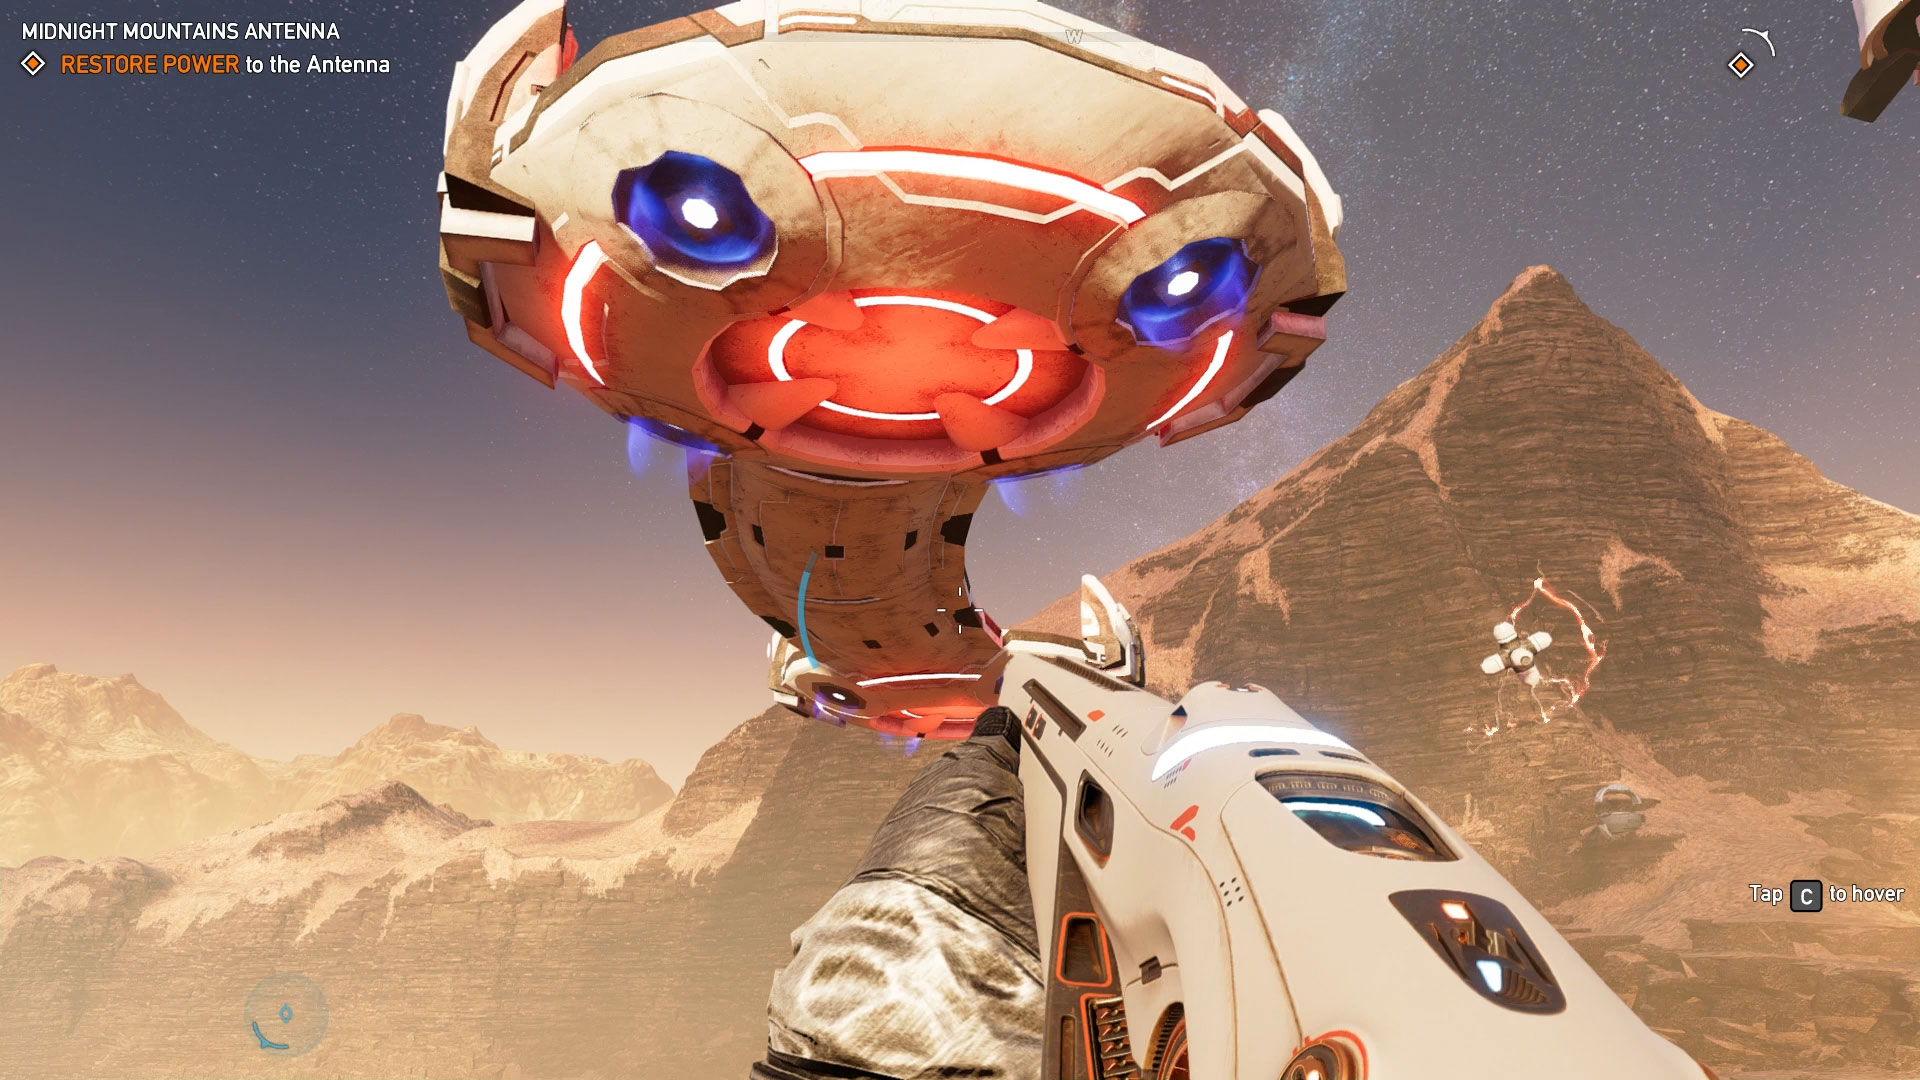
Midnight Mountains Antenna
The next item on the list is to activate the midnight mountains antenna. This is north-east of the Transference Center and has a few big leaps up the crags nearby to access it. Upon rising to the north, there are a few containers to pick up resources, as well as a few enemies to dispatch.
Hurk's Brobot can assist you in taking these out, but only as a distraction. As you get closer, there will be various spires that contain eggs. Throwing these at enemy arachnids will confuse them, causing them to fight among themselves, so be sure to take advantage of this. You will not unlock them at this stage, so keep an eye out for them.
Once you've dealt with nearby threats, it's time to ascend the tower. Thanks to the gravity belt, this is a little less stressful as falling damage isn't a factor, but there are now electrified nodes that upon getting close will deal a ton of damage to you. They cannot be shot down, so just steer clear of those and climb up each segment to reach the top. Activating the antenna will unlock both the shotgun and "More Hellsplosions" upgrade for construction in the printer.
That's it so far for our Far Cry 5 - Lost on Mars DLC walkthrough, but be sure to check back frequently as this will be updated regularly. If you're looking for more information on where the various collectables are, such as the items and Hurk's body parts, head over to our main Far Cry 5 Lost On Mars guide for more on that.