The Flare Path welcomes combative commenters
Quitting Qatab

While the inhabitants of High Ashton, Wiltshire have their annual hedgehog rolling competition, the residents of Balybridge, Cumbria their nettle wrestling day, and the people of Temple Habberjam, Dorset their combination cider festival/Papist hunt, the highlight of the year in the parish of Flare Path is a communal game of top-notch tactical war-em-up Combat Mission. Having relied on first generation Combat Mission titles for the last three outings, it only seems right that this year's event utilizes something a little more modern. For the next three weeks, via comments posted below daily SITREP posts, a staff of volunteer Comment Commanders you are very welcome to join will be doing its darndest to ensure a hotchpotch of Combat Mission: Shock Force 2 peacekeepers escapes a fictional/fractious Gulf state alive.
Operation Tantalus, NATO's attempt to prevent choleric Qatab from sliding back into civil war has failed, and the failure has been both sudden and savage. After a series of clumsy airstrikes in the highlands west of the capital, Qatab City, rebels and government forces have joined forces to slay the “Imperialist Hydra” in their midst. In QC the surrounded, outnumbered, and ill-prepared peacekeepers have no option but to dig-in and wait for rescue. However, in the coastal town of Al Rayman, the situation is quite different. With an angry Qatabi armoured brigade heading in his direction and overstretched friendly air assets nowhere to be seen, local brasshat Lieutenant Colonel Macmurray has decided the sensible option is to get the hell out of Dodge.

Comment Commanders, you've got a mere twenty minutes/turns/days to withdraw as many peacekeepers as possible from the getting-hotter-by-the-minute Al Rayman. The only way out for the multinational remnants that have gathered in a base on the western edge of the town, is across the Strait of Khormuk. Five capacious USMC AAVs will do the ferrying, assuming they survive the perilous journey to the coast, of course. All other vehicles will have to be abandoned on the beaches.
Friendly Forces
Your assets in detail.
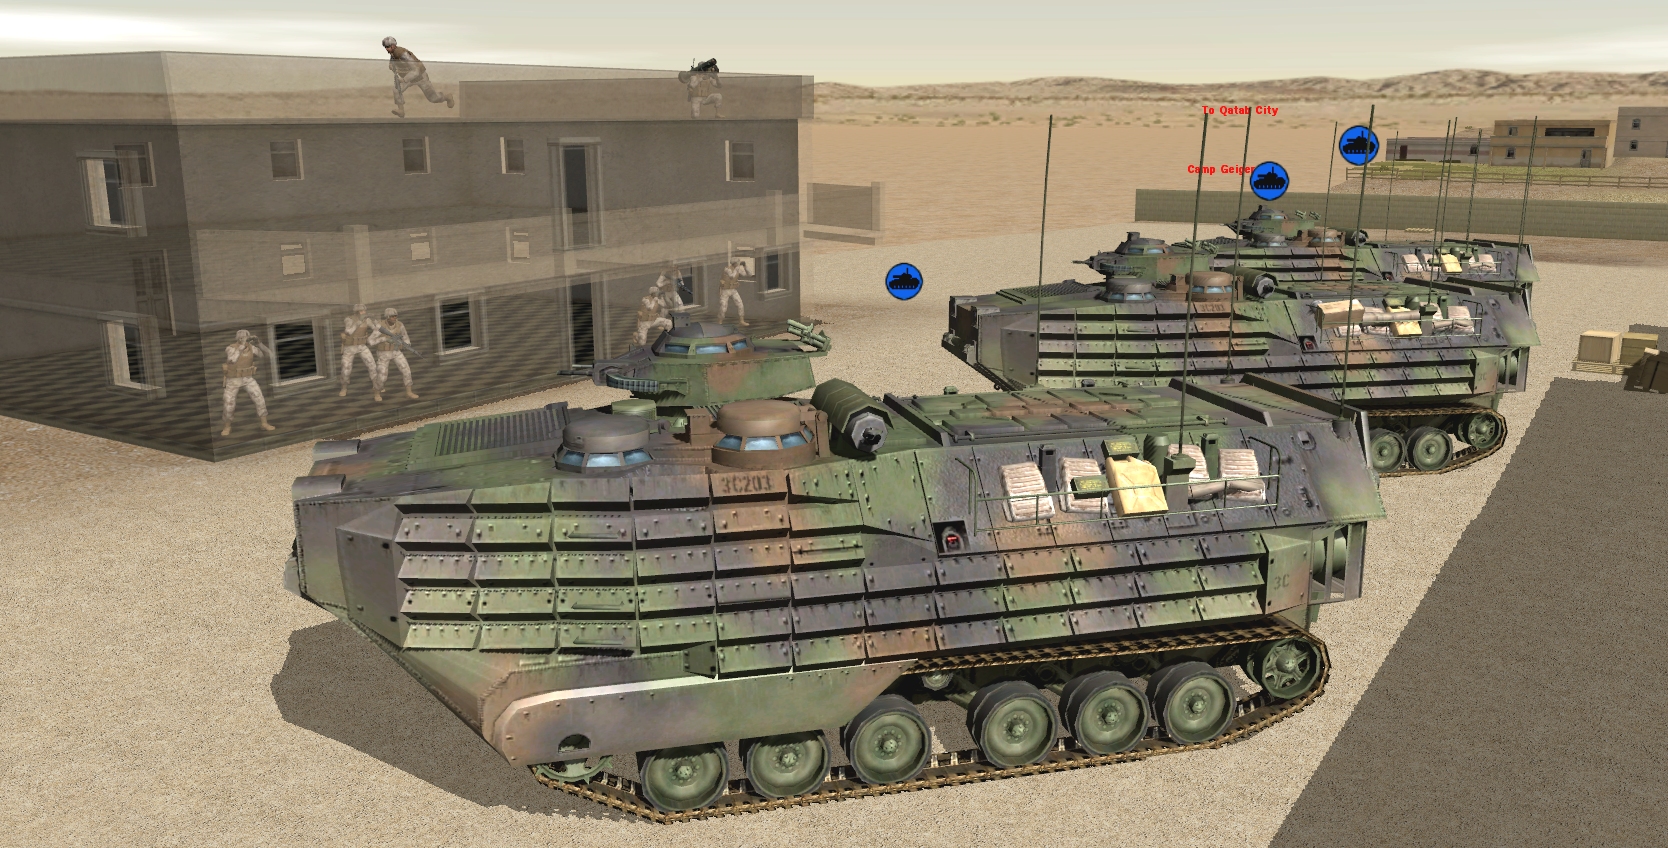
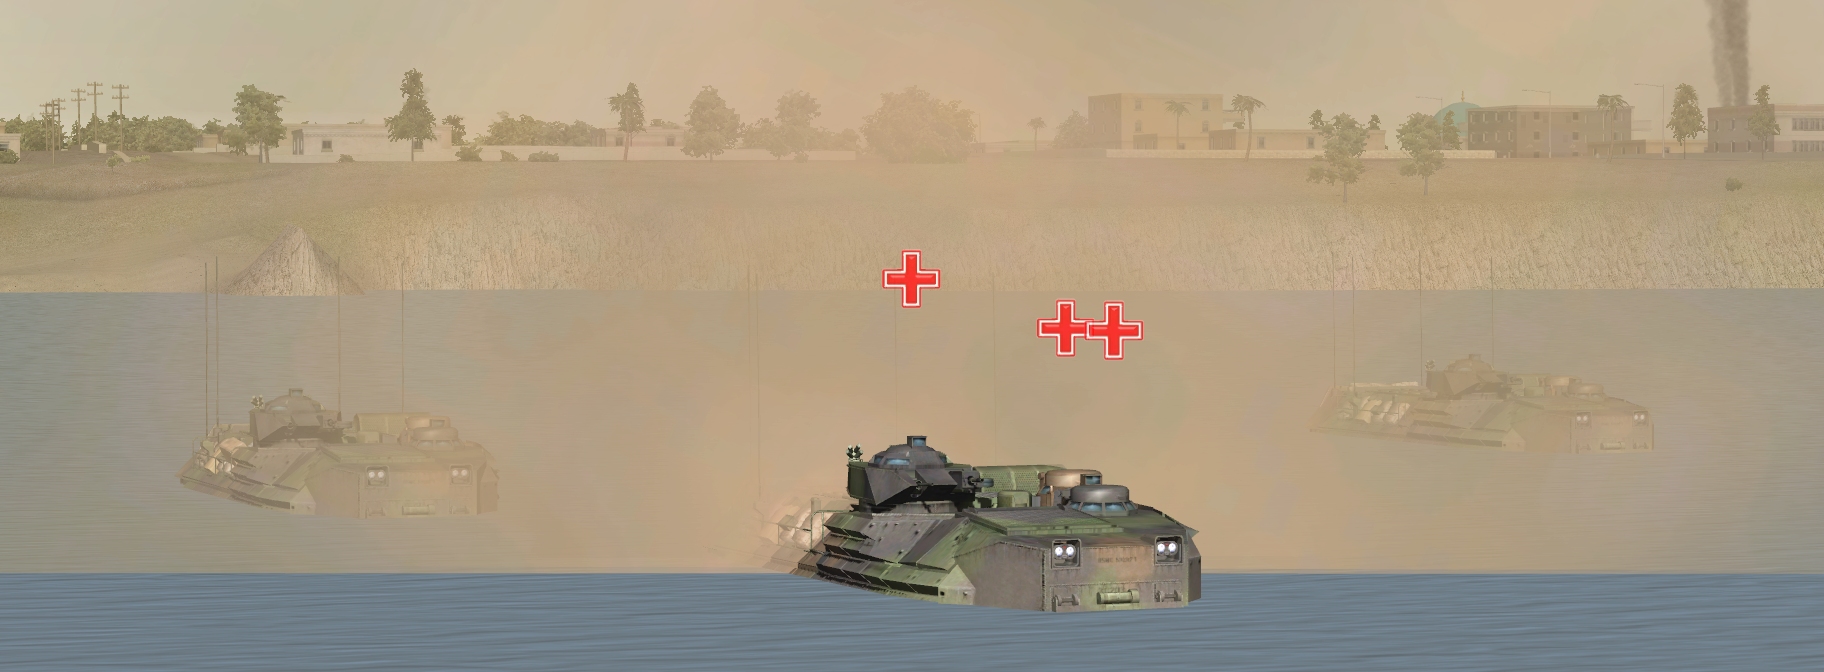
InstiGator, Swamp Thing, Ample Annie, Deathproof, and Bayou Belle. Your crown jewels. Five AAV-7A1s, each armed with a Mk 19 grenade launcher and an MG, and capable of porting 21 passengers, they can travel at quite a lick (45mph) on good roads. Beware though - well-aimed RPGs will make mincemeat of them.

A Wiesel TOW2. A diminutive refugee from a neighbouring district, this German tankette used three of its seven wire-guided tank trashers while en-route to Al Rayman. It relies on an MG 42 MG 3 for anti-infantry work.

A Challenger II MBT. Currently haring down the highway from Khuff, this formidable heavyweight should be with you by Turn 7 at the latest.
A Scimitar recon tank. The Chally's travelling companion, it goes like stink (50mph) but will struggle to penetrate anything sturdier than a BMP-1 with its 30mm RARDEN cannon.

The lion's share of your infantry force is a depleted but experienced USMC platoon that starts the scenario in Camp Geiger, the base on the western edge of the map:
- HQ (2 men), Second Lieutenant Sigler
- 1 Squad (13 men), Sergeant Iverson
- 2 Squad (13 men), Sergeant Daly
- 4 Squad (7 men, machinegun), Sergeant Eaton
- 5 Squad (4 men, assault/anti-tank), Corporal Metzger
- Javelin team, Corporal Yuen
With them is Company CO Captain Judge (3 men) together with his boss, Lieutenant Colonel Macmurray (3 men).
Finally, there are three foot units 'marooned' in the town. In need of rescue/collection/orders:

The two-man crew of a Royal Netherlands Navy NH90 which, with help from a MANPAD, came down to earth with a bump moments before the scenario began. They emerged from the wreck clutching assault rifles and grenades and sought shelter in a building at redq35.
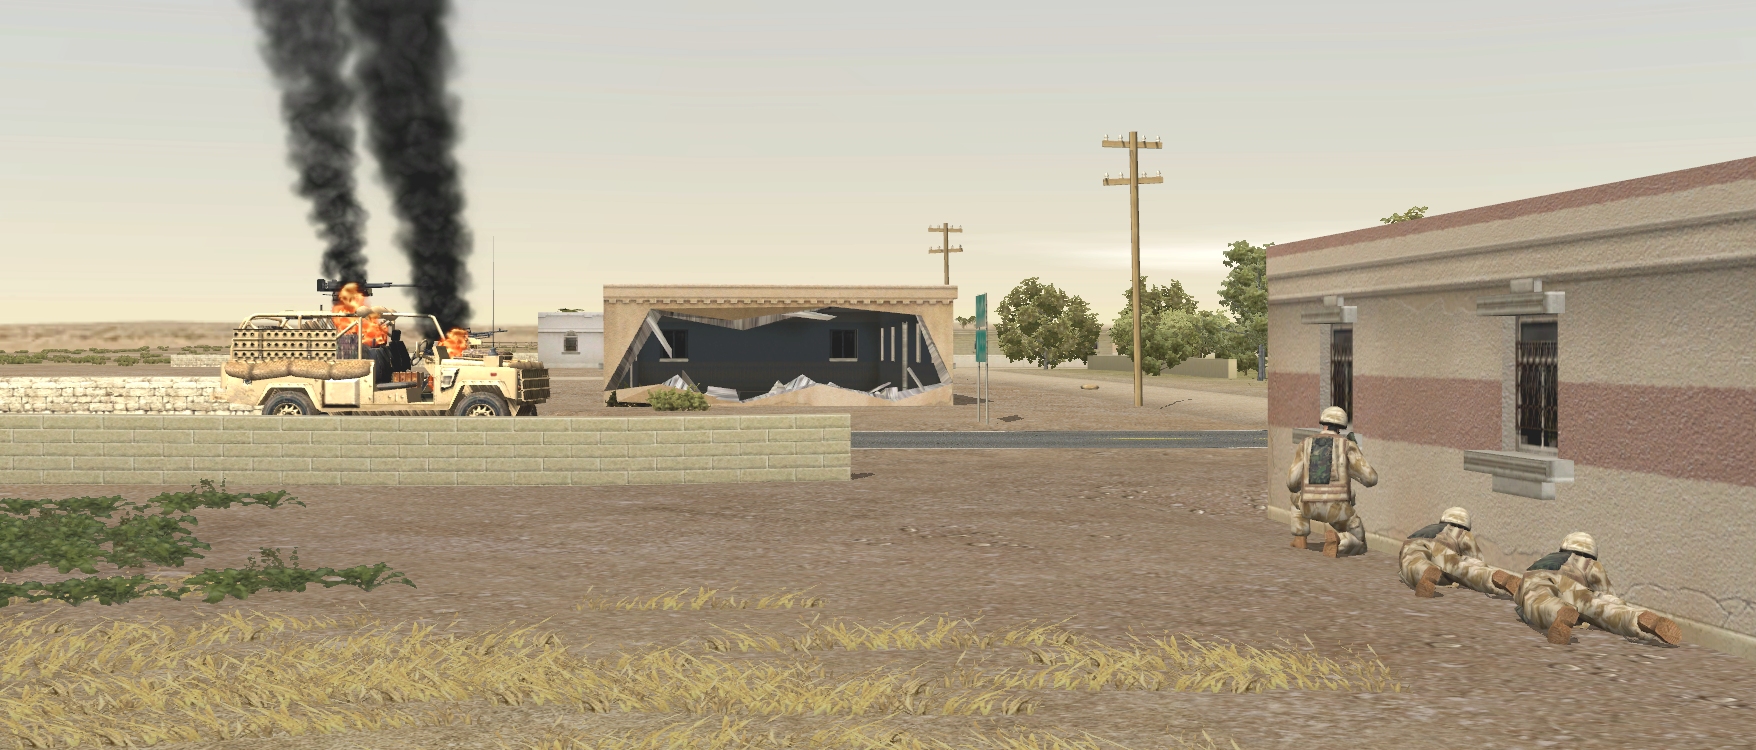
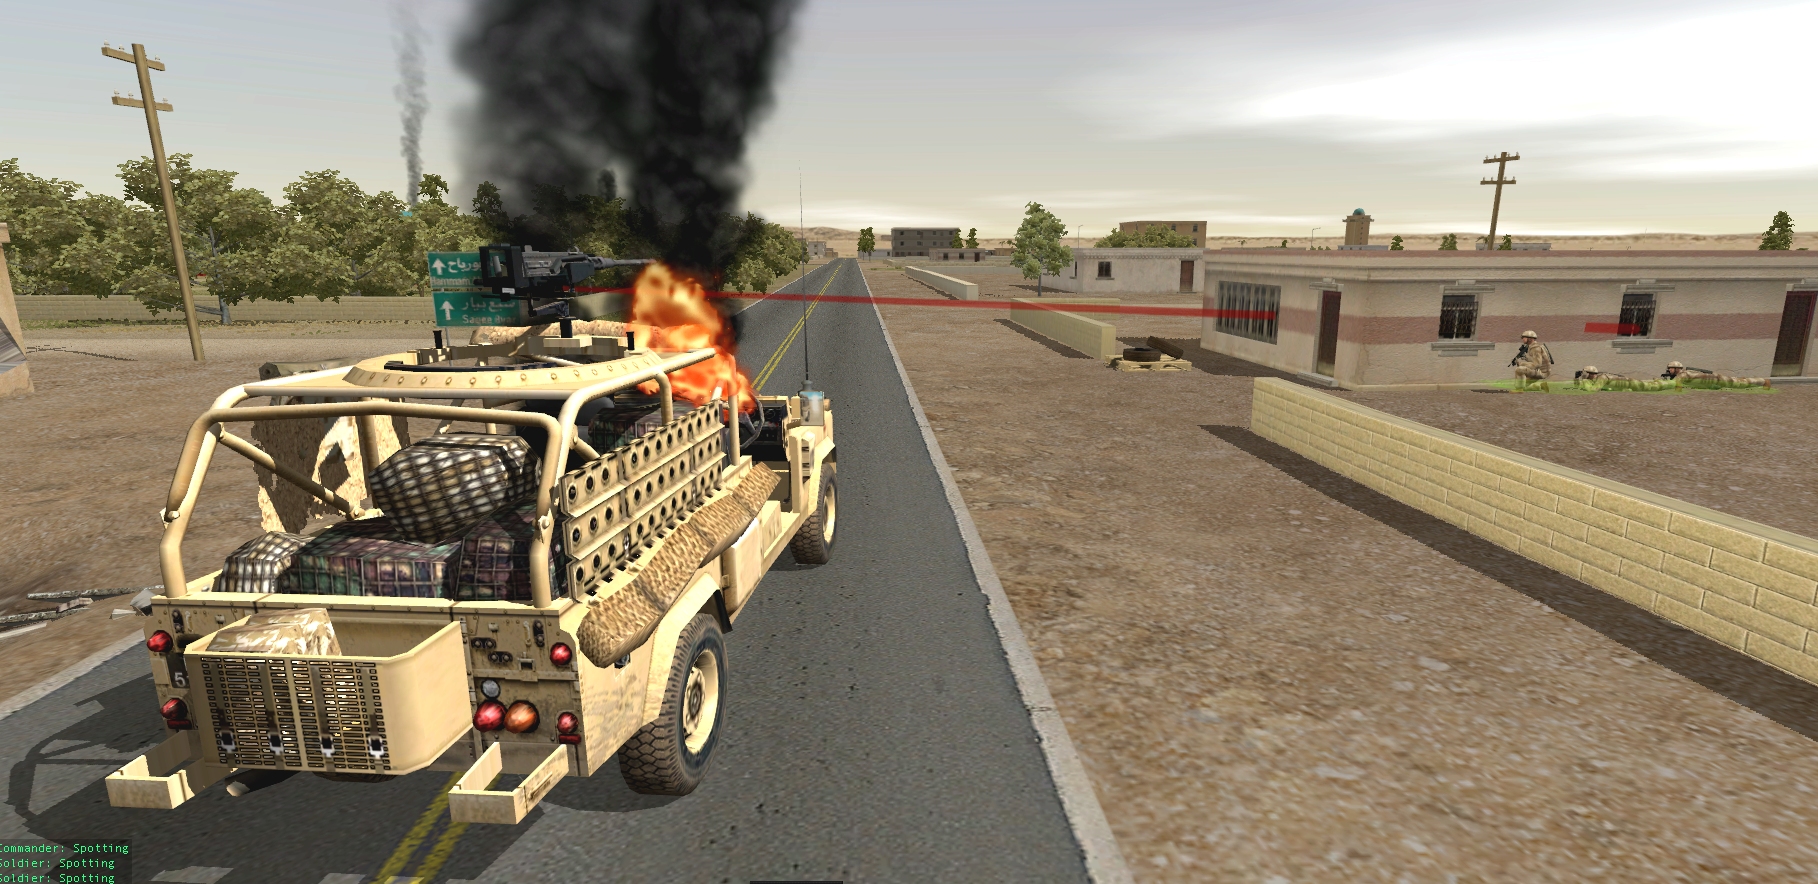
The owners of a Land Rover Wolf destroyed while entering Al Rayman from the south. This unit consists of three men armed with SA80s and grenades and starts the game at X76.

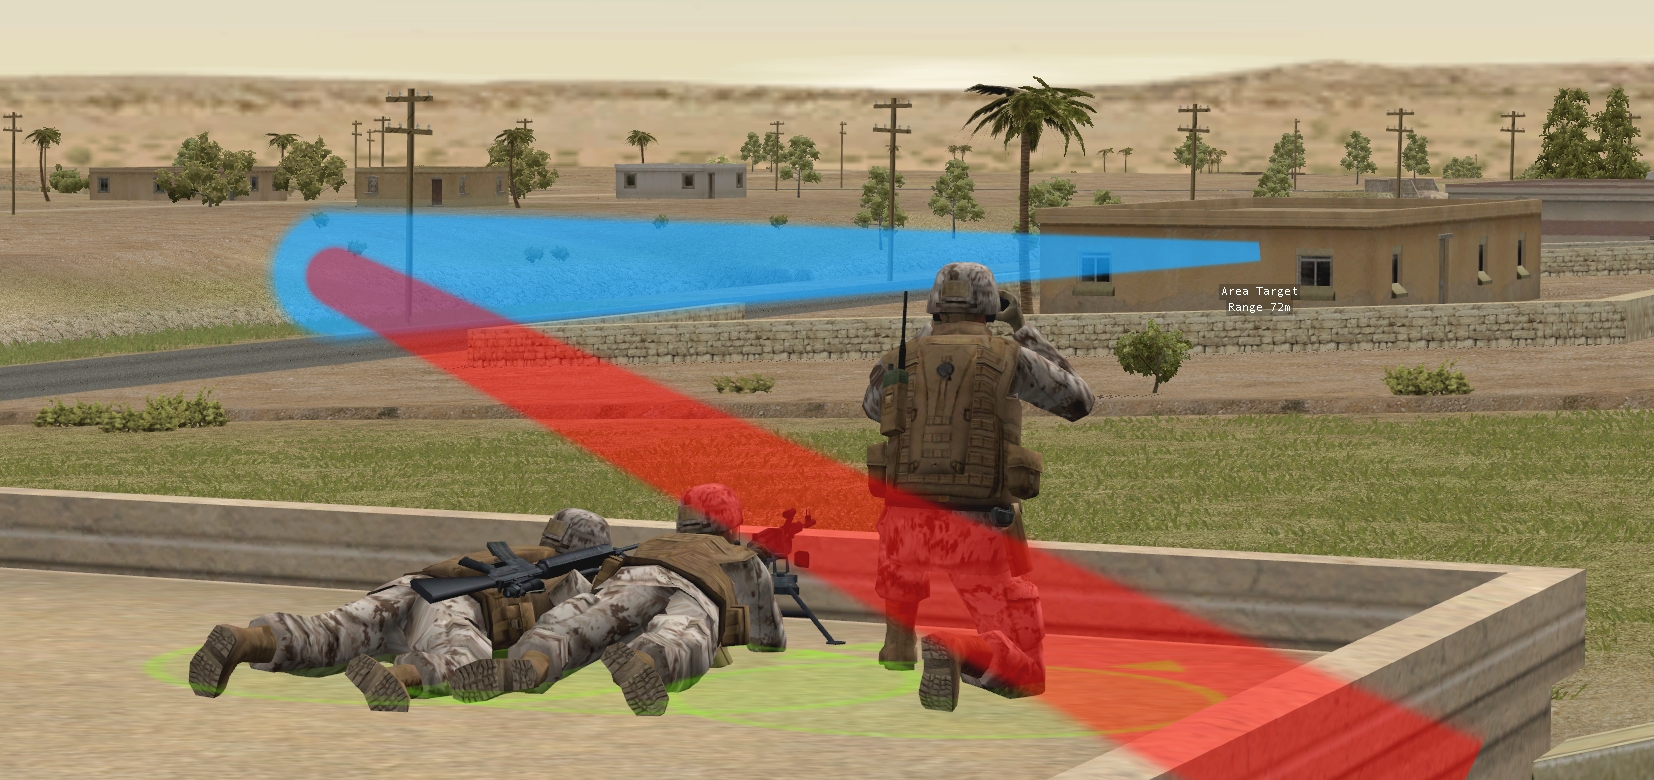
A three-man USMC sniper team at Z50 watching with interest as enemy forces gather in the marketplace in preparation - it seems - for an imminent attack on the base.
Enemy Strength and Intentions
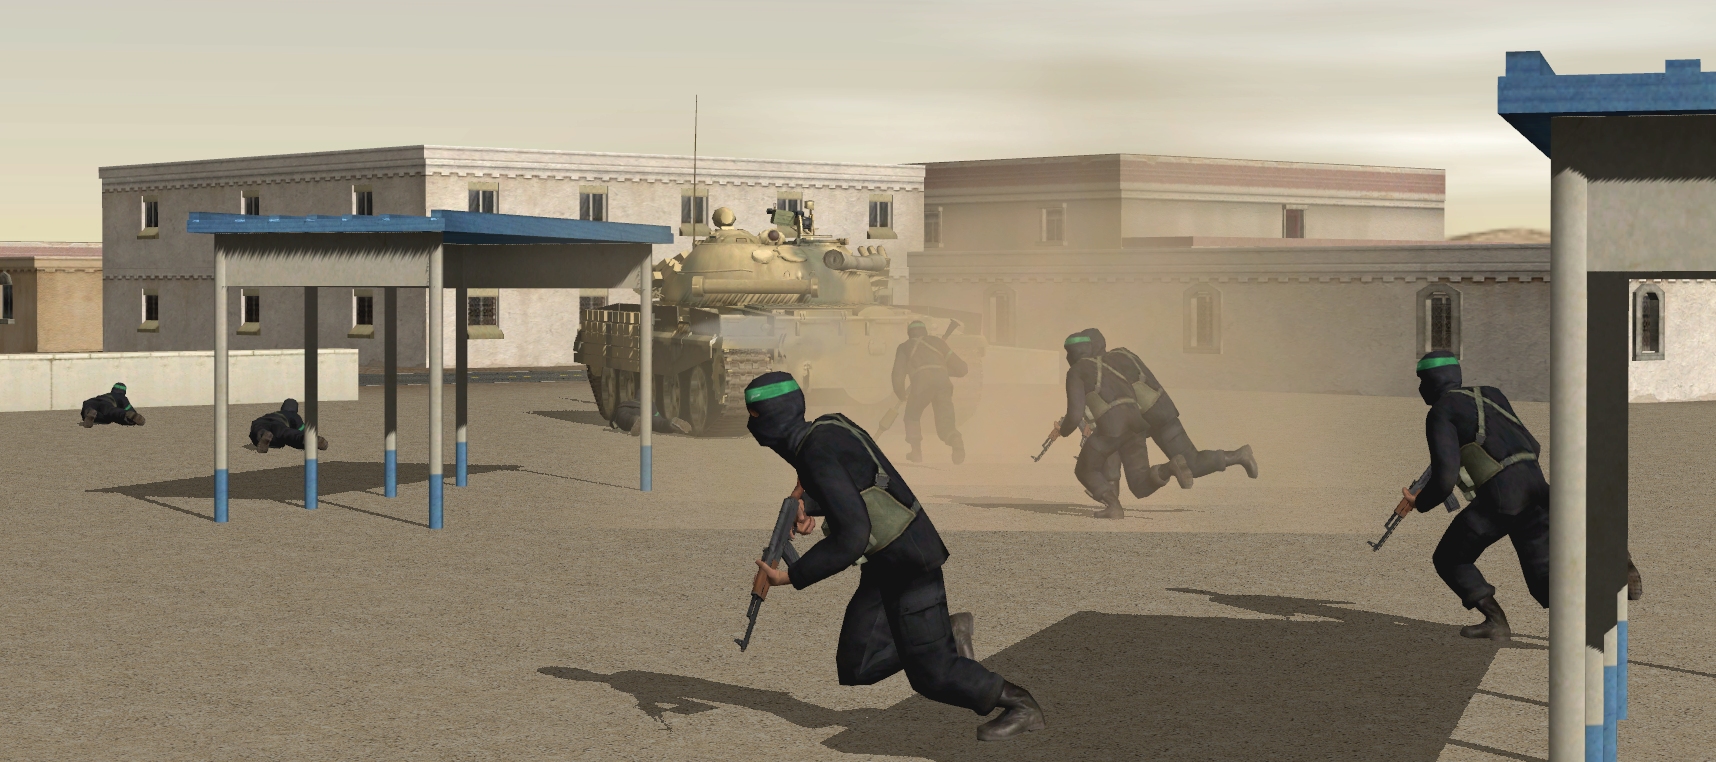
Before the Dutch aviators became pedestrians they spotted clusters of enemy infantry in the marketplace and park and three unidentified Qatabi Army AFVs heading for Pelican Point. The marketplace group was accompanied by a T-62. Another MBT glimpsed approaching Al Rayman from the north won't be able to join its brother in the marketplace because the bridge that carried the coast road across the river was blown up in the last days of the civil war. Macmurray is confident there are no foes west of the mosque (column F) at present.

Dustclouds visible west of Camp Geiger suggest a substantial armoured force is approaching the town from the direction of Qatab City. You've got, maybe, 15 minutes before the dust stirrers roll into the base and the date palm grove alongside it. Get your skates on!
The Venue
A topographical tour (click to enlarge screenshots).

^ Looking north. Points of interest include North Beach and South Beach, two gently sloping strands where AAVs can waddle into the Strait of Khormuk without too much difficulty, the lighthouse close to North Beach, Pelican Point (probably occupied) and the "cut-off" strip of land north of the river.
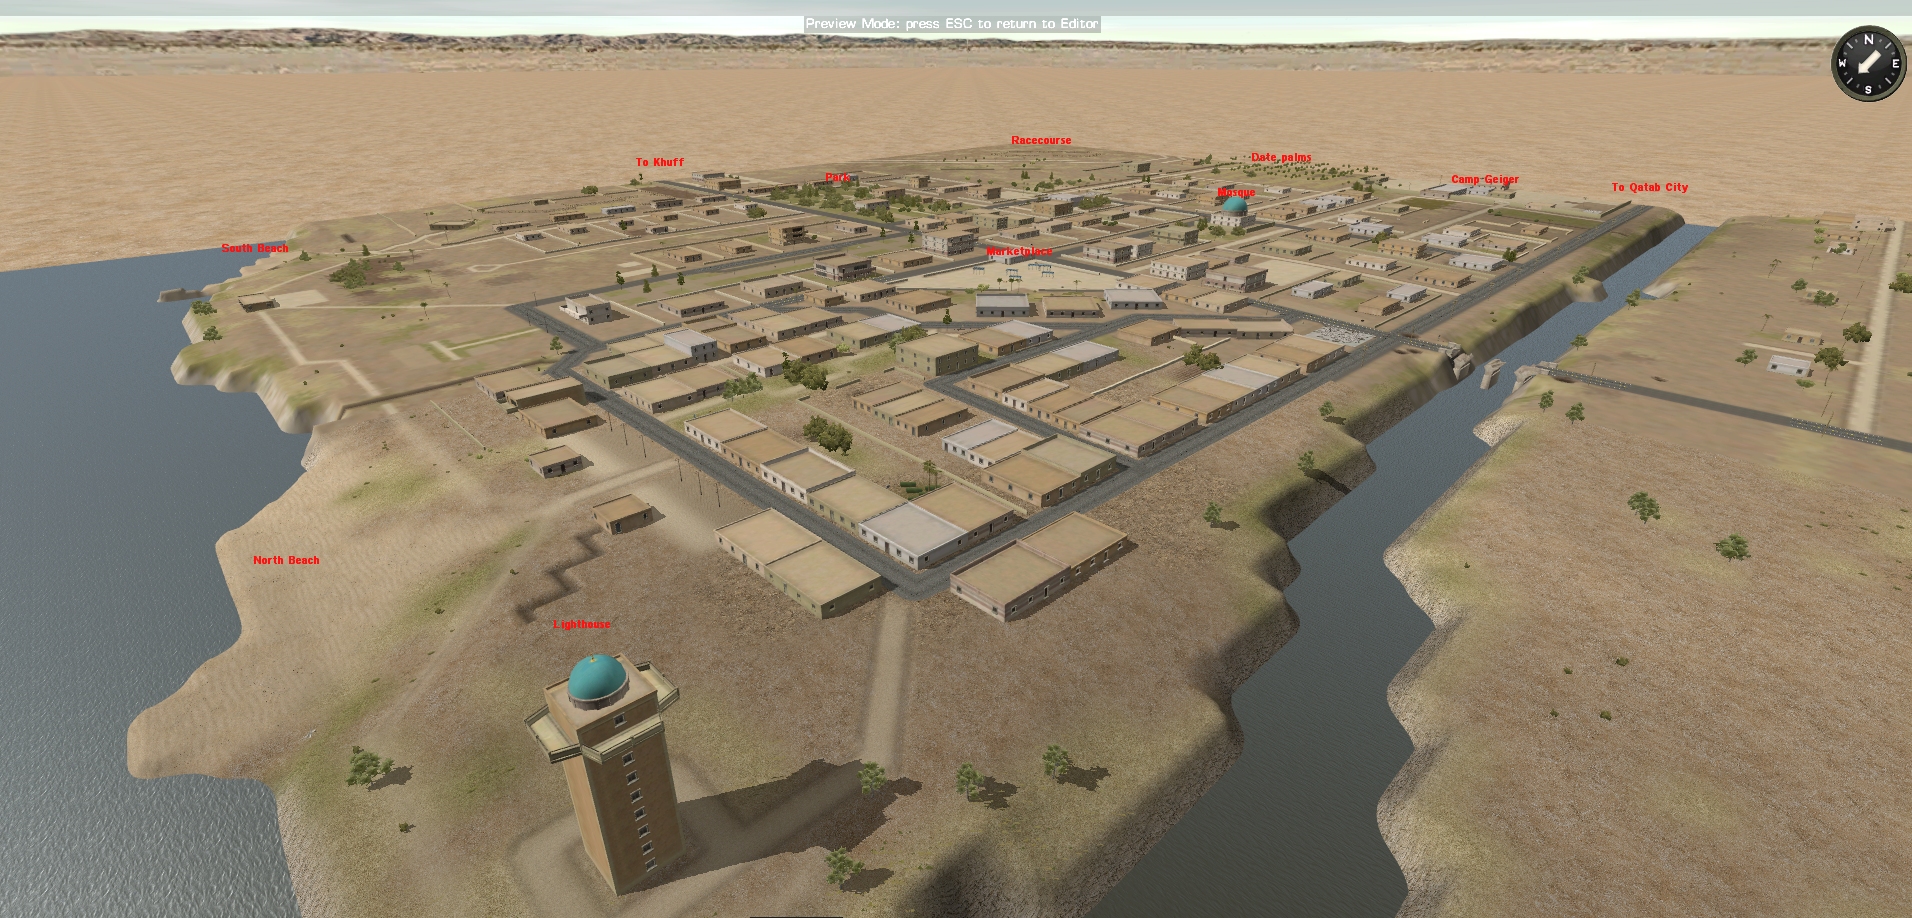
^ Looking SW.

^ The town centre, looking westward to Camp Geiger and the date palm grove.

^ The park, looking eastward towards the coast and your objective, the eastern map edge.
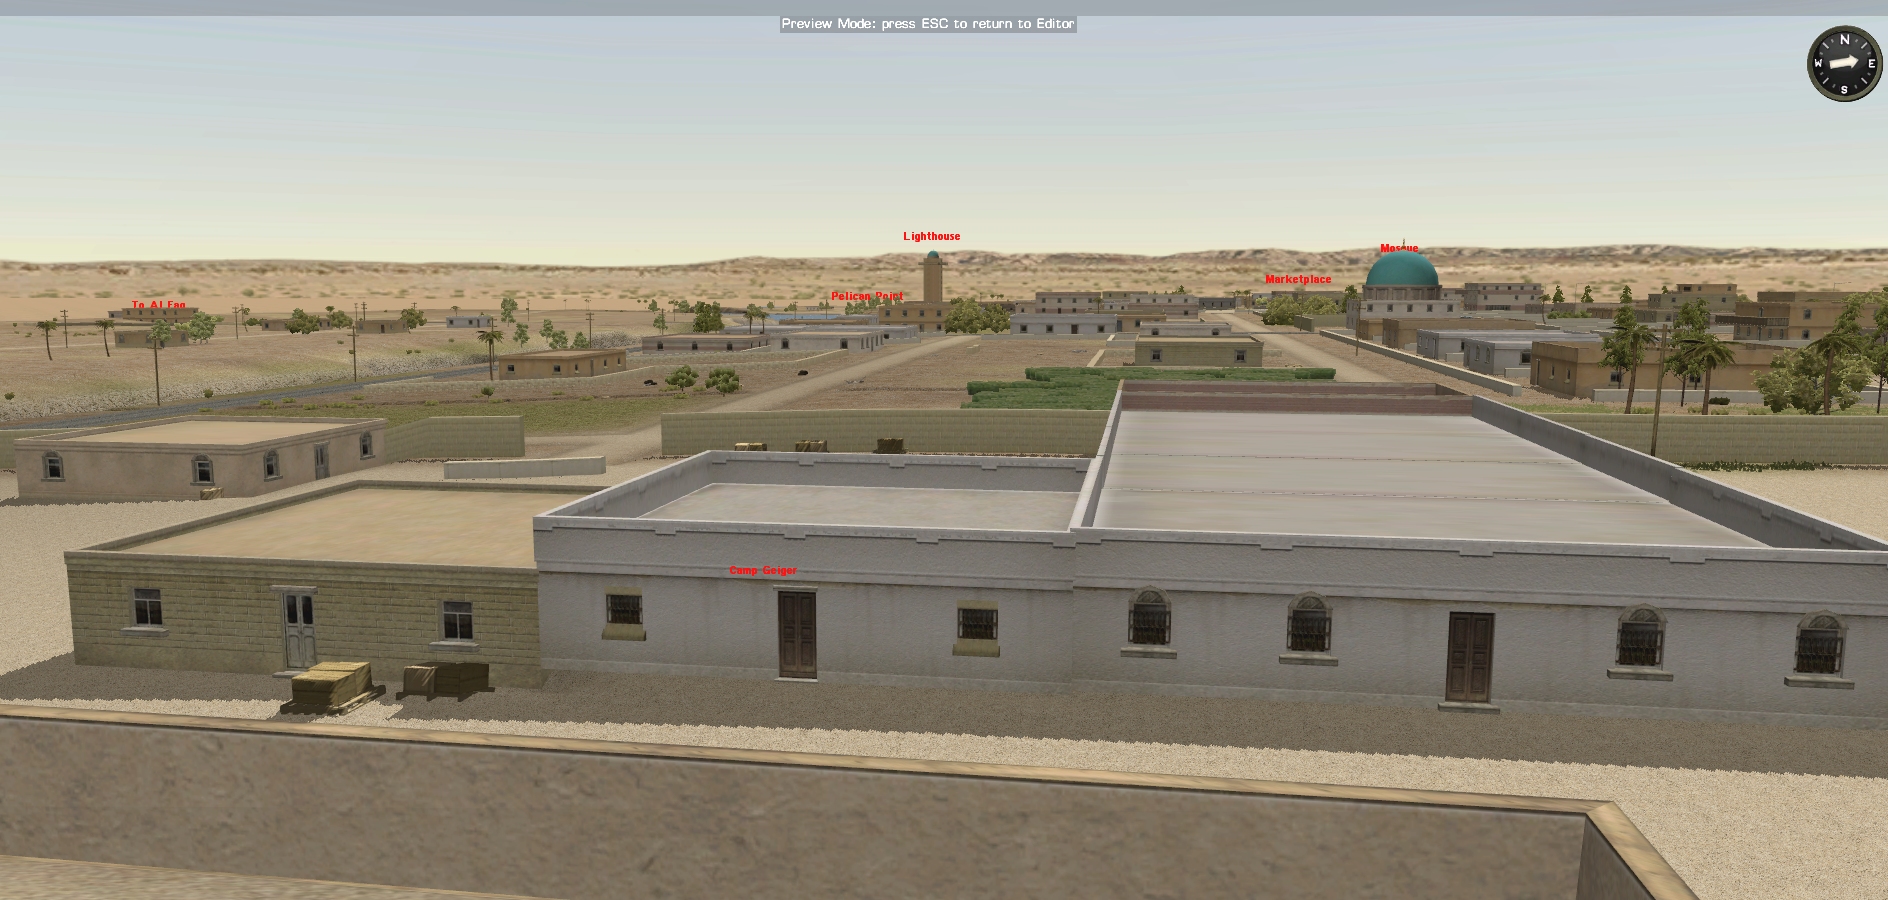
^ The view eastward from the roof of the highest building in Camp Geiger.
Communal Combat Mission Basics

Just in case you weren’t around for last summer’s Norman nailbiter, here’s how Play By Comment Combat Mission works. Every turn, via a comment along the lines of “Turn 1 orders here, please…” I solicit written instructions for friendly forces (enemy units are AI controlled). Orders are accepted on a first-come-first-served basis with individual commenters usually* only permitted to ‘move’ a single vehicle, infantry squad, or weapon team per turn.
* To prevent total chaos (some chaos is inevitable with the PBC format!) if you issue an embarkation or disembarkation order, the involved AAV is also your responsibility for the duration of the turn.
For example... one turn Humbug might order 2 Squad to board Bayou Belle then send her trundling towards grid square x60, while Tripehound finesses a sniper team and SlowDoris does something sly with the Wiesel. During the next order round, Balaton76 might decide x60 is too hot and halt Bayou Belle and disembark her passengers, while LMF hides the sniper team and Shropshire_Lass manoeuvres the Wiesel.
At around 1800 hrs GMT every evening I’ll execute all issued orders posting the results as a short illustrated article the following morning at approximately 0800 hrs GMT. Did Sigler manage to exit the mosque without being cut to ribbons by the MG on the balcony opposite? Did the Wiesel survive the ambush at the oasis? All will be revealed.
In contrast to last year, come the 16th of August, it will be Yours Truly rather than CM's internal logic that decides whether the battle has been won or lost. Scenario design in CMx2 is far more complicated than it is in CMx1 (one of the reasons why I've resisted the newer titles for so long) and as victory condition set-up is strewn with pitfalls I've decided to rely on my own judgement rather than fiddle hopefully with the various parameters. Rest assured, if you manage to exit a significant portion of your force by the time the curtain falls, or are well on the way to doing so, the champagne will flow. Kills will be considered when I pass judgement but escape is the primary objective in “Quitting Qatab”.
Issuing Orders

You don’t need to understand the intricacies of Combat Mission: Shock Force 2 in order to participate. Consider the tactical situation, and provide a destination coordinate and perhaps a clue to pace/cautiousness and I’ll do my best to translate your instructions into an in-game order.

Full strength infantry squads can be split into three sections for tasks like scouting and tank hunting, and will fight harder, react quicker, and be less likely to panic if close to an HQ.

During the sixty-second non-intervention ‘action phases’ that follow order issuing, units may encounter a threat or target that causes them to abandon or modify your instructions. For example, AFVs may decide to pop smoke and reverse if they don’t like the situation they find themselves in. Specific targeting instructions may be issued but usually combatants can be relied upon to self-select targets sensibly.
The generous demo is a great place to start if you're not familiar with play mechanics. I’ll do my best to answer any technical questions that arise during the next three weeks, but as I know the original CM trio far better than I know CMSF2 and its siblings, I'd be very grateful if spectators and players with more experience furnished explanations and proffered advice too.
Enjoy the flight, Comment Commanders. Best of luck. You'll need it.
^ Click to enlarge

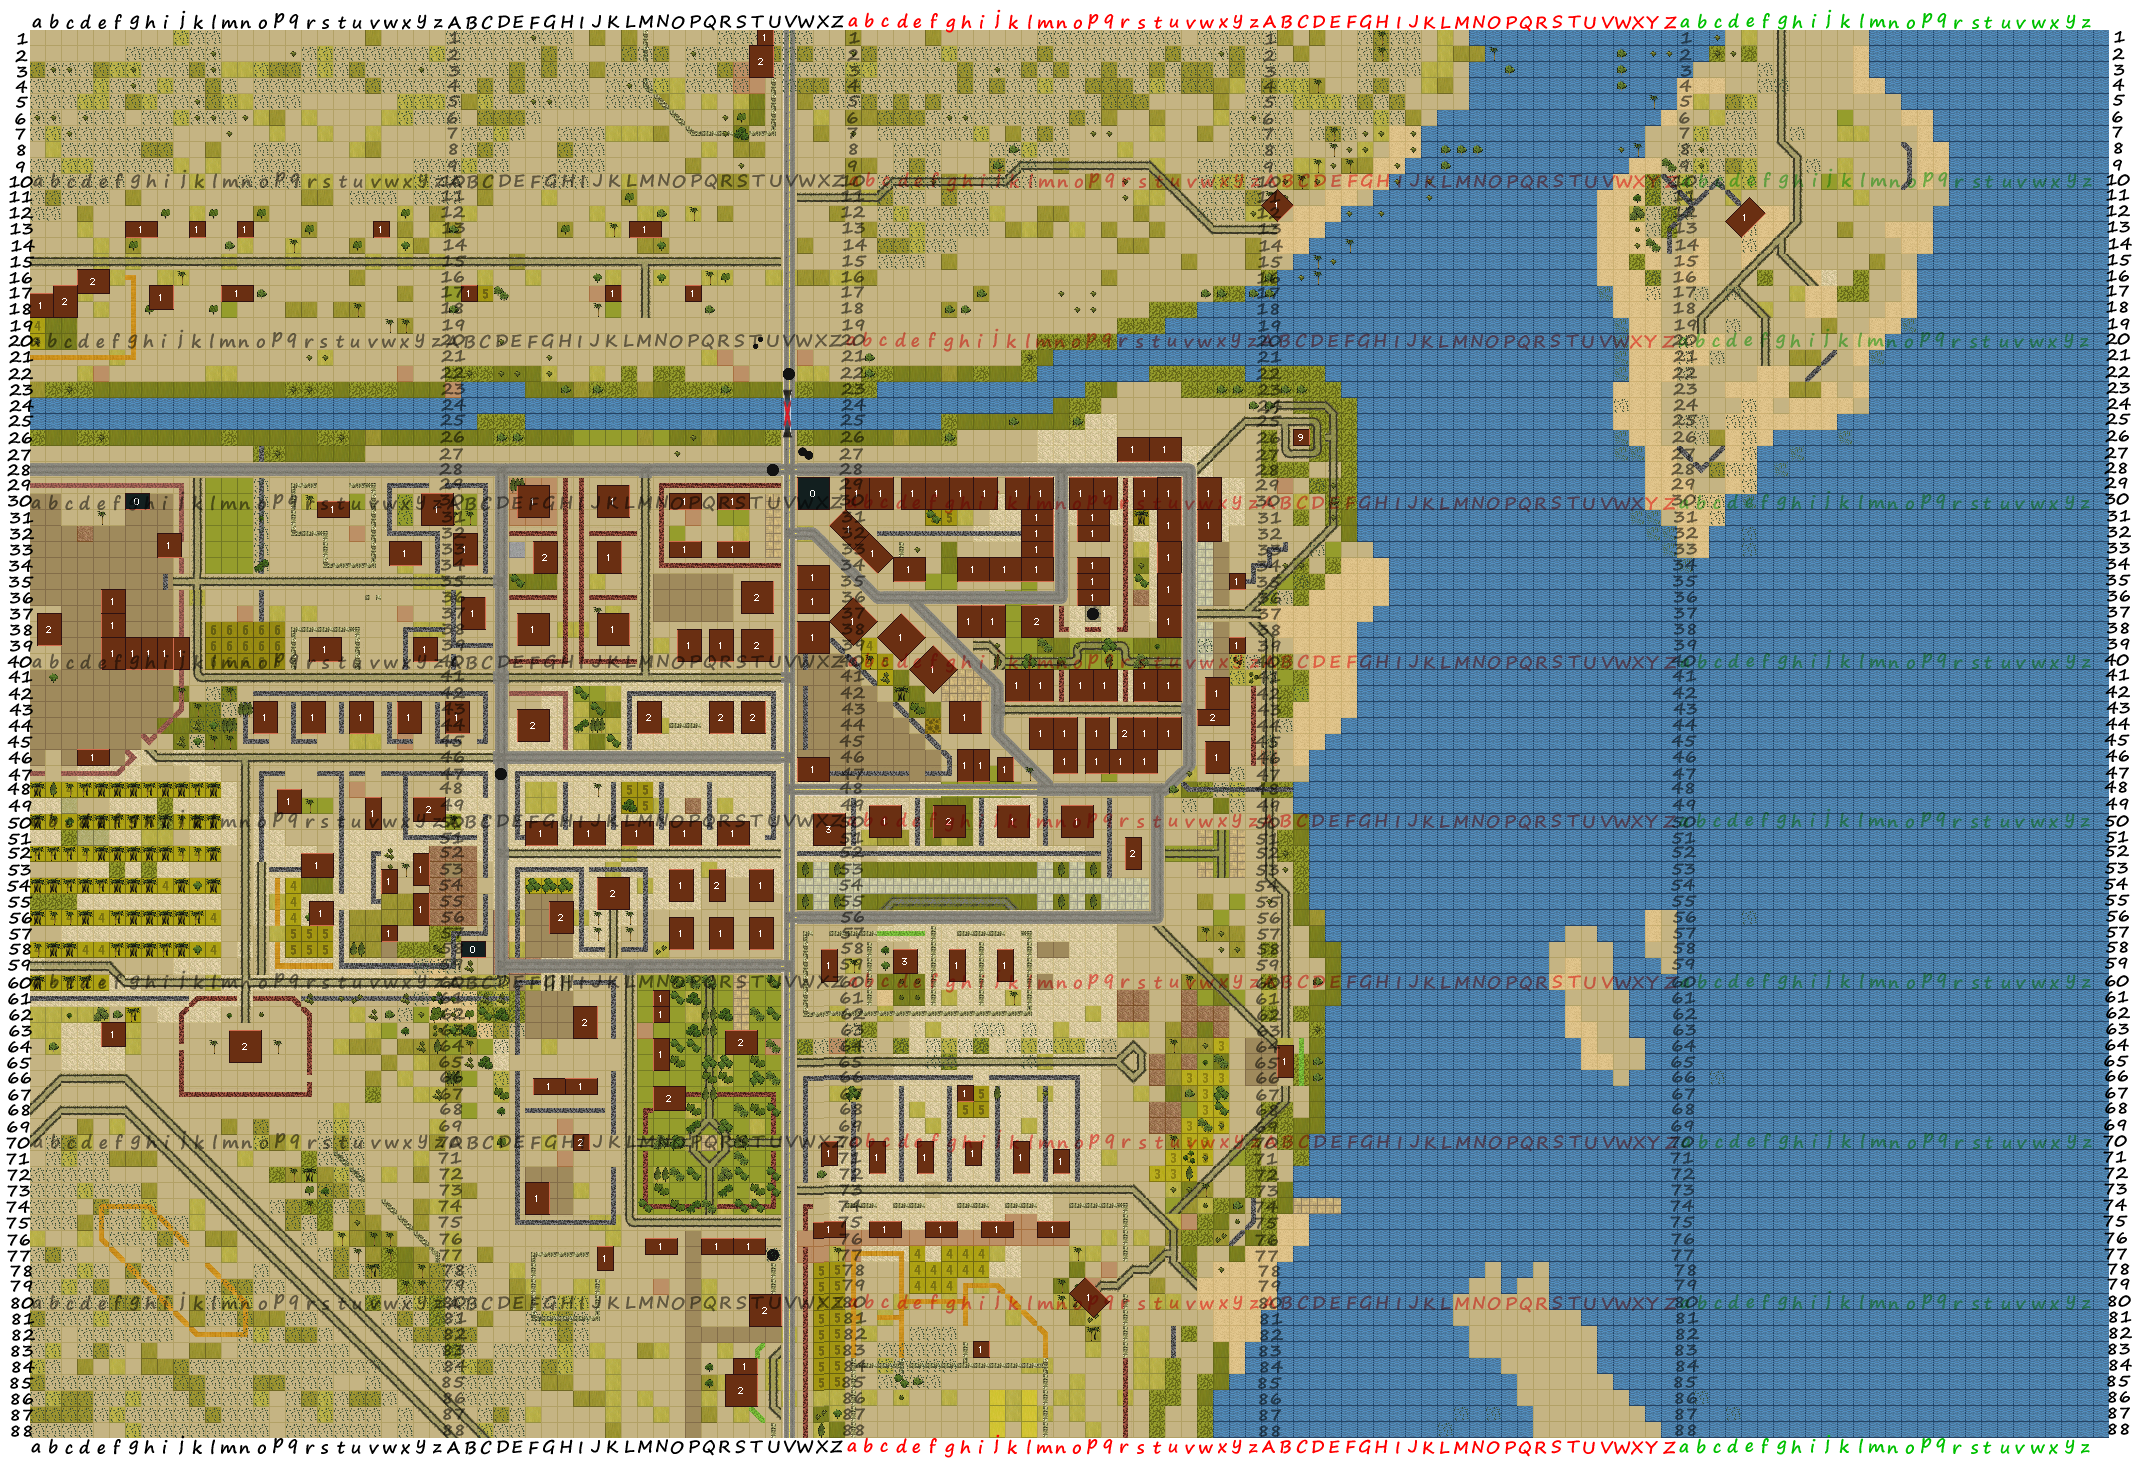
^ Situation at start of turn #1. Click to enlarge.
* * *