The Flare Path welcomes combative commenters
Colonel Croesus commences

Peter Peiper picked a pack of pickled Panzergrenadiers.
A pack of pickled Panzergrenadiers Peter Peiper picked.
If Peter Peiper picked a pack of pickled Panzergrenadiers,
Where's the pack of pickled Panzergrenadiers Peter Peiper picked?
Apologies - you've caught me limbering up in readiness for the exertions to come. For the next fortnight I'll be chronicling, with daily battle reports, The Flare Path's sixth experiment in co-op play-by-comment wargaming. The concept for those who've not encountered communal Combat Mission before: I fashion a map and scenario for one of Battlefront's ballistically rigorous turnbased battle sims, and you, issuing orders via comments, play said scenario against a CPU-controlled opponent at a rate of one turn/minute a day, until the big-boned diva warbles.
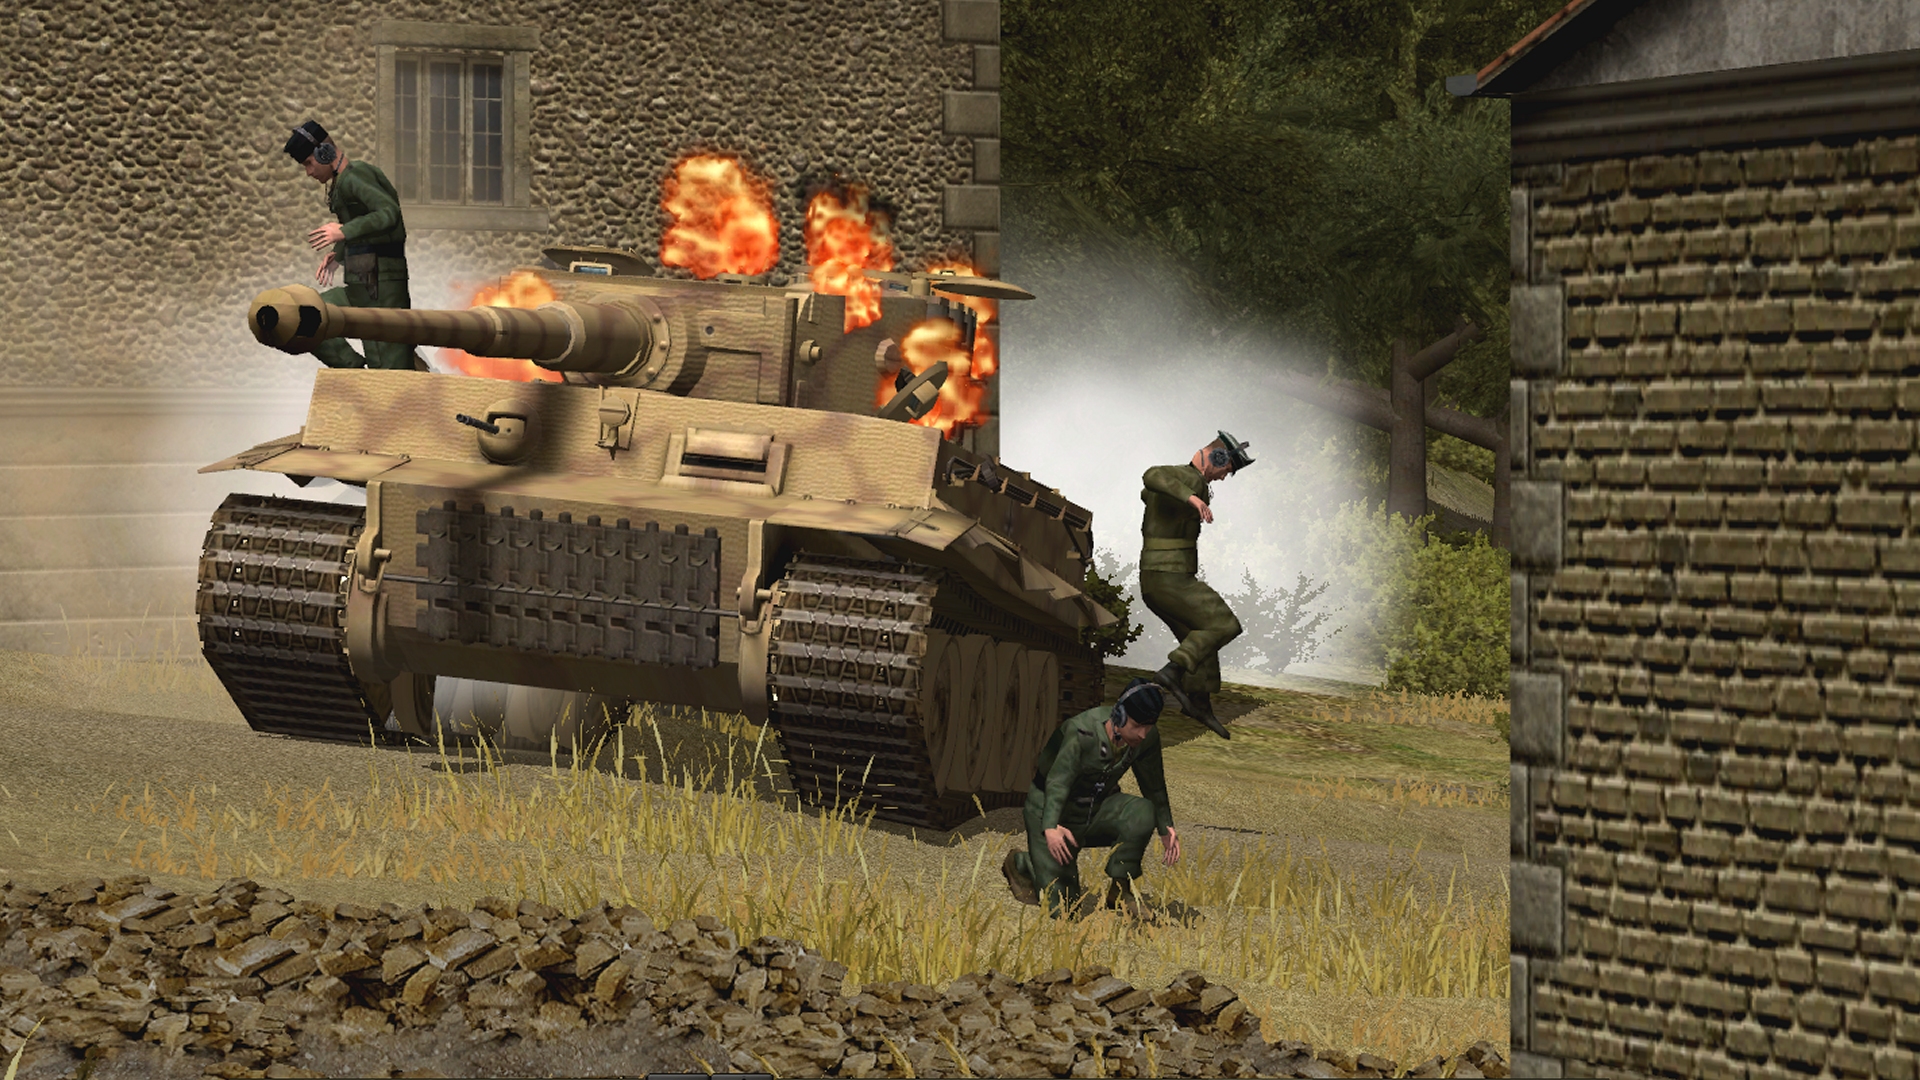
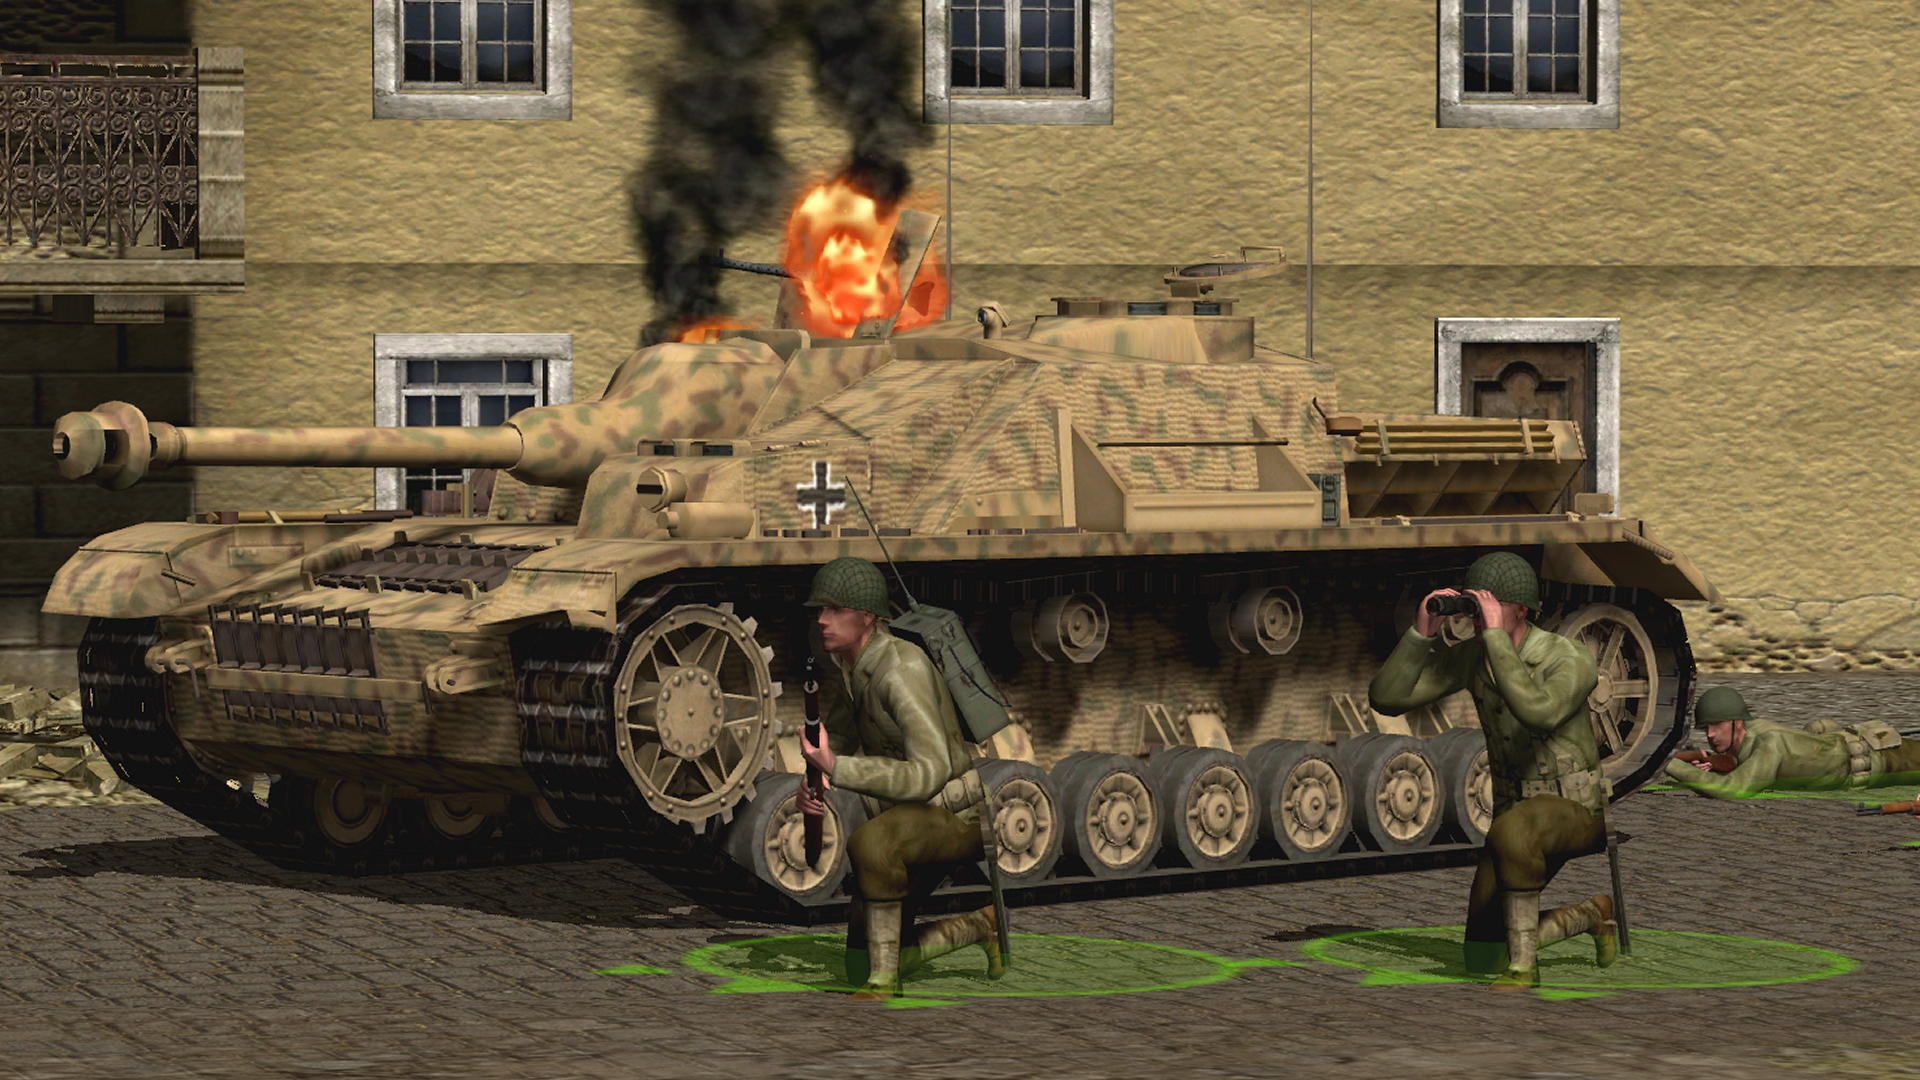
This year's challenge conscripts Combat Mission: Fortress Italy and is inspired by the final fifteen minutes of classic Seventies war movie Colonel Croesus (aka The Montaretto Millionaires aka The Tiger Under the Mountain). We join the story on the night following the double-cross. The ragtag band of Allied treasure hunters, deserters, and lotus eaters led by Colonel 'Croesus' Cresswell (Robert Duvall) is poised for action outside the 'abandoned' Italian sub pen where Hauptmann Otto Steiner's (Wolf Kahler) equally disreputable Kampfgruppe of chancers is busy loading the stolen bullion onto a waiting U-boat. Unless Croesus acts quickly, the Germans will escape with the loot!
Your Units
Initially, the goodish guys have at their disposal...

Two Sherman Crab mine clearing tanks hastily commandeered by Cresswell's business partner, Captain Crosbie (Clint Eastwood) after the duped doughboys discover that the road into the subterranean facility has been mined. Crosbie commands Crabmeat 1, Sergeant Nemchik (Charles Bronson) Crabmeat 2.
Cresswell's four-man HQ team, recently deprived of their transport, an M8 Greyhound, by a Tellermine 35.
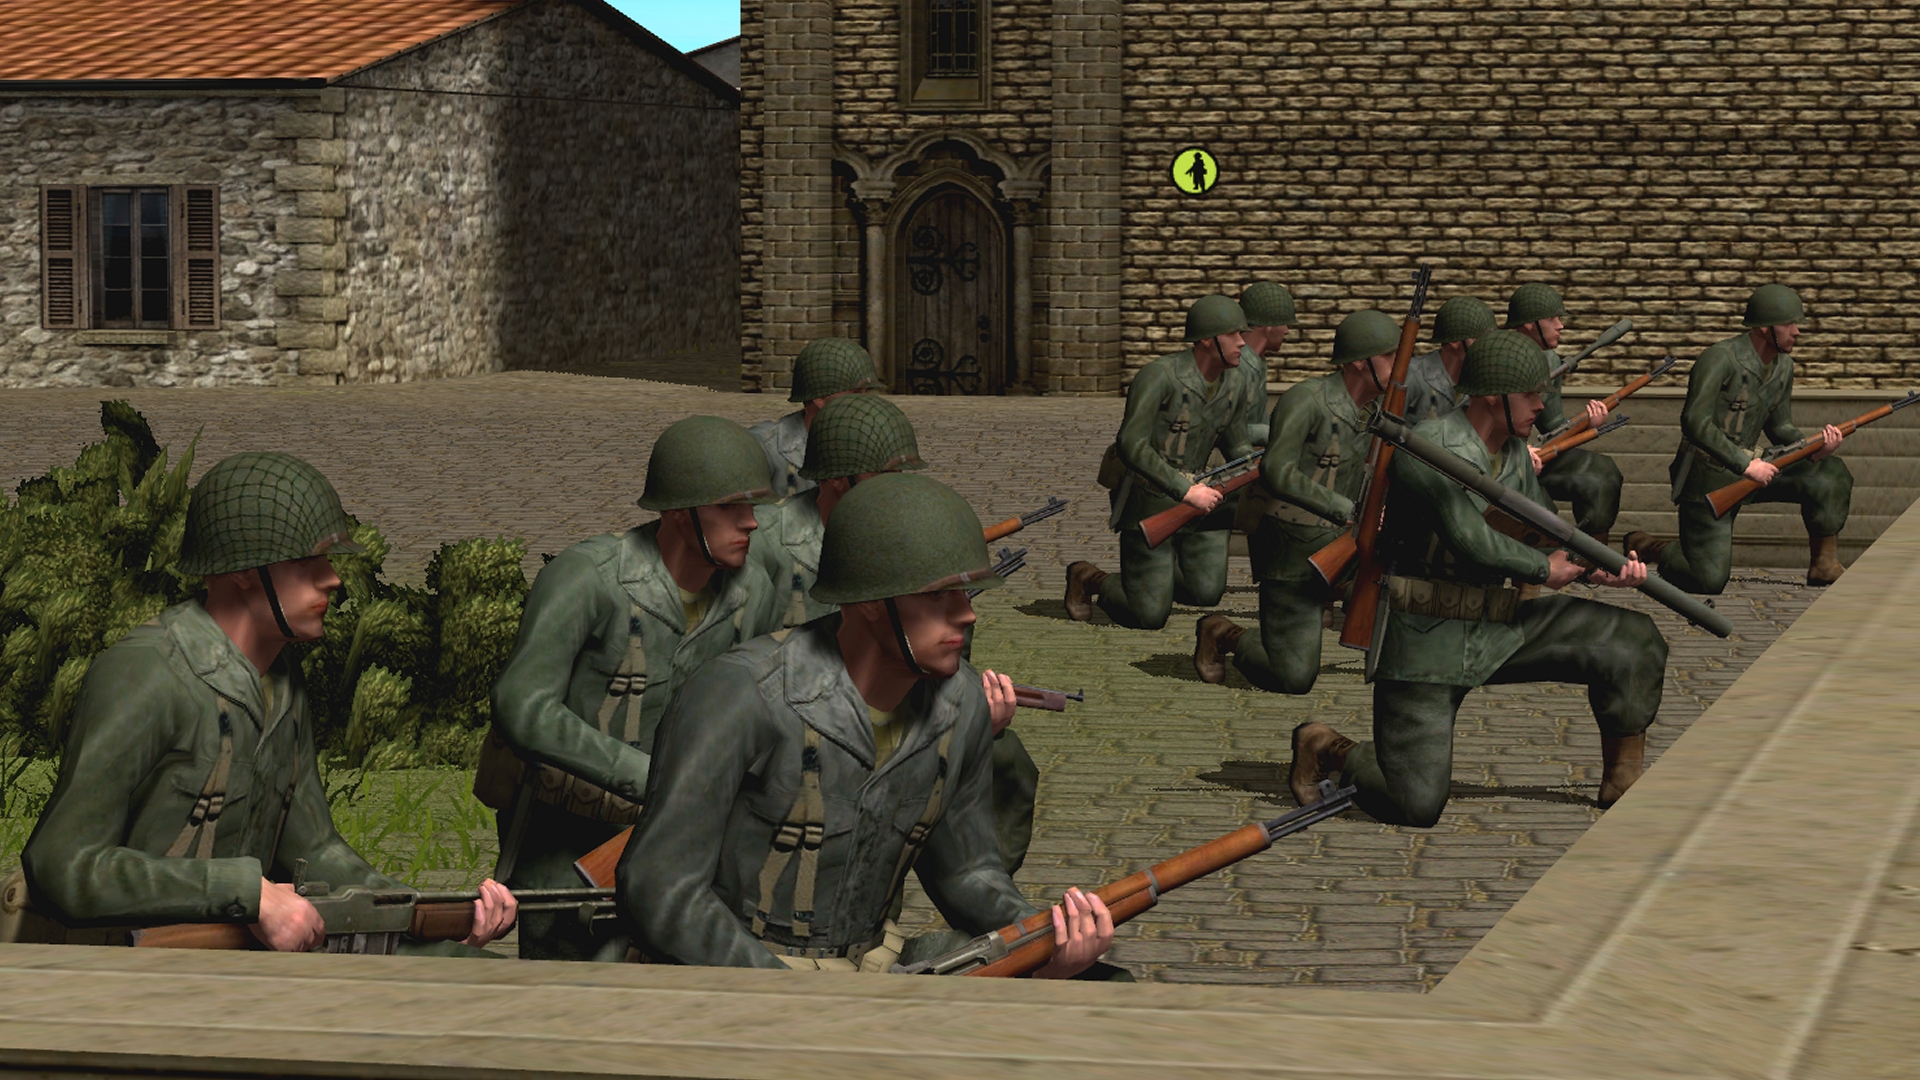
Two twelve-man US infantry squads. Ably led by Sergeants Nelson (Richard Jaeckel) and King (Carl Weathers), the squads are part of Staff Sergeant Rocca's (Telly Savalas) 1st Platoon. Rocca's HQ team consists of four men.

Count Casari's (Fabio Testi) Autoblinda 41 armoured car.
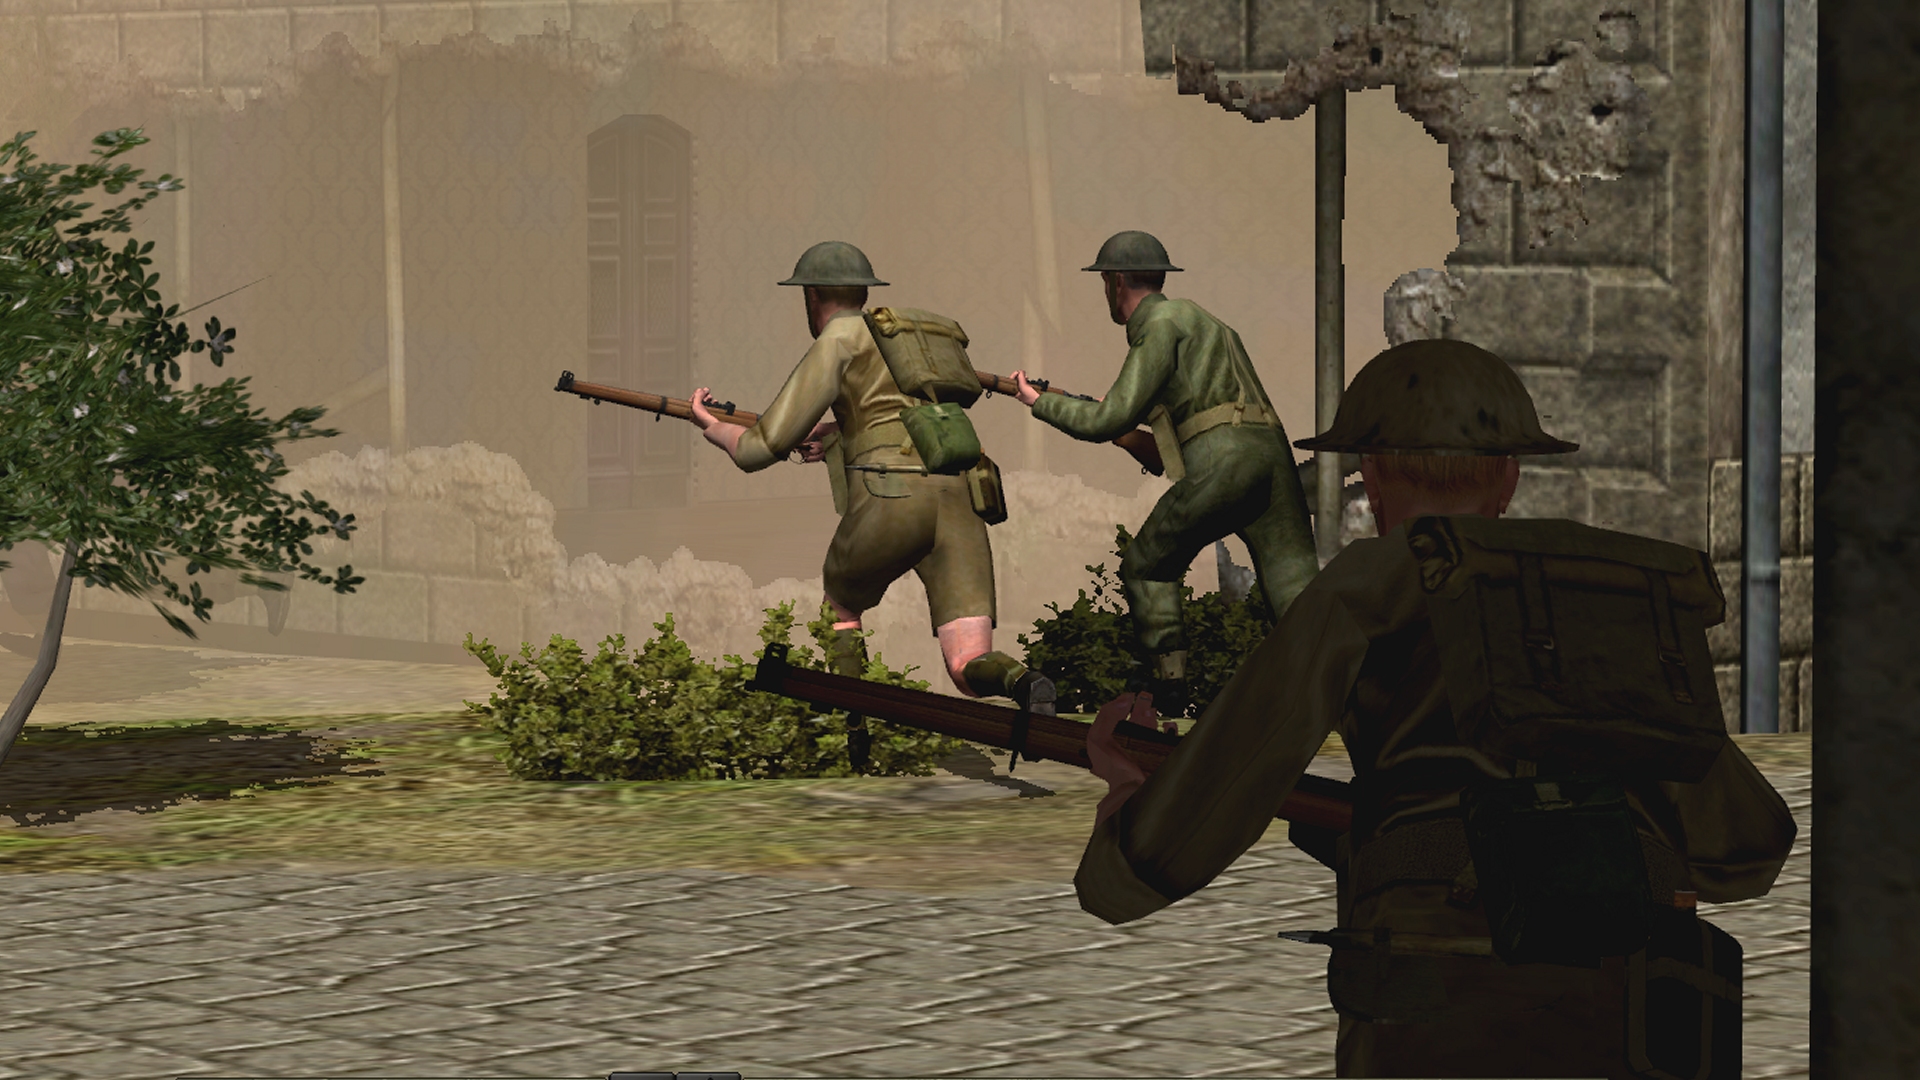
Captain Squires' (Michael Medwin) three-man breach team.

Corporal Wood's (John Nettles) two-man sniper team.
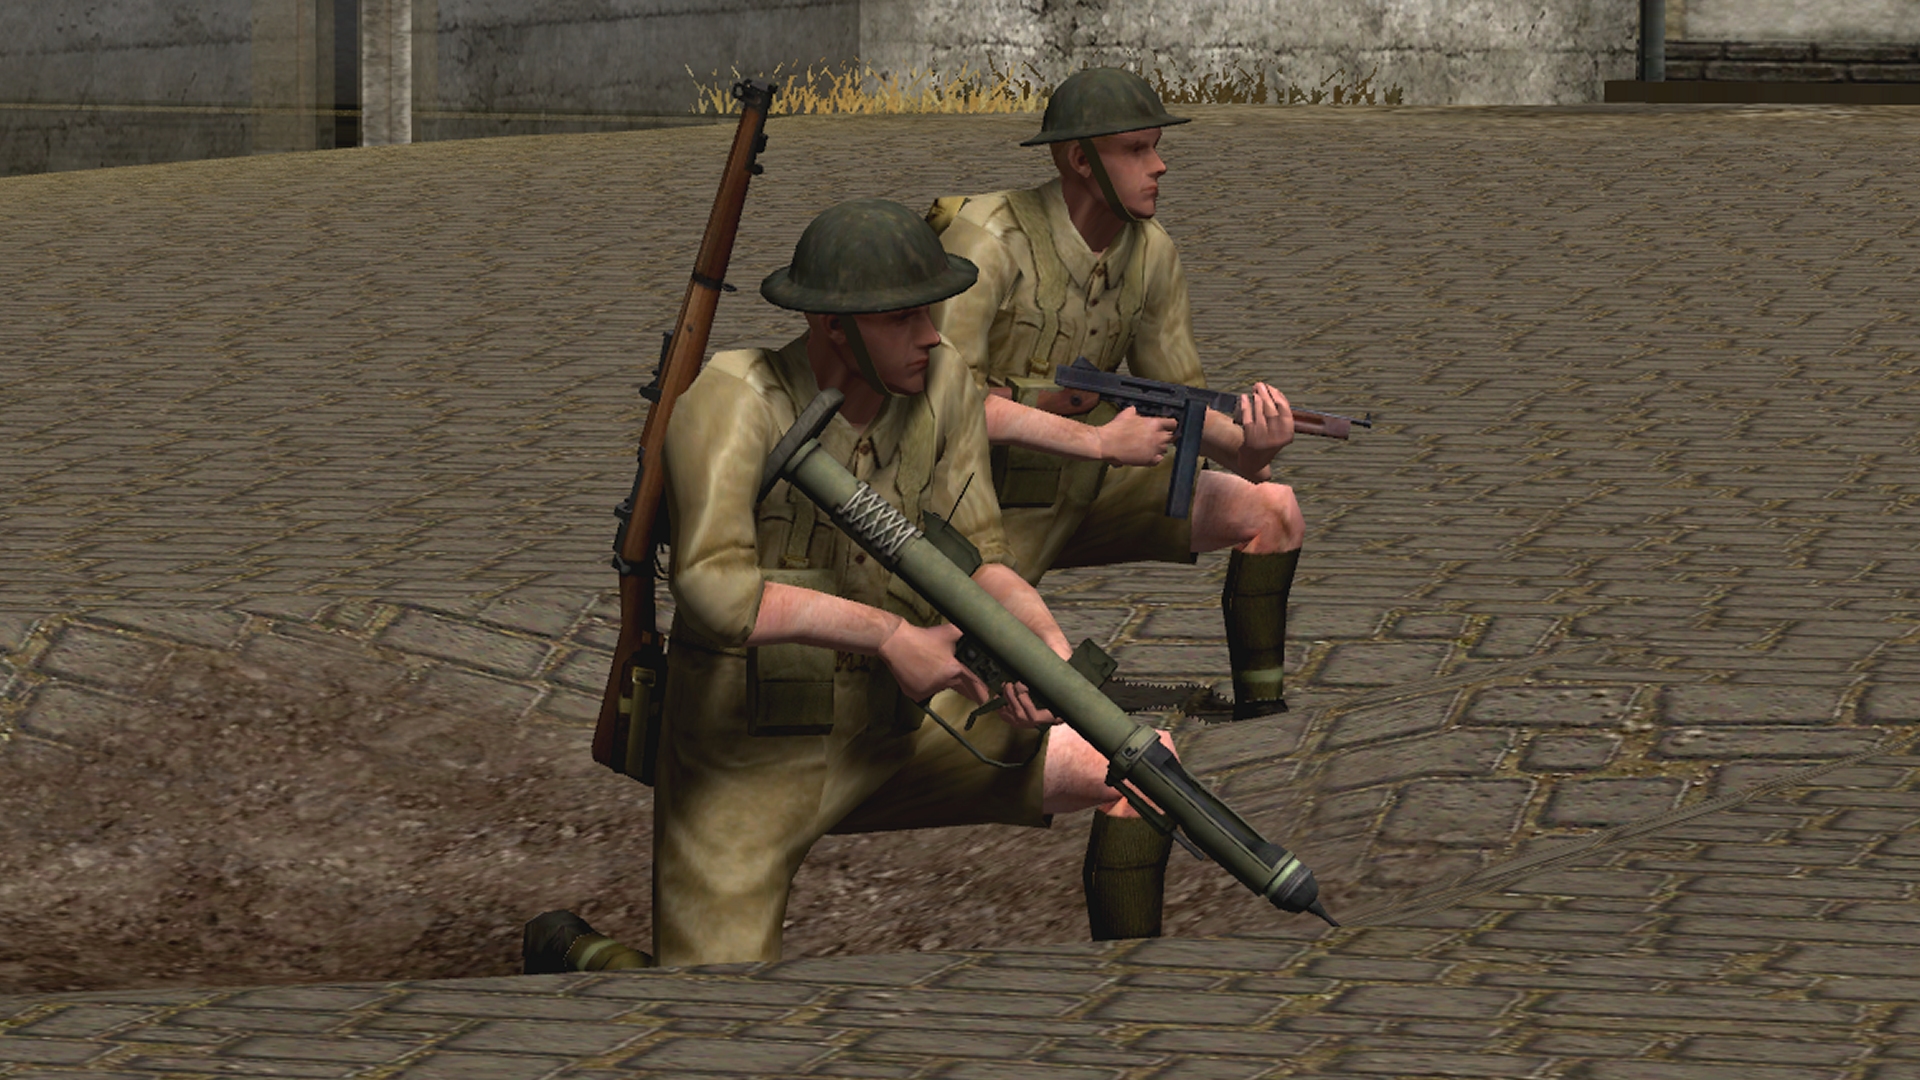
Private Moffat's (Alun Armstrong) two-man PIAT team
Due to arrive in approximately five minutes' time are the rest of the 'Montaretto Millionaires'...
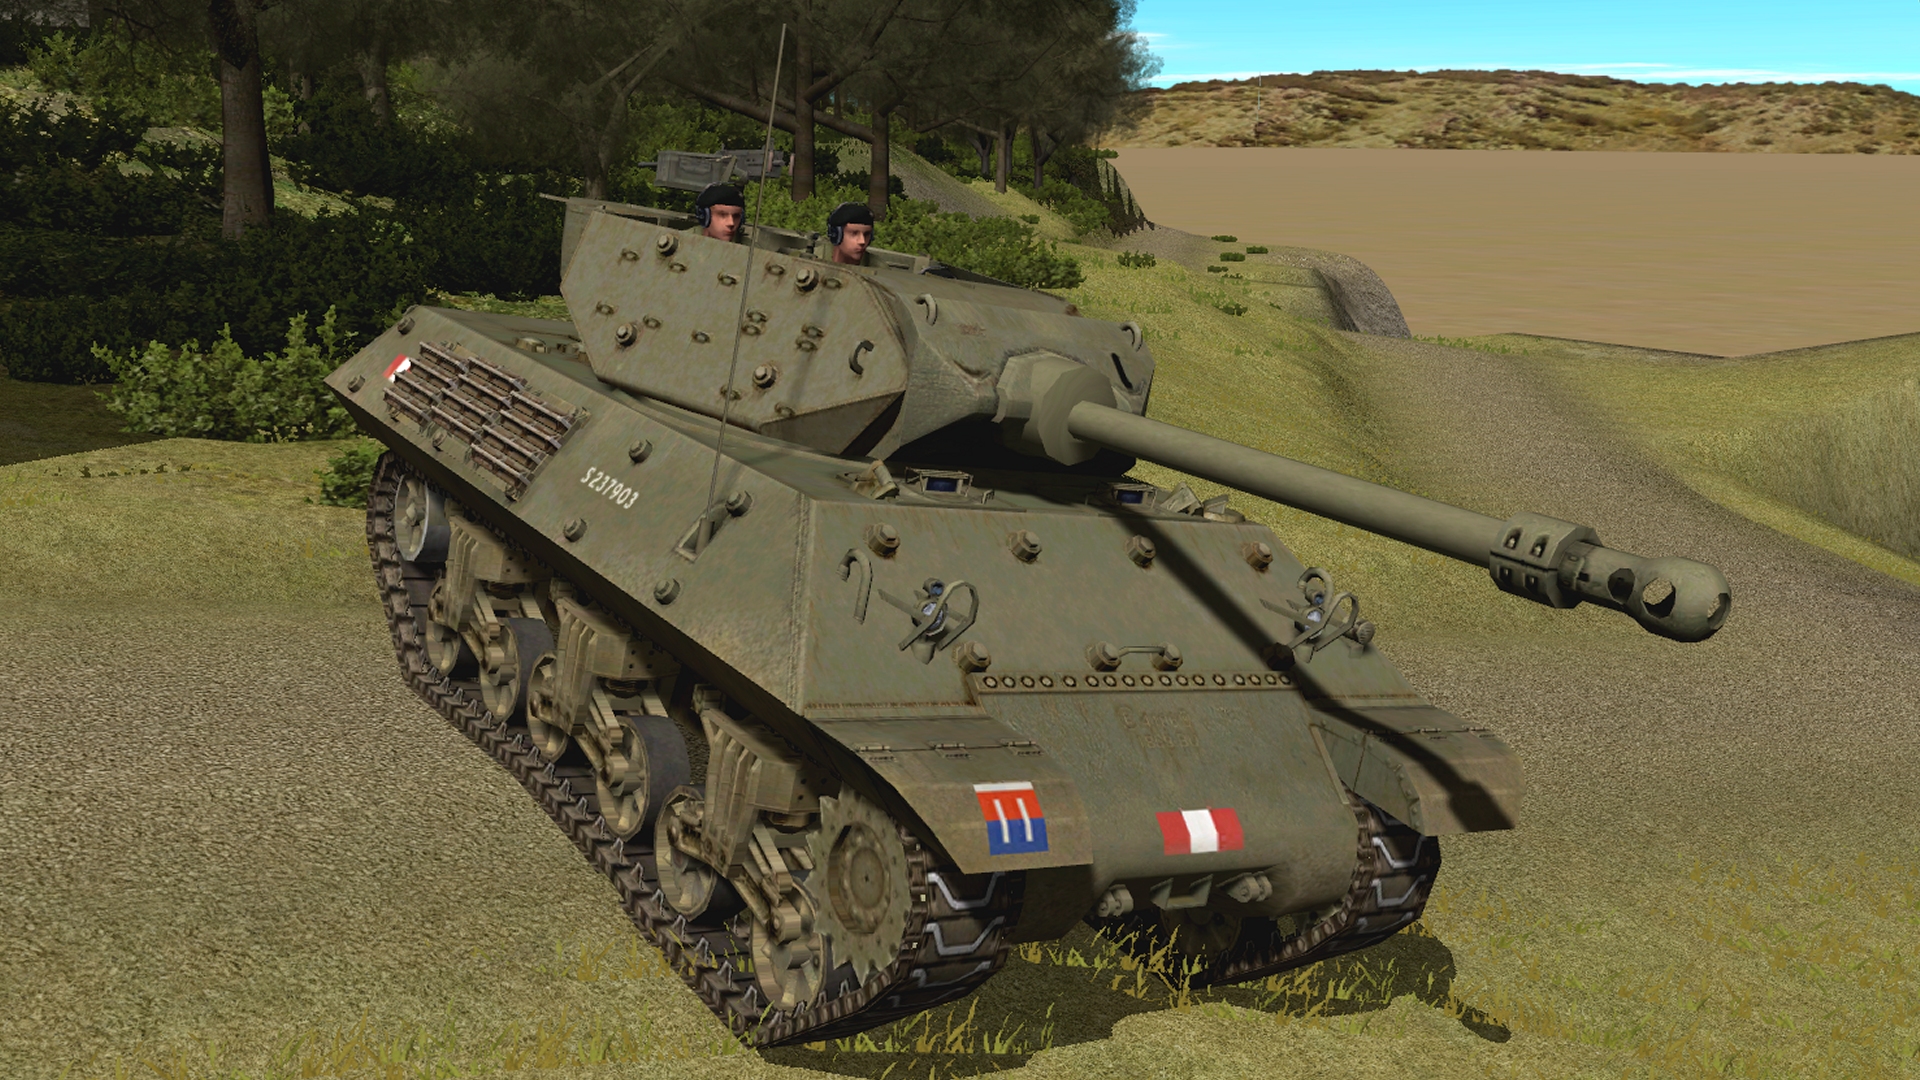
Lieutenant Ashbridge's (Roger Moore) Achilles tank destroyer.

Corporal Singh's (Ben Kingsley) Wasp flamethower.

Corporal Williams' (Jim Brown) halftrack, aboard which is the other third of 1st Platoon - 3rd Squad under Sergeant Costello (George Savalas).
Captain Lynch (Harrison Ford) and 1st Lt. Bishop (Michael J. Pollard), two survivors from a downed B-26, may also appear at some point. They were last seen scaling the mountain above the base in search of a ventilation shaft.
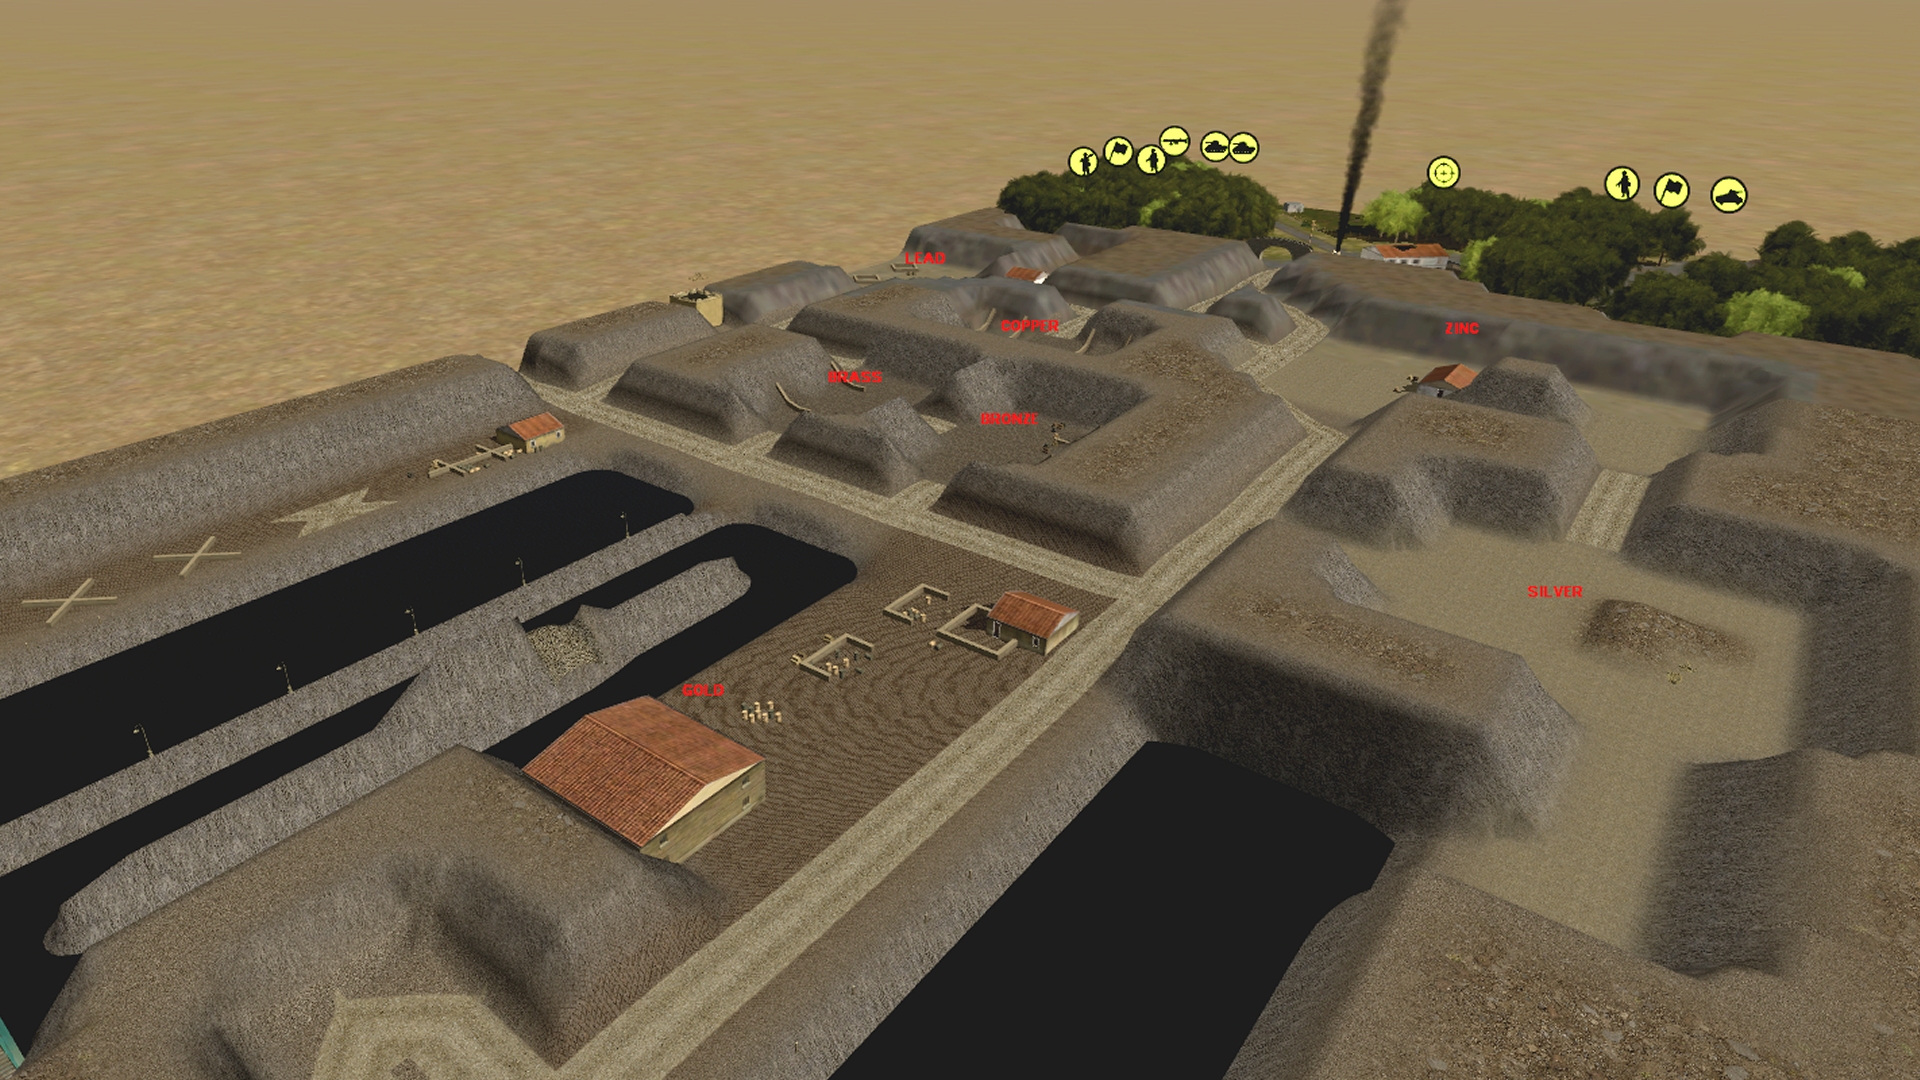
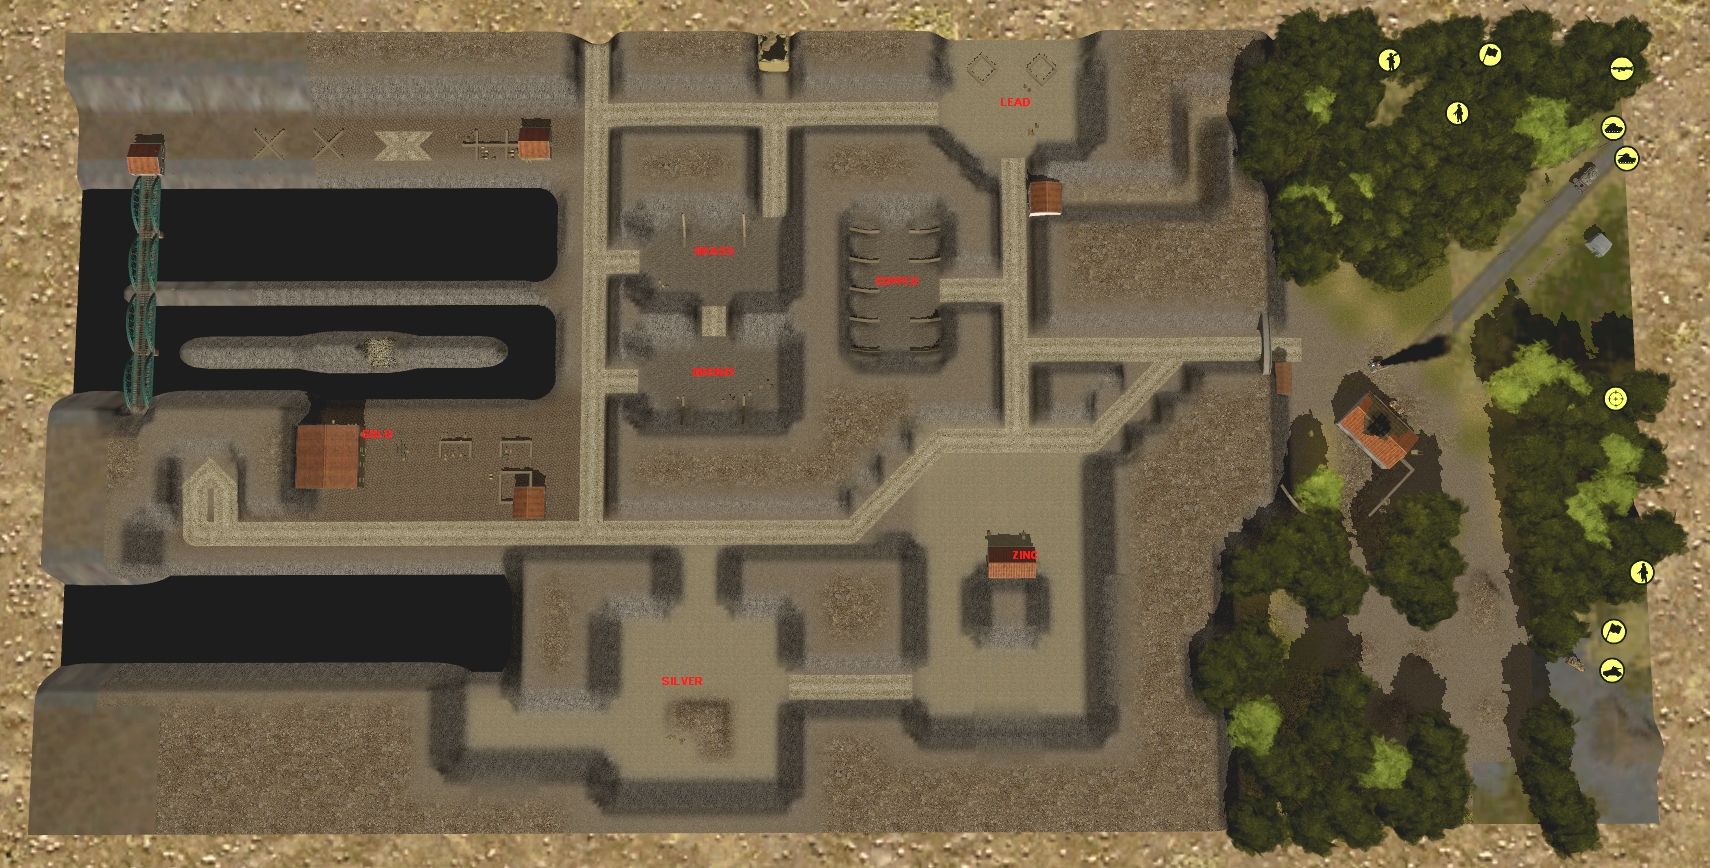
The Venue
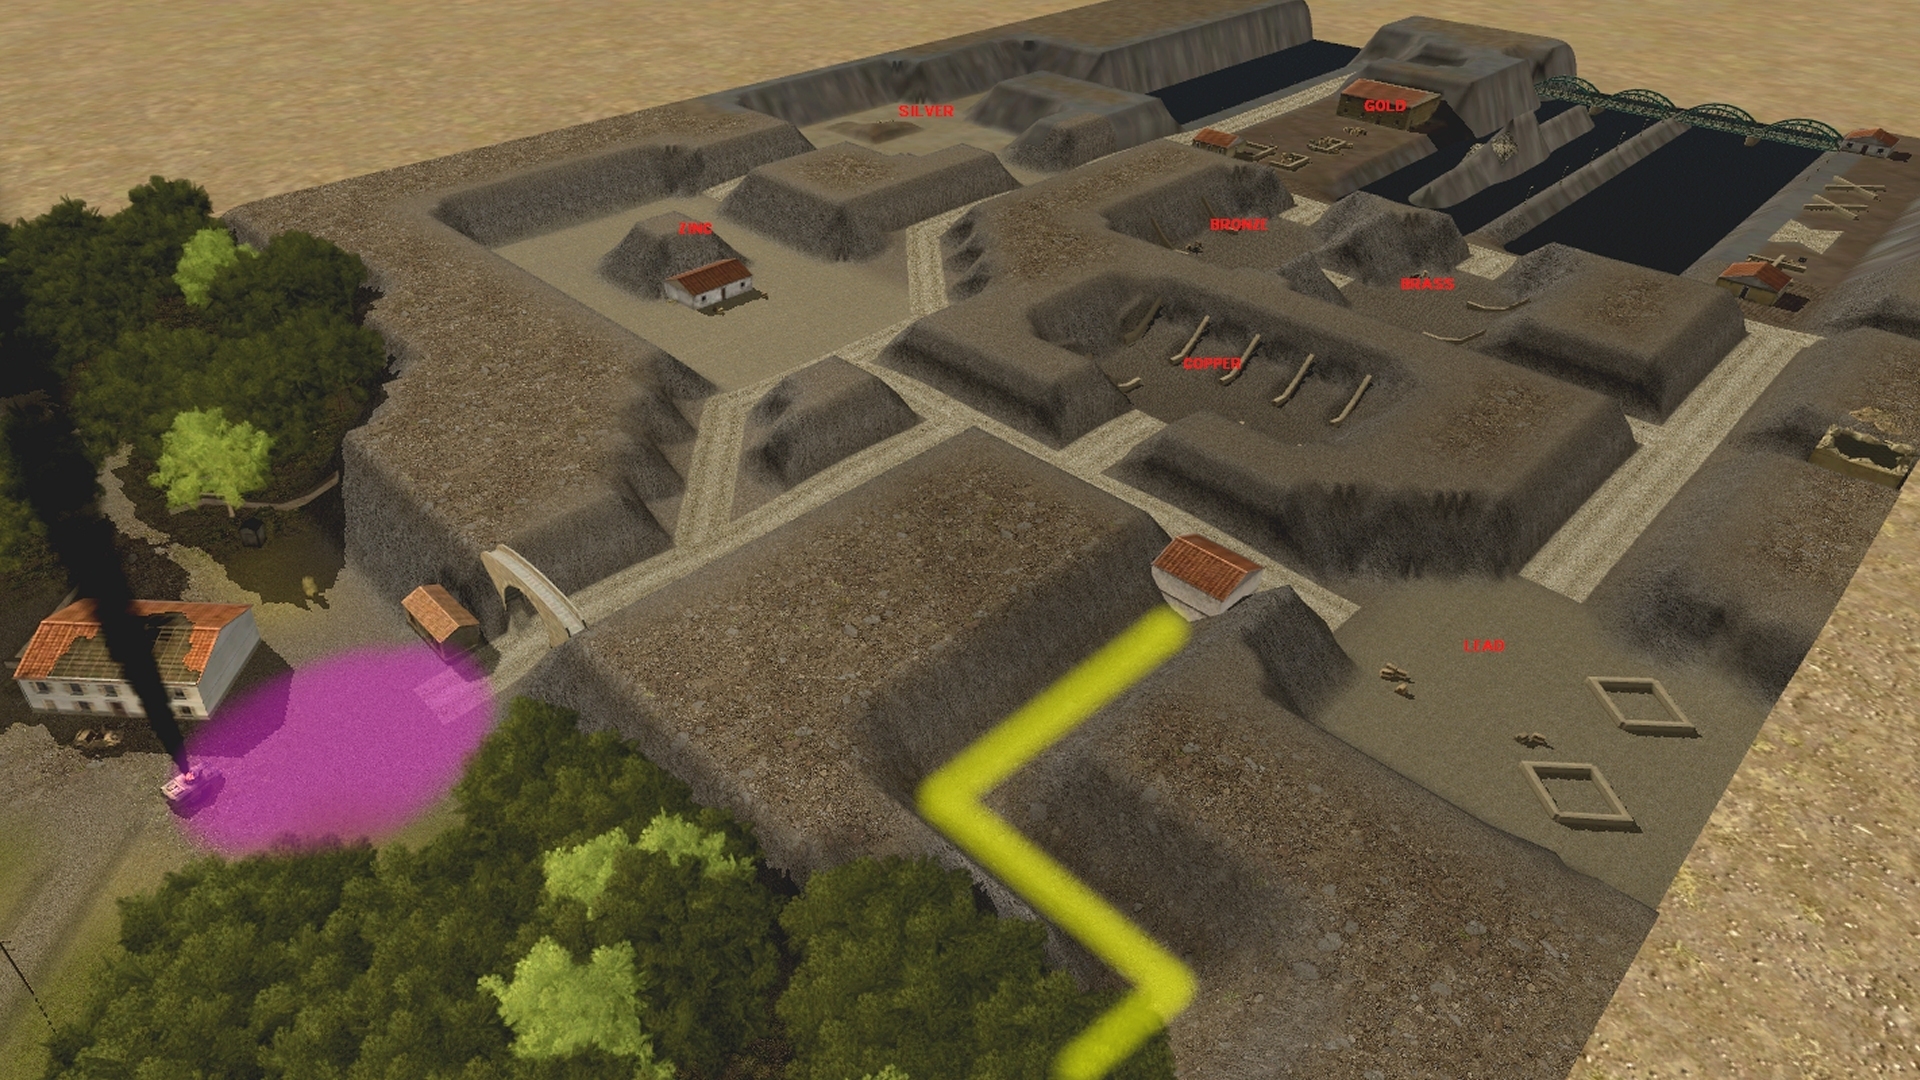
A game engine and map editor not designed with subterranean submarine bases in mind means the map you'll be playing on features some visual shorthand that, hopefully, won't impair immersion too much. The underground chambers and corridors are depicted in cutaway fashion, and barracks, storerooms, engine houses, etc. are, by necessity, represented with free-standing buildings. Bridge sections stand in for the pen gates, a crude earthwork for the U-boat. An engine quirk means some apparently flat passages (the entire base is on one level) in fact undulate a little.
The only way for vehicles to enter the base is through the tunnel mouth near the ruined villa. The area around this portal has been sown with anti-tank mines by the retreating Germans. Luckily, a local hunter watched the minefield being laid and has given us a pretty good idea of its extent (the pink oval on the above image).
After Corporal Wood gifted him a spare scoped Lee-Enfeld, the hunter also revealed the whereabouts of a disused tunnel to the north of the main entrance. Hidden by vegetation and too narrow for vehicles, the tunnel (indicated by the yellow line) is currently blocked at its western end by the kind of brick barrier that Captain Squires' breach team delights in demolishing.
The fact that Croesus and Co. weren't fired on or apprehended as they bailed out of the wrecked Greyhound strongly suggests that all of Steiner's force is now busy inside the mountain.
Communal Combat Mission Basics

Just in case you weren’t around for last summer’s Middle Eastern marathon, here’s how Play By Comment Combat Mission works. Every turn, via a comment along the lines of “Turn 1 orders here, please…” I solicit written instructions for friendly forces. Orders are accepted on a first-come-first-served basis with individual commenters usually only permitted to ‘move’ a single vehicle, infantry squad, or weapon team per turn.
For example… one turn Peacock_Plucker might order 2nd Squad to advance down the tunnel on row 3, while Balaton76 manoeuvres Crabmeat 1, and SlowDoris does something dashing with the Autoblinda. During the next order round Geodetic might decide 2nd Squad needs to pick up the pace, while LMF reverses Crabmeat 1, and Shropshire_Lass rethinks the Autoblinda's route.
At around 1800 hrs GMT every evening I’ll execute all issued orders posting the results as a short illustrated article the following morning at approximately 0800 hrs GMT. Did the Achilles bag the Tiger? Did 1st Squad survive the dash along the quay? All will be revealed.
It will be Yours Truly rather than CM’s internal logic that ultimately decides whether the battle has been won or lost. At the end of Turn 15 I'll take a look at the situation in columns a to r and dish out bouquets and brickbats accordingly. Neutralise all of Steiner's armour, 'puncture' his submarine, and gain control of key locations like the main quay ('GOLD') and gate control room (c4/5) and, rest assured, the pilfered Prosecco will flow. Kills, casualties, and general battlefield behaviour, will also be considered when I pass judgement, but control of the wet, western end of the map is the primary objective in Colonel Croesus.
Issuing Orders
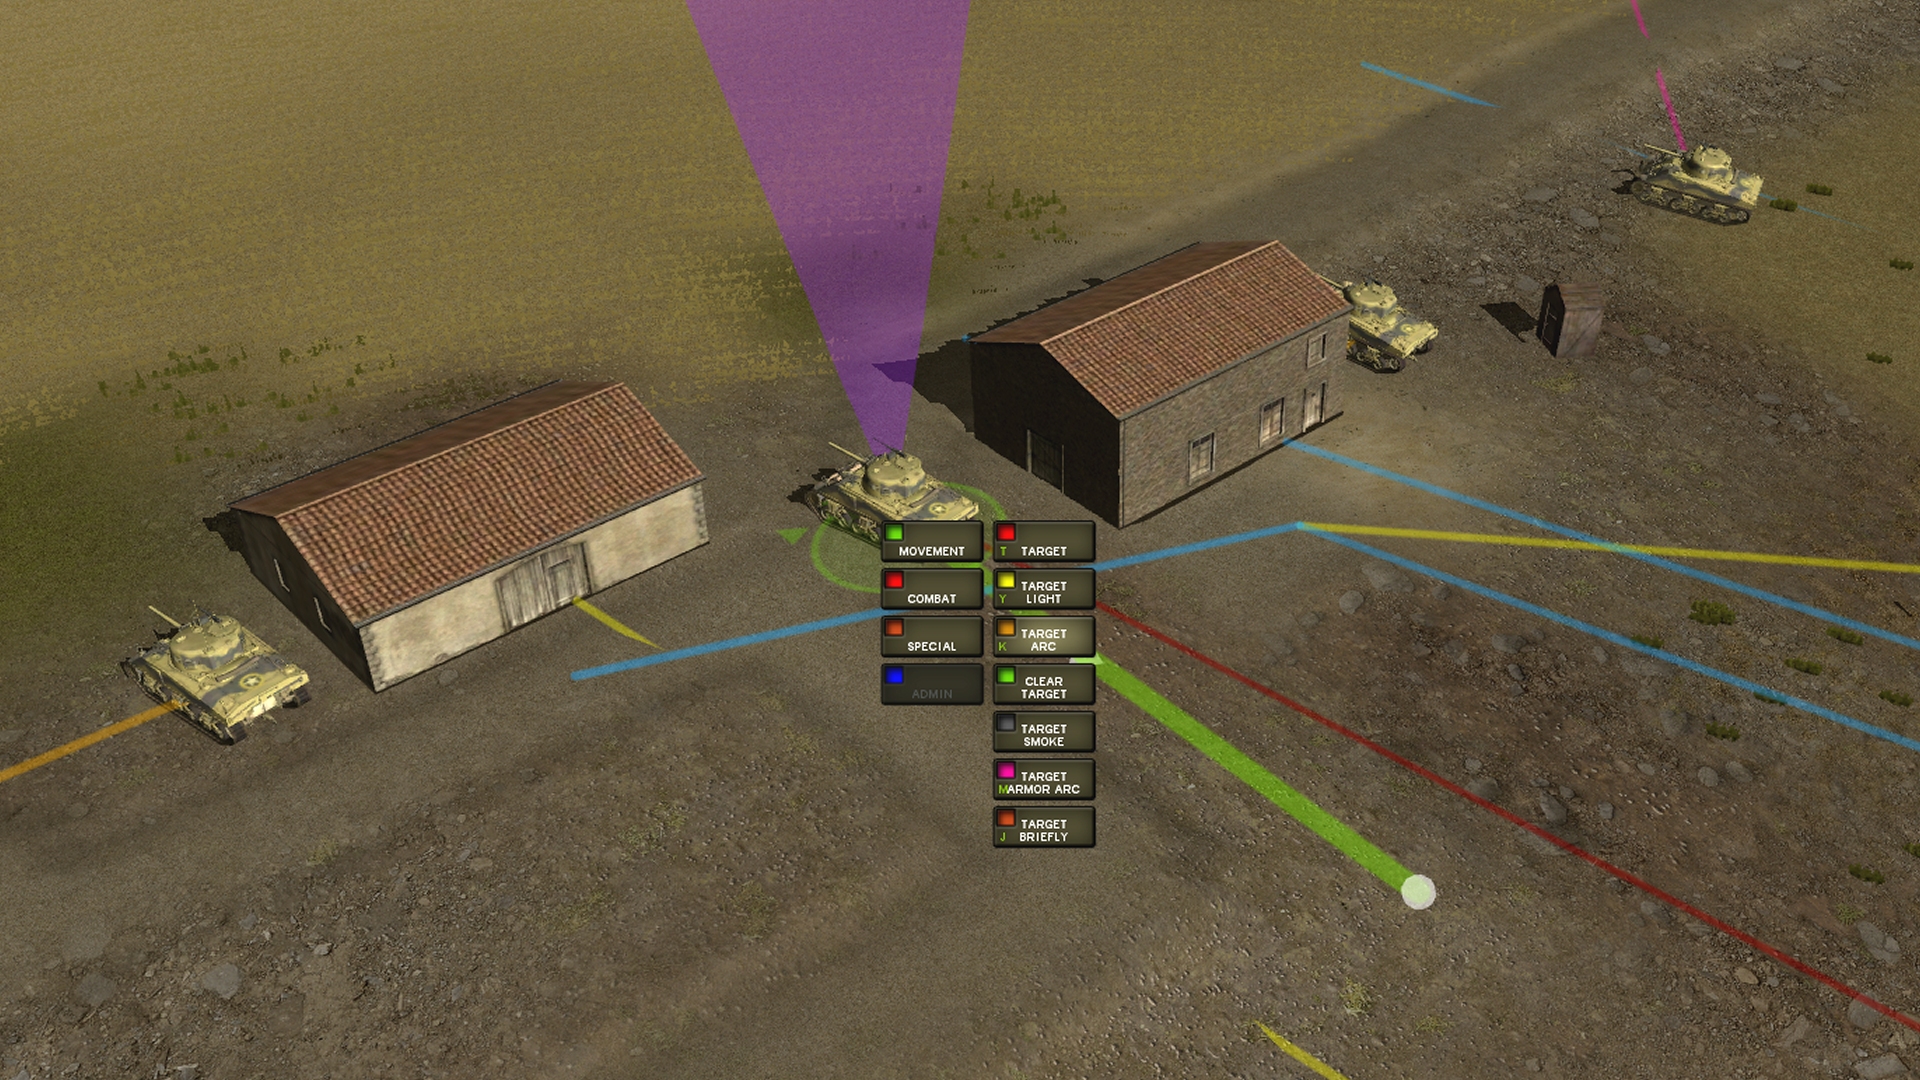
You don’t need to understand the intricacies of Combat Mission: Fortress Italy in order to participate. Consider the tactical situation, and provide a destination coordinate and perhaps a clue to pace/cautiousness and I’ll do my best to translate your instructions into successful in-game orders.
Full strength infantry squads can be split into three sections for tasks like scouting and tank hunting, and will fight harder, react quicker, and be less likely to panic if close to an HQ.
During the sixty-second non-intervention ‘action phases’ that follow order issuing, units may encounter a threat or target that causes them to abandon or modify your instructions. For example, AFVs may decide to pop smoke and reverse if they don’t like the situation they find themselves in. Specific targeting instructions may be issued but usually combatants can be relied upon to self-select targets sensibly.
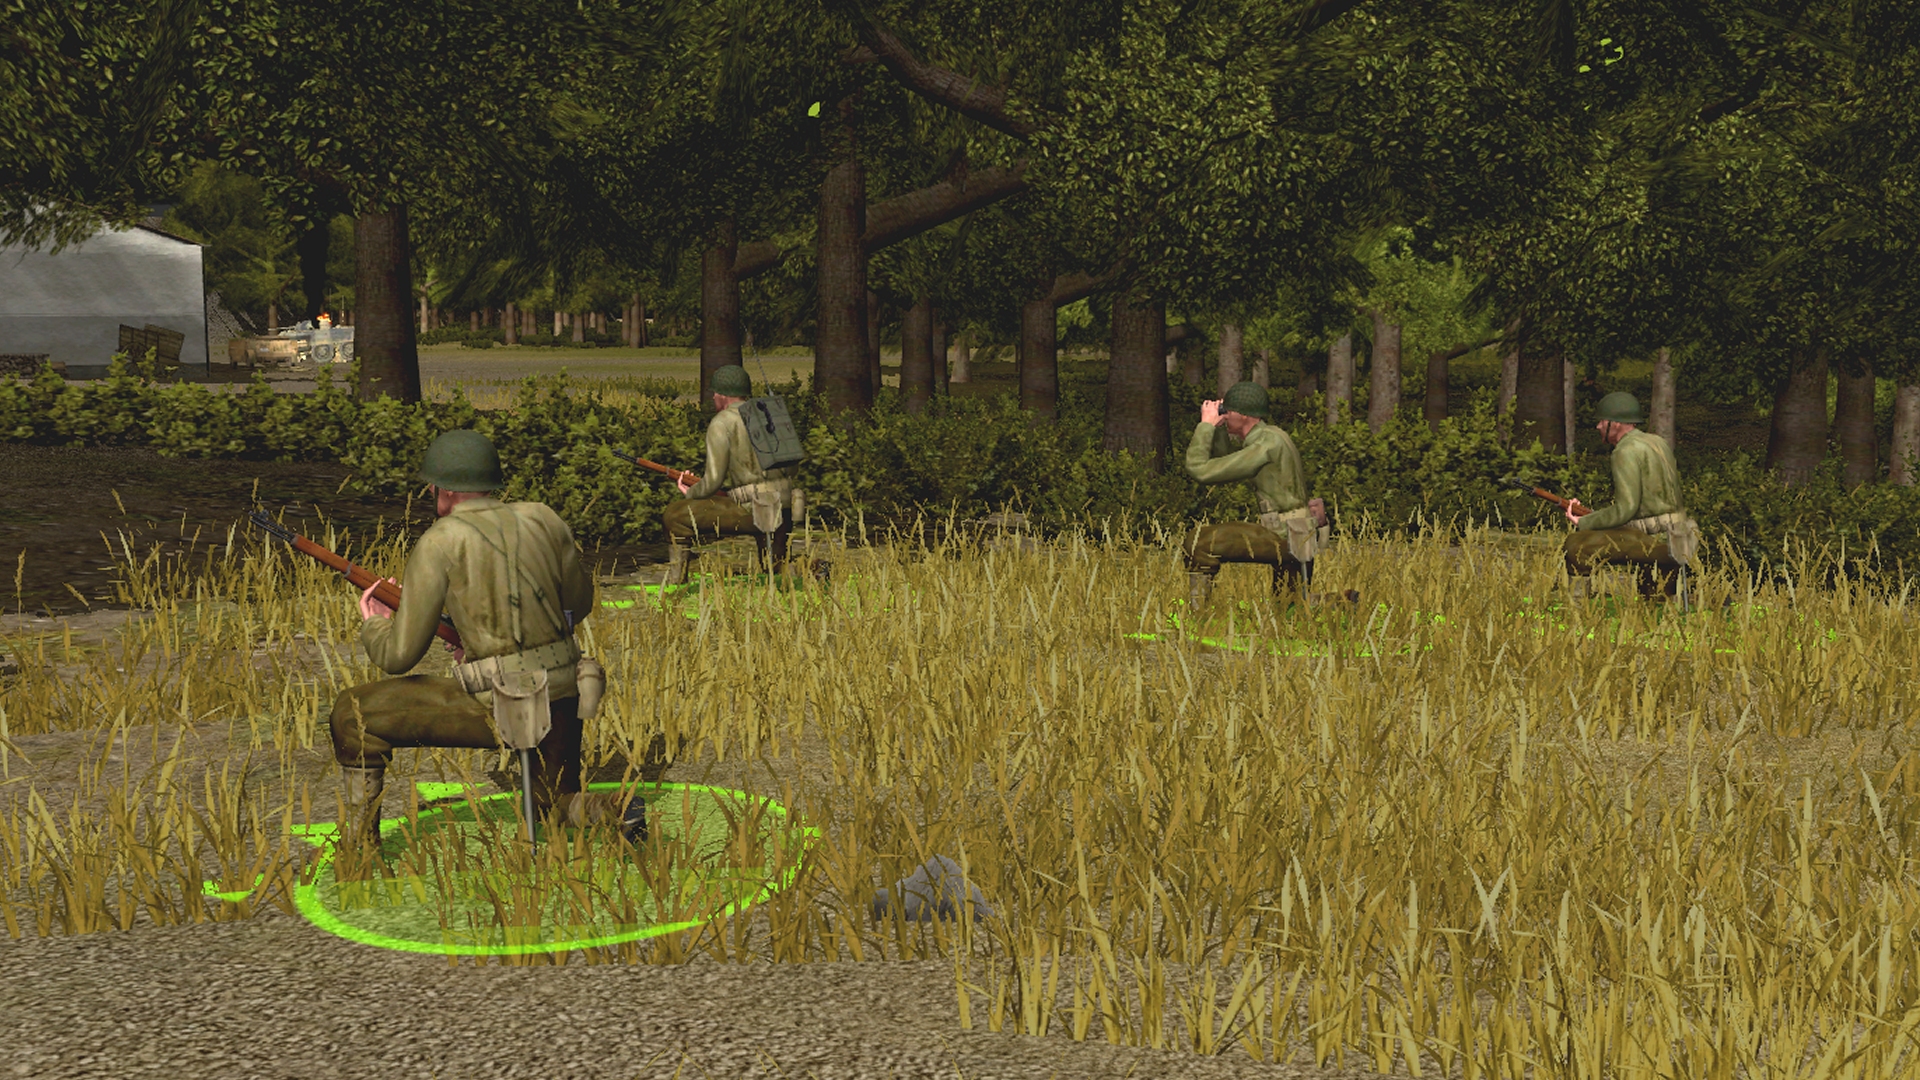
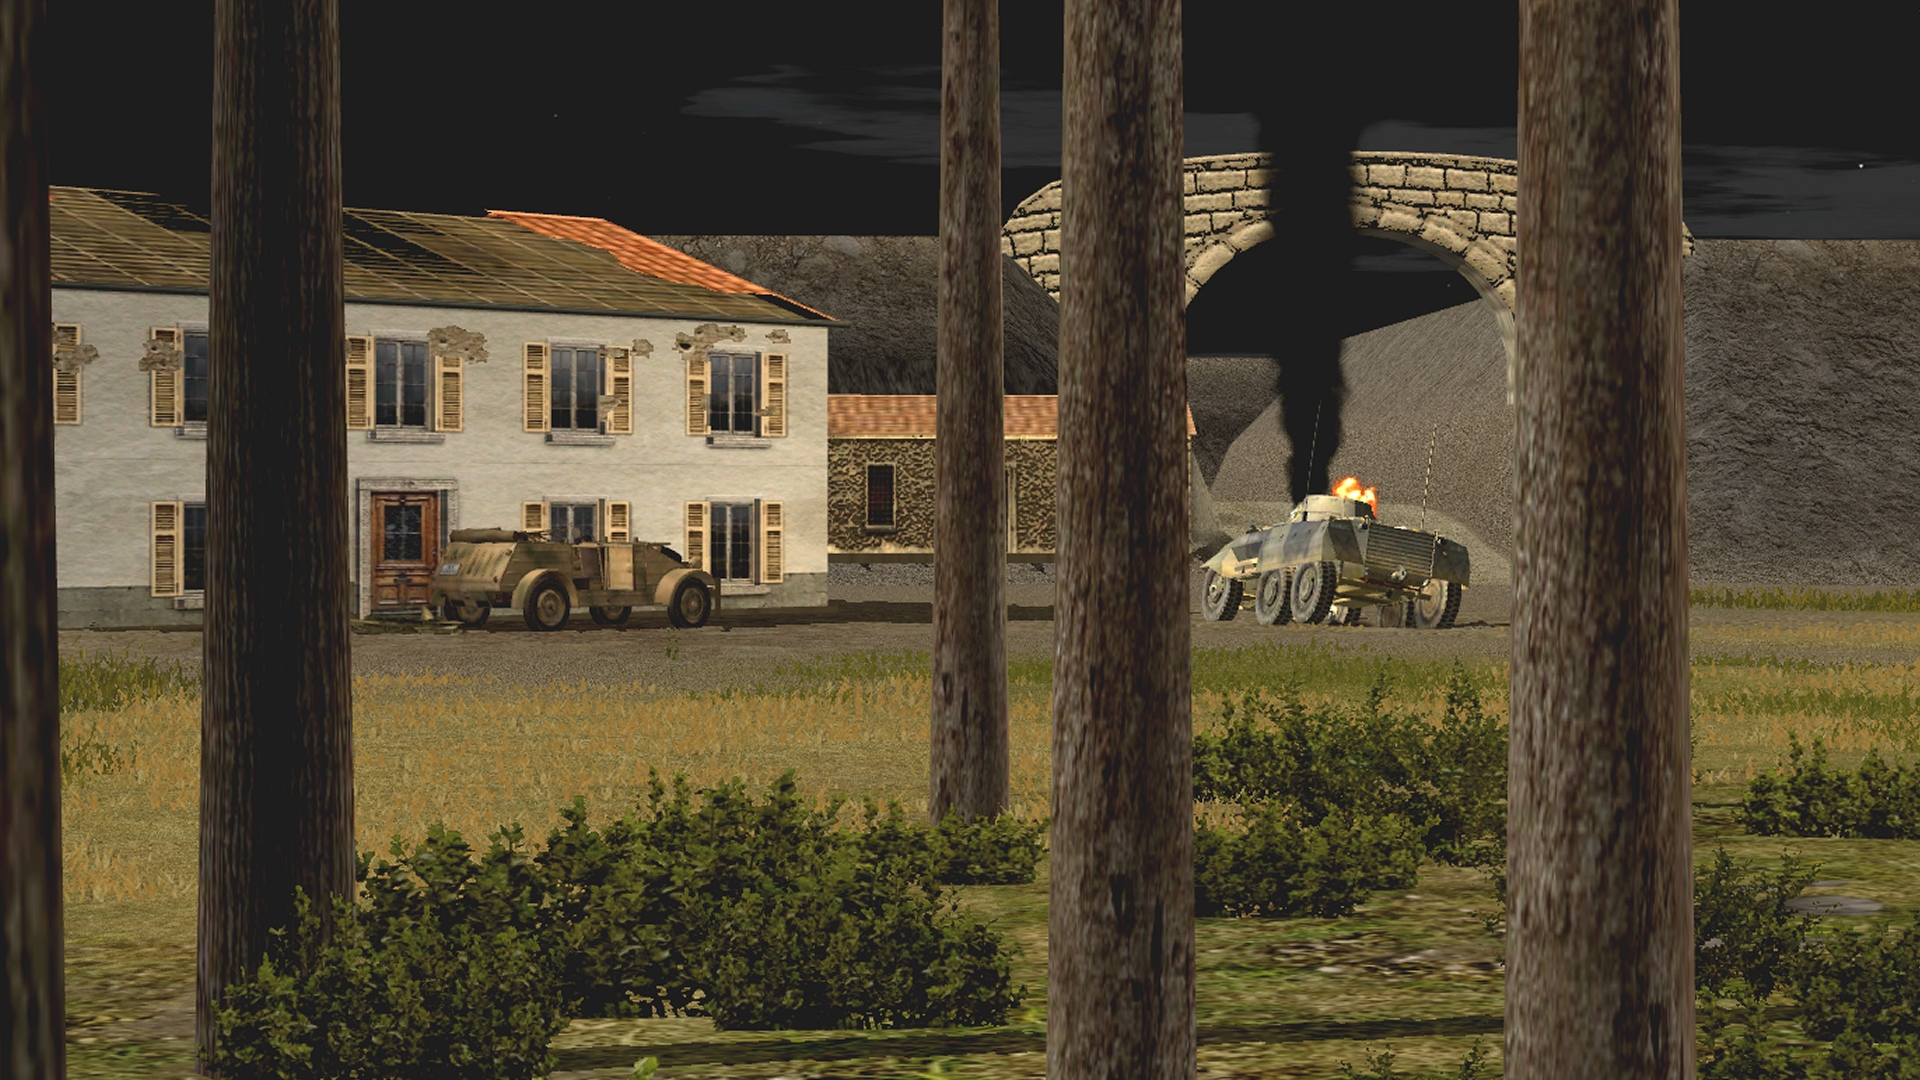
This is the first time I've set one of these scenarios at night. Because of the darkness inside and outside the mountain (Artificially brightened for command/screenshot purposes) expect relatively poor spotting performance from your units. Stationary, unbuttoned units asked to scrutinise a small sector of scenery will spot much better than moving ones without 'target arcs', but, as time is of the essence, painstaking scrutiny of every inky corner is a luxury you, unfortunately, can't afford.
The CMFI demo is a great place to start if you’re not familiar with CM play mechanics. I’ll do my best to answer any technical questions that arise during the next three weeks, but as I know the original trio far better than I know the second gen titles, I’d be very grateful if spectators and players with more experience furnished explanations and proffered advice too.
Enjoy the hostilities, Comment Commanders. Best of luck. You’ll need it.
^ click to enlarge

^ click to enlarge
* * *