Resident Evil Village: the best settings to improve your PC's performance
Keep those frame rates high with our recommended setting tweaks
Resident Evil Village is finally here, continuing the story of Ethan Winters from Resident Evil 7 as he finds himself trapped in a bleak, wintry landscape full of tall vampire ladies, snarling wolf boys and more horrible nasties than you can shake an Umbrella-shaped stick at. It's also one of the best-looking PC games of the year by my reckoning, especially if you happen to own a ray tracing-capable graphics card. It runs supremely well, but it can start to chug a bit if you exceed your graphics card's memory limit. To help you get the best performance in Resident Evil Village, I've put together this best settings guide, telling you which settings to turn on (and which to dial back) to help keep those frame rates nice and high.
You can read more about what we thought of the game over in our Resident Evil Village review, and you can also find out more about how it runs with its fancy ray tracing effects over in my dedicated Resident Evil Village ray tracing guide. In this article, though, I'm going to give you a detailed rundown of the game's general graphics settings and how to make the most of them, as well as which settings you can tweak to help improve your frame rate.
Resident Evil Village: how to get the best settings
If all you need are some quick graphics tips on how to improve your frame rate, here are the best settings to tweak in the game's Display Settings to help give your PC a boost:
Lower Image Quality
Despite sounding like it's got something to do with how pretty your game looks, the Image Quality slider is actually the game's resolution scaler, which can be a useful tool to help improve performance. All of the presets are set to 1.0 by default, which is effectively 100% of your chosen resolution, but you can also lower it in increments of 0.1 (10%) down to 0.5. This would mean the game is being rendered at 50% of your chosen resolution (at 1080p, this would be 960x540), and upscaled back up, putting less pressure on your GPU. I wouldn't recommend going all the way down to 0.5, though, as this makes the game look very fuzzy and blurry at 1080p. However, reducing it to 0.9 or 0.8 can bring a welcome bump.
Switch to Interlaced Rendering
This is already enabled on the "Prioritise Performance" preset, but this can bring another welcome frame rate boost to anyone who's currently got it set to Normal. I saw my frame rate jump by around 10-20fps when I made the switch, making those dense patches of tall grass in the Village much smoother and easier to navigate.
Turn Off Ambient Occlusion
Another big performance hog, switching off Ambient Occlusion can add a lovely big clutch of frames back to your PC's average frame rate. This setting affects the game's soft lighting and shadows, making objects and environments look more realistic, but it requires a big chunk of graphics power in order to do so.
Lower Shadow Quality
Shadows can be surprisingly intensive effects in a lot of games, and Resident Evil Village is absolutely full of them. From gloomy village shacks to candlelit castle basements, you spend a lot of time in the dark in Resident Evil Village, and reducing the quality and complexity of those shadows can make it a lot more smoothly.
Turn on Variable Rate Shading
Variable Rate Shading is only available on AMD and Nvidia graphics cards that support DirectX 12 Ultimate (that's Nvidia's RTX 20 and 30 cards, and AMD's RX 6000 GPUs), but this a very clever performance boosting technique that dynamically adjusts how your GPU renders or shades certain objects. You can read more about how it works in my Nvidia RTX tech explainer, but it's effectively a way of telling your graphics card where its attention is needed most, making sure detailed objects get all the love and rendering attention they deserve, while simpler ones, such as flat walls and surfaces, or those near the periphery of your screen are filled in with a little help from nifty AI algorithms. It's a really nifty tool for boosting performance when you've got ray tracing enabled, and can also bump up frame rates more generally when you're playing at higher resolutions, too.
Resident Evil Village: graphics settings explained
There are four main presets in Resident Evil Village: Prioritise Performance, Balanced, Prioritise Graphics, and Max. There's also a dedicated Ray Tracing preset if you have a compatible graphics card, as well as a Recommended option that automatically selects the best settings for your individual PC. They can be found in the Game's Display tab in the main Settings menu. If you want to change preset, you'll need to return to the game's title screen, as you can't switch to a different one in-game. You can adjust individual settings in-game, but to change preset you'll need to save and quit to the title screen.
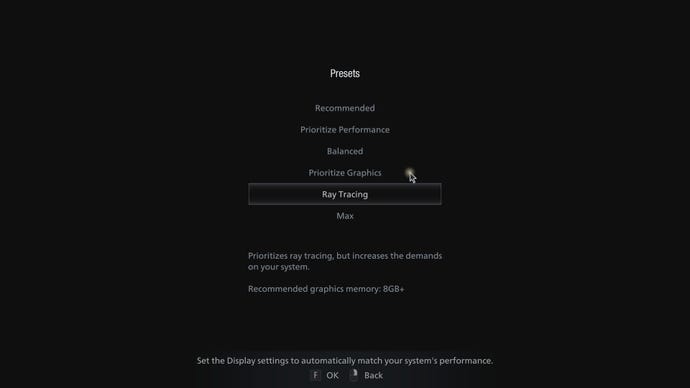
I'd strongly recommend sticking with one of the game's four main quality presets if you can help it as Resident Evil Village's graphics settings are pretty horrible. They're not user-friendly in the slightest, and are often downright confusing. Some are poorly labelled, others have useless explanations that leave you none the wiser about what they actually do, and there are a handful of them that are only available on certain graphics cards.
A lot also depends on how much graphics memory / VRAM is available on your graphics card. Capcom recommend having at least 4GB of VRAM in their minimum PC specification (detailed at the bottom of this article), which is just enough to accommodate the game's "Prioritise Performance" preset, as this uses 3.8GB of graphics memory. "Balanced" and "Prioritise Graphics" use 4.6GB and 5.6GB respectively, making them a better fit for graphics cards with 6GB or 8GB of memory, while the "Max" preset requires a massive 12GB of graphics memory, so you'll really need one of AMD's premium 16GB RX 6800 cards to make proper use of that one.
The good news is that the game tells you exactly how much graphics memory you're using in the main Display menu, and you can see the numbers go up and down as you fiddle with the settings. It's far from ideal, but at least it gives some indication of what your PC can handle before things get too much. As such, it probably goes without saying that those of you with lower end graphics cards may well be limited by the amount of VRAM they have, as pushing beyond these boundaries will severely impact your PC's performance.
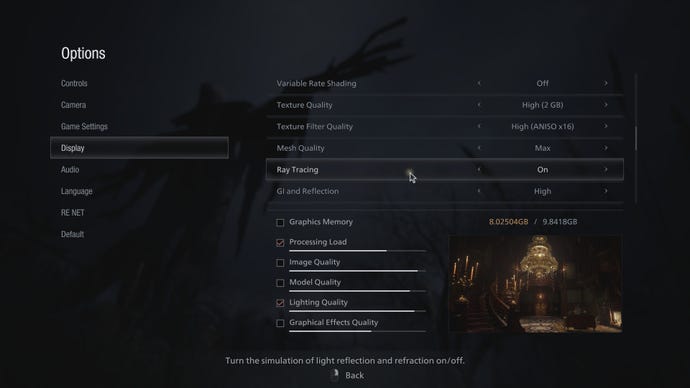
I should also note that the game's "Prioritise Performance" preset already encompasses the lowest possible settings in Resident Evil Village, so if your PC can't cope with this, there's not much you're going to be able to do about it.
To give you a better idea of what each quality preset looks like in Resident Evil Village, have a look at the screenshots below from the big grand staircase in Castle Dimitrescu. On the face of it, the four main presets are surprisingly similar, which is good news for those of you with more modest gaming PCs, as it means you can still get a great-looking experience without the added performance cost.
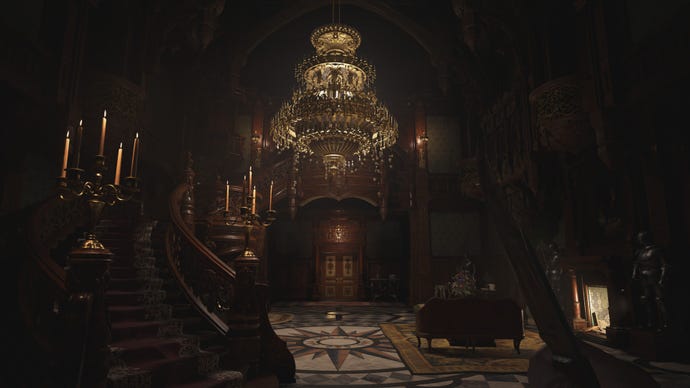
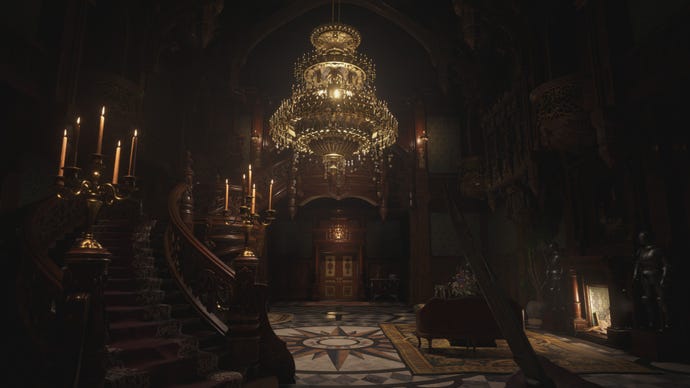
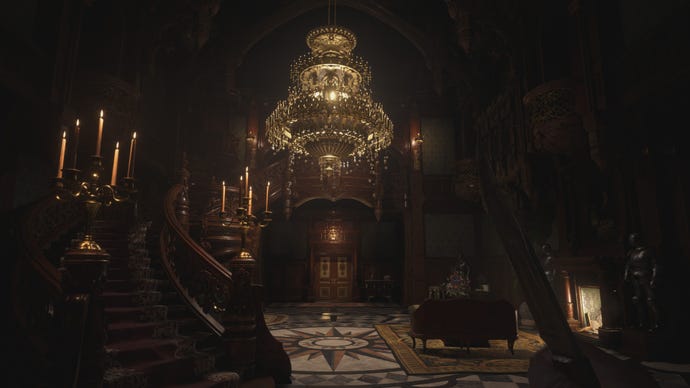
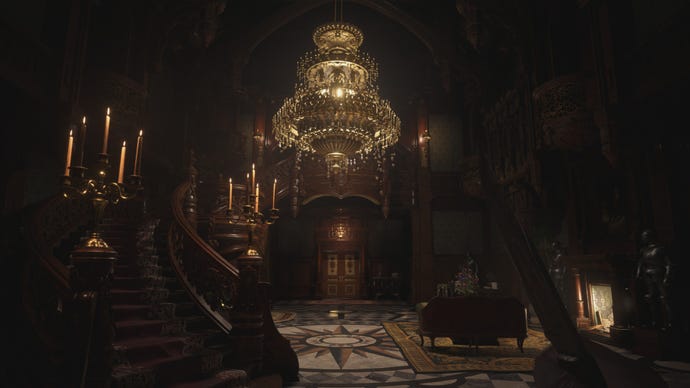
In fact, the only difference you can notice immediately between the four presets, is the lack of light bloom on the candles and chandelier in "Prioritise Performance". Zoom in up close and you might also notice some slightly more jagged edges in "Prioritise Performance" due to its lower anti-aliasing settings, but on the whole you're still getting a great level of detail and atmospheric lighting.
Indeed, it's only when you zoom in really close that you start to notice that "Max", for instance, has a much more detailed, crisper looking yellow carpet than the rest of them, maintaining its complex pattern while the rest dissolve into a smudge of primary colours. The same goes for the level of detail around the far door frame, too, with the higher presets retaining more of the embossed wood panelling than the ones lower down.
You really have to squint to see it, though, and in motion I'm not sure you're really going to notice. If you really want to go all out on the game's detail settings, try increasing the Image Quality to 1.5, or even 2.0 if your card can handle it, as this will make everything look extra sharp and lovely.
Resident Evil Village PC requirements
As a reminder, here are Resident Evil Village's PC requirements. According to Capcom, their recommended spec should be able to get you 60fps speeds at 1920x1080 (although they don't specify with what settings, unfortunately), while their minimum spec should be able to get the same 60fps 1080p performance when you enable its 'Prioritise Performance' quality preset, which is the lowest preset available.
Minimum PC requirements
CPU: Intel Core i5-7500 / AMD Ryzen 3 1200
RAM: 8GB
GPU: Nvidia GeForce GTX 1050 Ti (4GB) / AMD Radeon RX 560 (4GB)
DirectX: 12
OS: Windows 10 (64-bit)
Recommended PC requirements:
CPU: Intel Core i7-8700 / AMD Ryzen 5 3600
RAM: 16GB
GPU: Nvidia GeForce GTX 1070 / AMD Radeon RX 5700
DirectX: 12
OS: Windows 10 (64-bit)
As for the game's ray tracing requirements, you'll need at least an Nvidia GeForce RTX 2060 or AMD Radeon RX 6700 XT graphics card inside your PC, in addition to the minimum specs listed above. Capcom also have the RX 6700 XT as their recommended AMD ray tracing GPU as well, while their recommended Nvidia GPU is the RTX 2070. The rest of their recommended ray tracing spec is the same as their general one listed above.
As you can see from my Resident Evil Village ray tracing guide, all Nvidia RTX and AMD RX 6000 cards can happily manage the game's "Ray Tracing" preset at 1080p, and most give you plenty of scope to bump up the settings even further. I reckon it's one of the best ray tracing games you can currently play on PC, and you should definitely turn it on if you've got a compatible graphics card.
