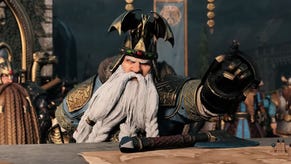
Total War Warhammer 3 Kislev faction guide: how to win with Kislev in campaign and on the battlefield
Bear arms against Kislev’s enemies with our faction focus guide
Looking for a Total War: Warhammer 3 Kislev Guide? Slavic bear-buds Kislev are one of the most versatile factions in Total War: Warhammer 3, offering powerful hybrid units, magic, and some of the best archers in the game. Kislev, like most factions in Total War: Warhammer 3, have more nuance than you might expect from their ‘Empire with Bears’ aesthetic. As such, we’ve put together a list of helpful pointers so you can get the most out of Kislev both on the battlefield and in campaign. For the Motherland!
On this page:
Note: if you're after information on any of the other factions in the game, check out our Total War: Warhammer 3 factions tier list!
Kislev Roster guide
While the standard of infantry, cavalry and archers might hold true in traditional Total War, Warhammer 3 likes to make things a bit complicated with the addition of, say, giant elemental ice bears. Luckily, we’ve got your back. Find out how to get the most out of each unit on Kislev’s roster below.
Tzarina Katarin
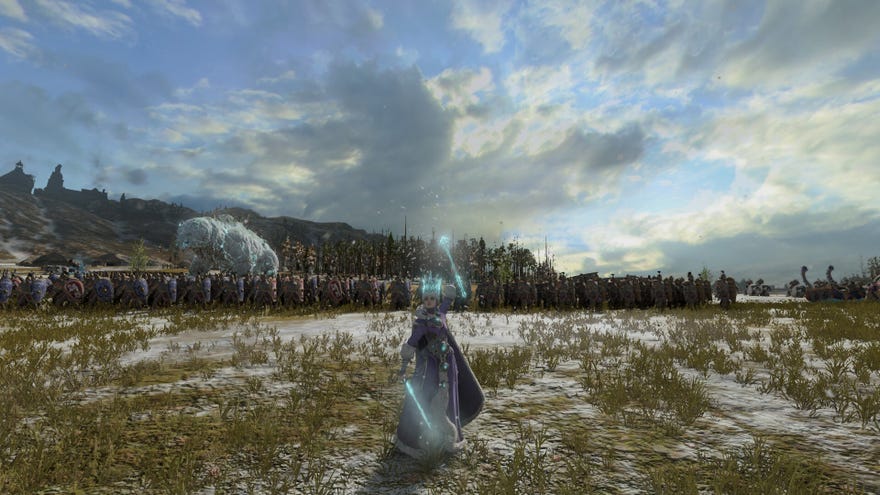
While Katarin is no slouch in melee, she’s primarily a spellcaster, so you’ll want to avoid sending her in against anything elite without some support. That said, she’s hardy enough to stay near your frontline, providing support magic and leadership buffs. Especially - and this will become a theme as we go down the roster - if she’s on her polar bear mount.
Boris Ursus
An anti-large beast with several powerful passive and active skills, Boris is your daemon-dueling powerhouse. Send him after greater daemons, ogres, enemy elite cav, or anything bigger than regular infantry. You’ll get some extra mobility and hit points out of his special bear mount, Urskin, but be mindful this will also make Boris vulnerable to other anti-large units.
Kostaltyn
Not particularly gifted at either magic or melee, Kostaltyn is the apparent weakest of Kislev’s three legendary lords; but he does have a few tricks up his ragged sleeves. While regular Patriarch heroes have access to one prayer, Kostalytn can use all three. That’s an AOE heal, a vigor regen, and a melee attack buff, as well as the standard leadership and charge bonuses. Keep him behind your frontline as a support, or pop him on a mount with some bear cav to buff their charges.
Boyar
Kislev’s standard melee lord, the Boyar is an anti-infantry fighter with good armor, and a boost to melee defense should he drop below 50% HP. A solid tank for supporting your frontline.
Ice Witch/Frost Maiden (Ice/Tempest)
With a lord and hero variant for each of Kislev’s two unique lores of magic, all four of these characters play a similar role. Though each is more mobile and defensive on their bear mount, you’ll want to avoid combat wherever possible. We’ll look more into their magic below.
Patriarch
Similar to Kostaltyn, the Patriarch is a support hero with access to one of three prayers. Nothing too exciting, but a rare source of healing on Kislev’s roster, so still worth considering.
Kossars (Standard/Spears)
The most basic infantry unit on Kislev’s roster, and also the first of the hybrid units that define their playstyle, Kossars are the rare archers that won’t immediately crumble in melee. Their bows grant them a wide firing arc, which means placing them behind other infantry won’t block line of sight. Standard Kossars do better in melee against infantry, while spears can brace against cavalry or large unit charges, making them ideal for protecting your flanks until you can replace them with something better.
Armored Kossars (Mace/Axe)
Your mid tier frontline for Kislev, Armored Kossars aren’t incredible damage dealers, but can hold the line well against non-armour piercing assaults. They pack a short ranged precursor pistol to pepper enemies on the approach, and if you spread your frontline wide enough, you can use any occupied Kossars to unload their pistols into engaged enemy’s flanks without disrupting your lines too much. Two variants, again. Axe and shield for blocking missile fire, mace for dealing armor piercing damage.
Tzar Guard (Greatsword/Shielded)
Kislev’s elite infantry. No ranged capabilities, but incredible frontline staying power. Use greatsword for mulching through infantry, and shielded for soaking up missile damage.
Streltsi
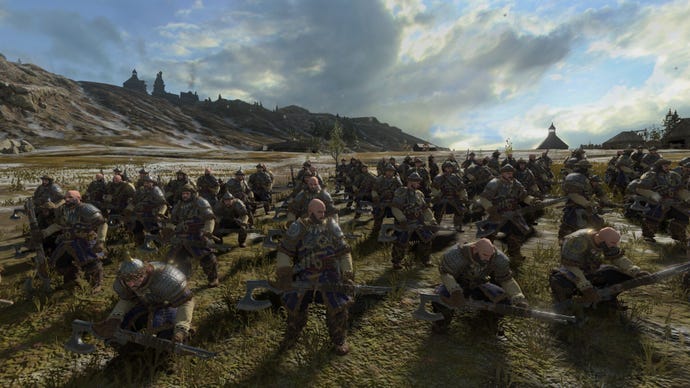
Strelsi rock an impressive - although potentially impractical - axe/rifle combo. You still don’t necessarily want to be using Streltsi as your main melee contingent, at least until they run out of ammunition. But they can at least defend themselves against infantry charges. Their real damage potential is in their rifles, which have a straight firing arc and require line of sight to use. Use elevation if possible, or move them around to the enemy's flanks or back once melee lines have been established.
Ice Guard (Glaive/Sword)
Kislev’s most elite infantry unit. Dangerous from range, and able to melt low tier units in melee. Not too much to be said here. Group two or three units together, wait for whatever you want to die to get in range, and right click.
Kossovite Dervishes
Very light cavalry, likely to get chewed up by even lowly chaos warhounds. Useful for chasing off routing units so they don’t return to the fight, or even a few early game hammer and anvils. Otherwise, replace them with some upgraded mobility sharpish.
Horse Archers
Similarly vulnerable in any sort of melee, horse archers can still make a great early-game harassing unit. Use them to kite sections of an enemy army (The AI loves running after low threats), or to fire into the backs of foes engaged in melee to give your infantry an edge.
Winged Lancers/Gryphon Legion
These shock cavalry units play the same role as any other in Total War - the hammer to your infantry’s anvil. Send them around the flanks, wait until battle lines are drawn, and get those rear charges off. Wait a moment or two for the full impact of the charge to register, pull out, line up, and repeat. Winged Lancers are a touch squishy. Gryphon Legion stand up much better to a protracted melee, but you’ll still want to keep them mobile and charging if possible.
War Bear Riders
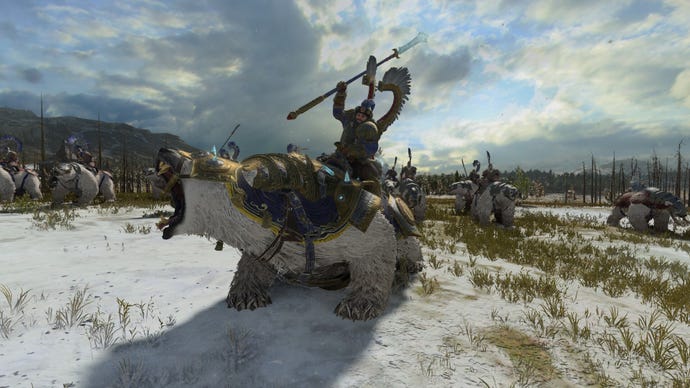
Your anti-large monstrous cavalry choice for Kislev. Definitely no slouch against infantry, especially with their ability to cause Fear, potentially making an enemy route earlier than they otherwise would. But their real strength is against enemy monsters and cavalry. In campaign, you’ll want to grab the tech that gives them Frenzy, granting some serious combat buffs.
Little Grom
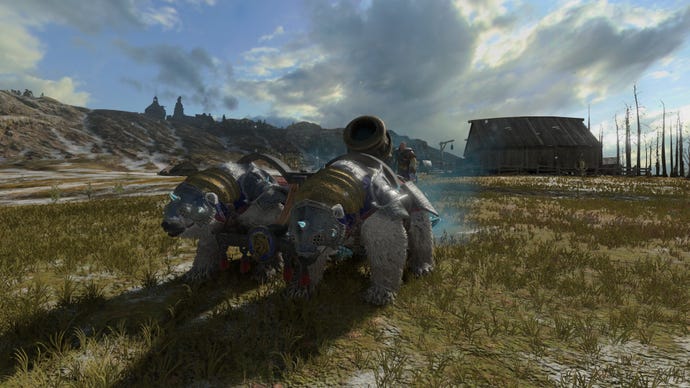
Little Grom implies the existence of a Big Grom, which, once you’ve used this huge cannon pulled by two polar bears, is a terrifying concept. This long ranged artillery piece will put a decent dent in enemy infantry, but its real use is sniping large units on the approach. Focus fire two of these on a soul grinder or greater demon and watch it crumble like meringue.
War Sleds (Light/Heavy)
Effectively a missile chariot, these bear-pulled sleds can be used to harass and flank until they run out of ammo, then charged into enemy infantry. They’ve got respectable speed, especially the light variant, but can still be caught out by some enemy shock cavalry, so keep an eye on them while kiting.
Snow Leopard
The fastest unit in Kislev’s roster, with an anti-large bonus, ideal for chasing down mid-tier cavalry, or disrupting archer lines.
Elemental Bear
While not a huge damage dealer, a 10k health pool and terror causing ability makes the Elemental Bear a great frontline anti-infantry bulwark, with a frostbite causing breath attack to take the momentum out of oncoming enemy charges.
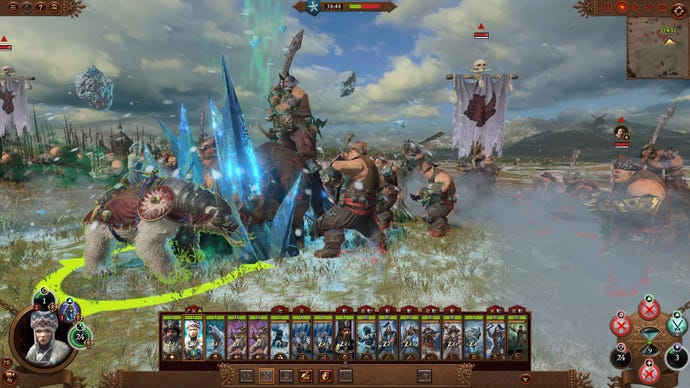
Kislev Magic spells list
Kislev’s magic comes in two flavors: the lore of ice, and the lore of tempest. While each has its uses, they’re extremely powerful when used in unison with the rest of Kislev’s roster. Read on for a breakdown of each spell.
Ice spells:
- Ice Sheet: With a huge AOE effect that debuffs enemy movement and charge speed by 25%, this can be further combined with magic that causes frostbite to seriously hamper your foe’s approach, giving Kislev’s missile contingent more time to unleash their deadly volleys.
- Ice Maiden's Kiss: A tear-shaped AOE attack with a short wind-up. Low damage, but great for disrupting infantry formations. Also causes Frostbite - a 30% speed debuff for 10 seconds.
- Frost Blades: A 26 second buff to melee attack, armor piercing damage, and base weapon damage, useful for helping your melee infantry end an engagement quickly and reposition where needed, or aiding a single entity bogged down in an unfavorable engagement.
- Death Frost: A direct damage spell, best used against enemy lords or heroes, specifically while dueling to try and route a character by piling on lots of damage in a short period.
- Crystal Sanctuary: Great for buffing your frontline with a massive 60% damage reduction for 35 seconds. They won’t be able to move during this time, though.
- Heart of Winter: An anti-infantry direct damage spell that increases in intensity every 8 seconds, dealing more damage and slowing the enemy unit. Powerful, but expensive, so best combined with ranged fire to deal with elite enemy infantry before they reach your lines.
Tempest spells:
- Gust of True Flight: Possibly my favorite of Kislev’s spells, especially when combined with the speed reduction from the lore of ice. Granting a 30% range and accuracy buff, with an AOE effect when overcast, this can turn entire formations of Little Groms and Ice Guard into deadly snipers. Disgusting, to be honest.
- Hailstorm: A high damage, low cost AOE spell, great for punishing blobs of enemy infantry.
- Swiftwing: A 40% charge bonus and 25% speed buff. Useful for a caster/bear cav combo.
- Biting Wind: A rectangle-shaped AOE, able to blast through ranks of infantry. Not incredibly powerful, but good for edging even melee engagements.
- Hawks of Miska: A vortex spell that can tear through enemy ranks, though random movement means its effectiveness can vary. Not armor piercing, so best used against low tier infantry, especially as it confers a leadership penalty. Unlike most vortexes. this one doesn’t cause friendly fire. Always a plus.
- Blizzard: Another vortex, this time with armor piercing damage, a static AOE, and Frostbite. This will affect your own troops, so best used against pinned enemy blobs.
Kislev battle tactics
We’ve looked at each unit in the Kislev roster, and the two unique lores of magic Kislev have at their disposal. So, how do you combine it all to make Kislev a formidable force on the battlefield? Here are some general tips to get the most out of Kislev.
Make the enemy come to you
While decent cavalry, chariot, and monster options grant Kislev some respectable mobility, their strongest units, the Ice Guard and Little Grom, all excel from range. Set up defensive battle lines with your Ice Guard and Little Grom close together, then use an overcast Gust of True Flight for that range and accuracy buff. Once you start sniping out some key units, the enemy army will be forced to move up on you. Then, you start laying down Ice Sheets and any other spell that causes Frostbite, slowing the enemy approach, and giving your ranged troops even more time to fire. By the time they get there, they should be softened up enough for you to make short work of them.
Bring out the bears
Kislev’s frontline troops are solid, but with the exception of the Tzar Guard, they aren’t the best damage dealers - especially when up against more melee focused factions like Khorne. Ice Guard can deal great damage in melee, but low armor and defense means they aren’t suited to line holding. Keep some bear cav and war sleds in reserve, and once the enemy hits your front line, move them around the flanks to disrupt enemy missiles and swing melee engagements in your favor.
Don’t underestimate the lowly Kossar
Despite being the weakest infantry unit in the Kislev roster, Kossars can still be surprisingly effective. Kislev’s ‘by our blood’ ability is factionwide, granting unbreakable to wavering units, which temporarily nullifies the main weakness of low tier infantry. This way, you can use some Kossars as a front line and fire into enemy flanks with others. If you’re low on funds early in the game, it’s worth trying out a wide build with lots of Kossars rather than a smaller, elite army. As anyone who's ever gone up against skavenslave slingers will tell you, even low tier missiles can do serious work if you focus fire enough of them.
Kislev campaign tactics
No matter which Legendary Lord you choose with Kislev, you’ll be using similar campaign mechanics. Here’s a brief overview of each, as well as how to get the most out of it during your Kislev campaign.
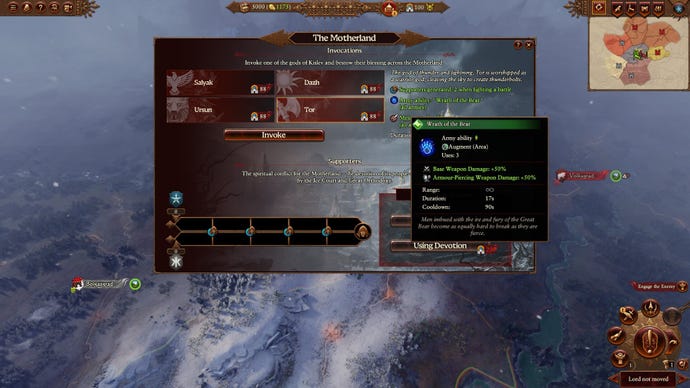
The Motherland
- The Motherland tab is split into a few different mechanics, but most of it centers around Kislev’s unique resource, called Devotion.
- The best way to gain Devotion is by winning battles against Chaos forces, with passive income from the Orthodoxy building chain a close second. Fighting against other Kislev forces loses you devotion, however.
- High devotion means less chance of a random chaos incursion. Note that these chaos armies are separate from the ones that emerge from rifts and the named chaos factions on the campaign map: you’ll still have to deal with those, regardless.
- Devotion can be spent on four different invocations, each of which can be upgraded through Kislev’s tech tree.
- Each invocation grants Kislev’s secondary unique resource - supporters - upon completion of certain actions while the invocation is in effect. Read each one carefully and plan ahead depending on what you’ll be doing in the next few turns.
- Supporters grant factionwide diplomatic and control bonuses, providing you can beat your rival Kislev faction to certain milestones. Honestly, don’t worry about this too much. As long as you’re keeping invocations active and building a decent amount of churches, you’ll win the race.
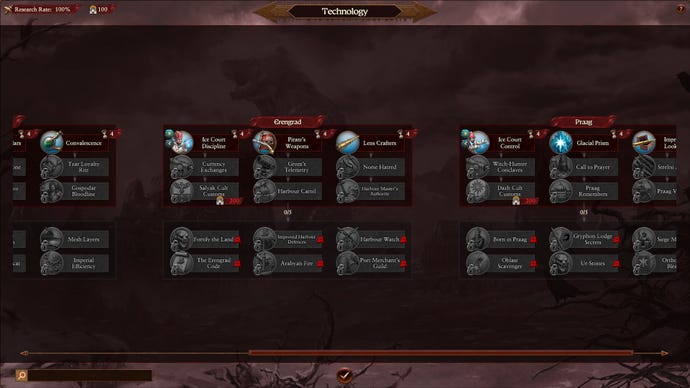
Kislev, Erengrad, and Praag
- Succeeding as Kislev means gaining control of these three major settlements as soon as possible, and holding them.
- Each of the three under your control unlocks top tier technologies, and grants access to some powerful unique landmark buildings to supercharge your economy.
- Being single settlement provinces, each one is extremely defensible. Together, they provide your main bulwark against chaos.
The Ice Court
The Ice Court is simple to use; just make sure you recruit spellcasters and lords from here rather than their basic building chains if possible, as they’ll end up far more powerful in the long run.
Atamans
Another easy to use system that grants you one governor for every two provinces you control. They are able to confer income, control, or corruption bonuses across those provinces. As a side note, corruption is much more impactful in Warhammer 3, for Kislev especially. Any edge you can get to reduce it shouldn’t be underestimated.
That covers it for getting the most out of Kislev! While they favour a ranged, defensive playstyle, the roster is versatile enough to respond to most situations. Kislev’s campaign is one of the more thematic, and challenging, campaigns in the game, and sure to be a fan favorite. Looking for more tips? Check out our Total War: Warhammer 3 beginner’s guide to kickstart your campaign. Or, If you want to know more about the game, here’s our Total War: Warhammer 3 review.
