The Flare Path: Hillocks and Pillocks
A Field of Glory II tussle tale
Subtle slope textures and a lack of unit bases and battle replays make Field of Glory II a tricky wargame to After Action Report. I can't promise that today's aggro account will be easy to follow, but I'll be mortified if it baffles and bores. The fabulous FoGII is to tedium what Domestos, the Greek god of sanitaryware, is to all known germs. Any wargame correspondent that suggests otherwise deserves to be thrown to the lions.
My last scrap was a randomly generated clash between some beligerent Belgae and some riled Romans. While it wasn't as nailbiting or as tidal as some of the FoGII battles I've orchestrated during the past fortnight, it gripped from start to finish so arguably represents Byzantine's latest tactical TBS as accurately as any other. Combine today's combat yarn with my beta impressions to understand why FoGII is currently wearing a coveted Flare Path 'Best of Breed' rosette on its lapel.
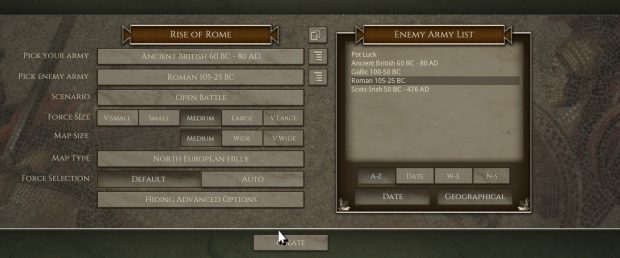
Combat mechanics might be firmly rooted in history's rich loam, but an extremely flexible battle sequence and single clash generator, and a selection of ancient factions as long as the Appian Way, mean FoGII is just as happy recreating far-fetched Greeks vs. Gauls or Seleucids vs. Scots tussles as battles involving historical sparring partners. If you'd rather keep things plausible then the 'geographical' button on the battle set-up screen helpfully filters out unlikely match-ups. What follows is a Gallic Wars episode that Julius Caesar failed to mention in Commentarii de Bello Gallico.
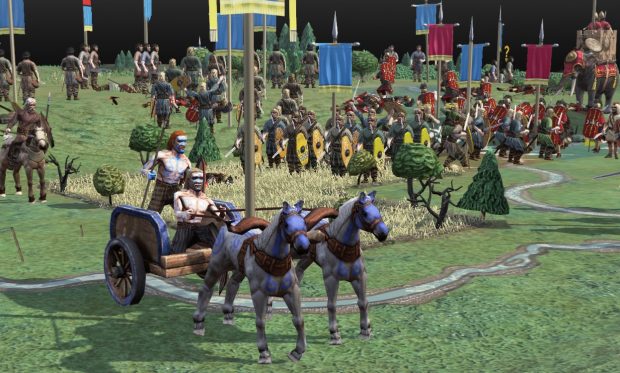
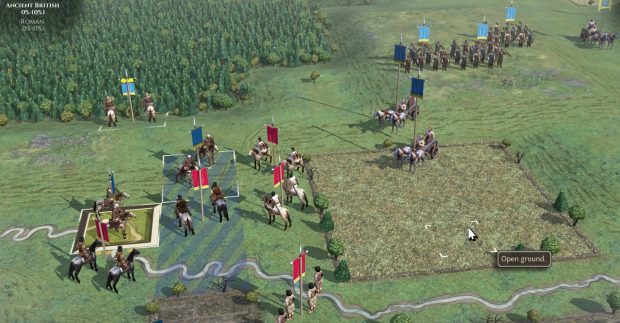
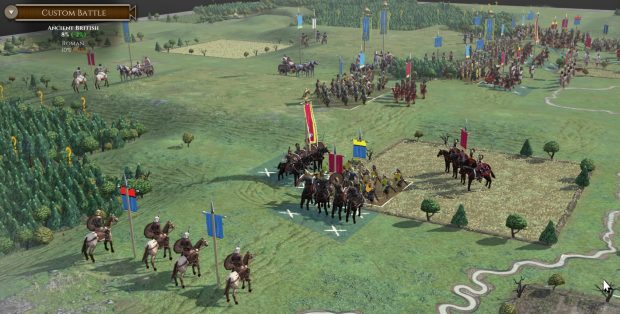
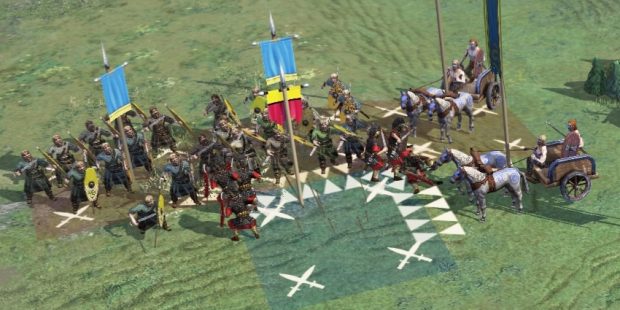
It's 54 BC. On the west side of a shallow valley in what will one day be known as Hampshire my army of Ancient Britons prepares to meet the Men Who March in Rows for the first time.
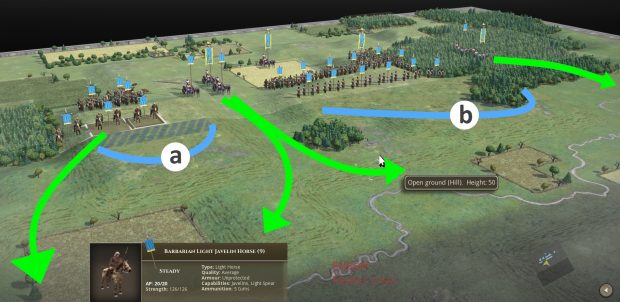
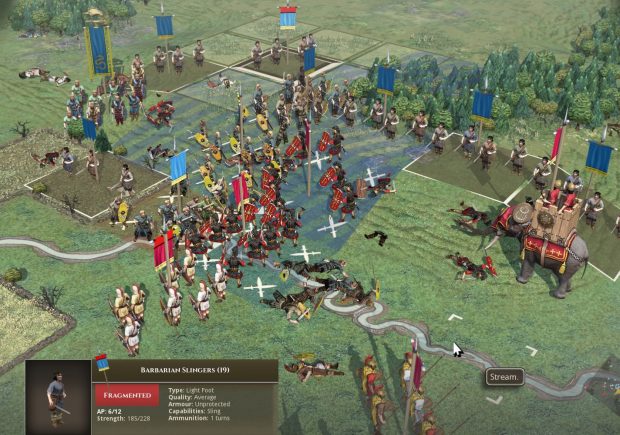
We don't yet know the exact composition of the enemy force but as their heavy infantry are likely to be numerous, well trained and well armed, I'm already thinking defensively. Just ahead of our deployment position are two low hills, 'A' and 'B' in the above pic, that could prove crucial in the fighting to come. I plan to picket these protuberances with my infantry, a mix of warbands and slingers, while my cavalry and chariots work to fragment the Roman assault.
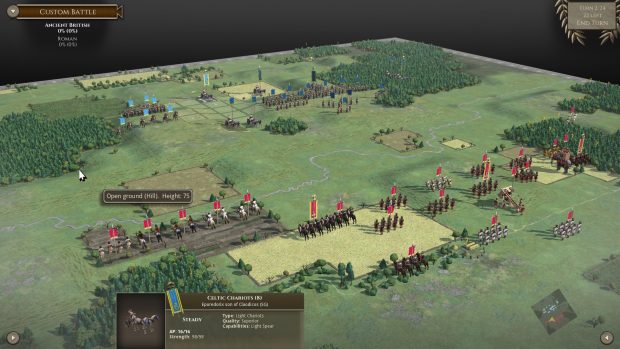
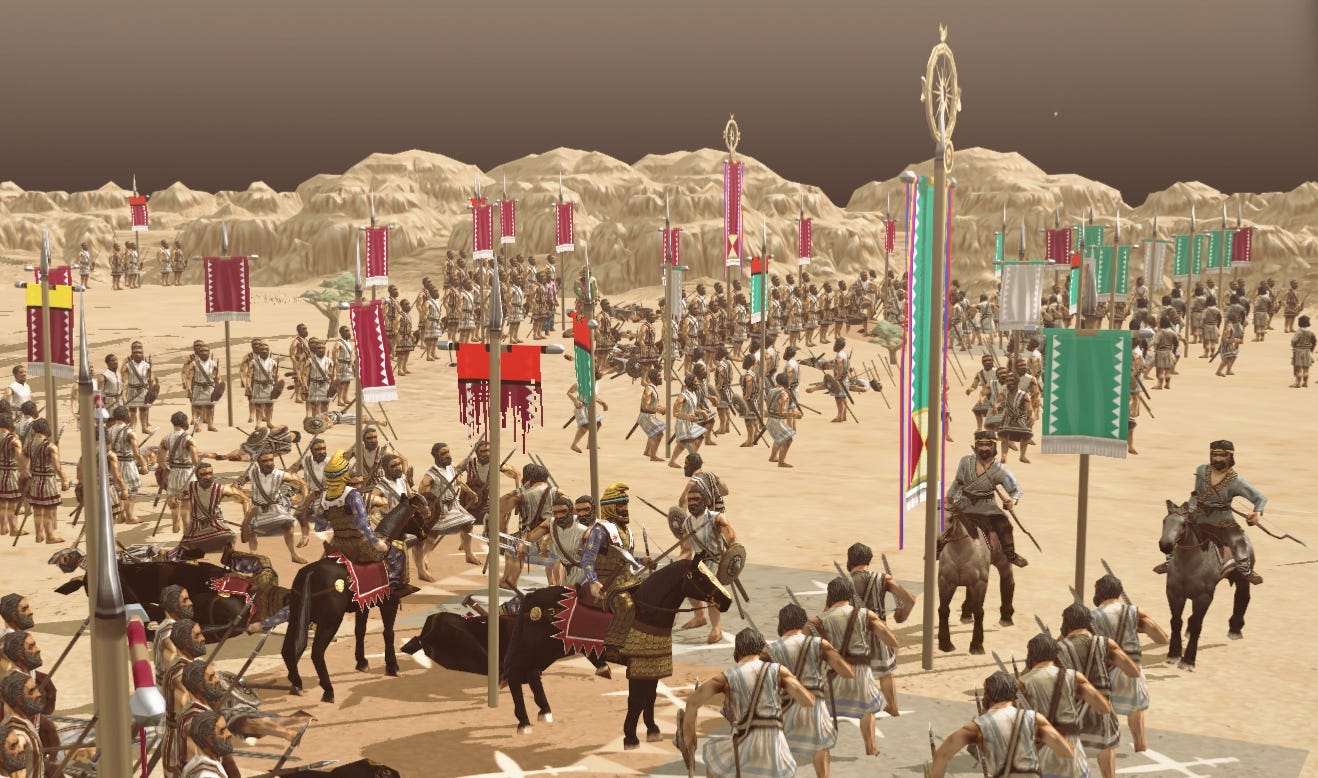
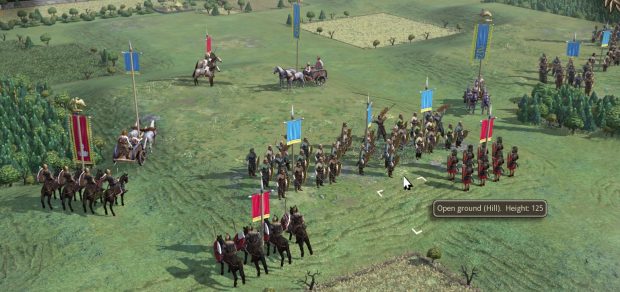
A rising sun as pink as a ripe spindleberry burns away the Fog of War to reveal an opposing army dotted with the strange and the shiny. The invaders have brought war beasts as tall and wrinkled as old oak trees, and devices that clack like scared blackbirds before hurling huge bolts amazing distances.
In the first few turns my warbands and slingers scamper forward eager to take possession of the two hillocks. The Romans watch and wait.
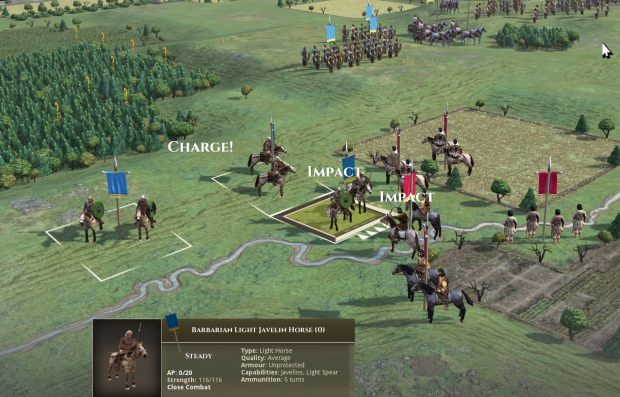
Eventually, several knots of light Roman cavalry are lured away from their positions on the enemy left by a foray by my mounted barbarians. Hooves drum cropped valley turf, javelins fly, men on both sides tumble from their mounts. All light troops in FoGII 'auto-evade' which lends pleasing dynamism to side skirmishes like this. When charged, horsemen and missile troops generally scatter – they rarely end up locked in costly melees.
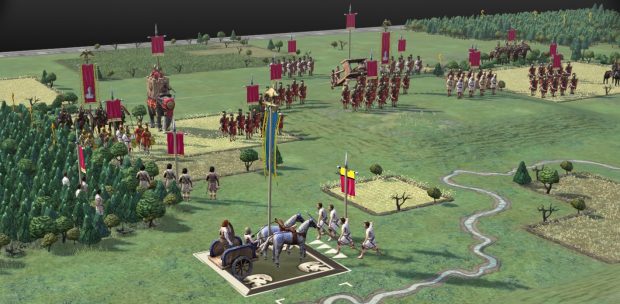
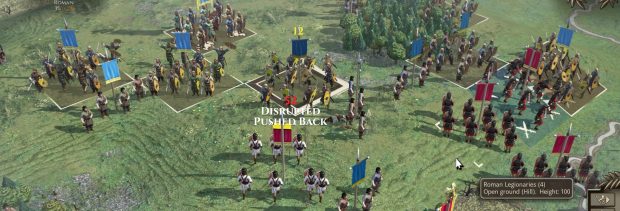
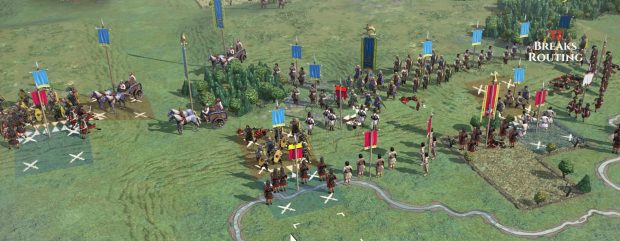
On the other flank, one of my two sub-generals, Cacumattos, emerging from the woodland that has screened and slowed his advance, veers right heading for a line of unprotected enemy missile troops that have also just quit leafy hiding places. The first threatened unit dodges the thundering war wagons but the one beyond it is less sprightly and winds up depleted and 'disrupted'. Cohesion is vitally important in FoGII. Units are far more likely to rout – the final state on a three-stage composure track - than be completely wiped out in combat.
A second chariot lunge proves too much for the alarmed Roman javelin troops and the sight of a woad-daubed Cacumattos pursuing vanquished foes along the river bank seems to finally persuade the Roman C-in-C that the time for action has arrived. Weak morning sunlight glitters on rippling armour segments and bobbing pila points as blocks of impressive legionaries begin their advance.
Outnumbered, my barbarian horsemen are coming off worse in the cavalry duel unfolding on my right, so I send two chariots from the centre to assist.
For a horrible moment it looks as though Cacumattos' keenness to chase down fleeing routers may end up costing him his life (Auto-pursuits have been toned down in FoGII but they still add delicious unpredictability at times).
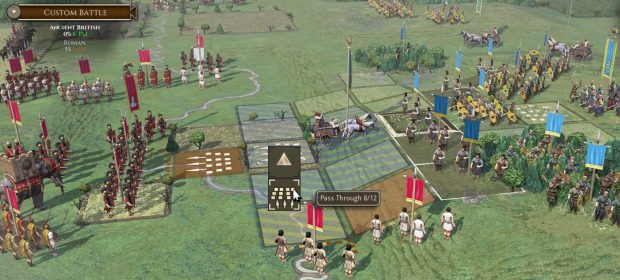
The tramping legions are bearing down on him and his blood-spattered combat cabriolets when he finally abandons the pursuit, allowing me to steer him towards friendly lines. To make doubly sure my sub-general gets away, I utilize the useful 'pass-through' ability of a band of nearby slingers (light troops can transit squares occupied by unengaged comrades) to create a short-term screen sure to retreat if charged by the approaching imperialists.
My first clear-cut blunder? Annoyed by the enemy javelin chuckers sniping the slingers atop Hill B, I attempt a charge. Not unpredictably, the chargees skedaddle and the chargers end up cooling their heels in the stream at the foot of the slope.
The overbold Britons are attempting to rejoin their pals when Caesar's shocktroops catch up with them. Only a well-timed lunge by the chariot too slow to join in Cacumattos' early rampage prevents the vulnerable warband from becoming the victim of a multi-pronged mugging.
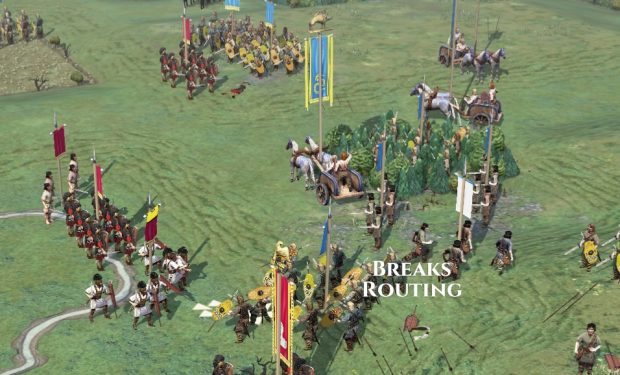
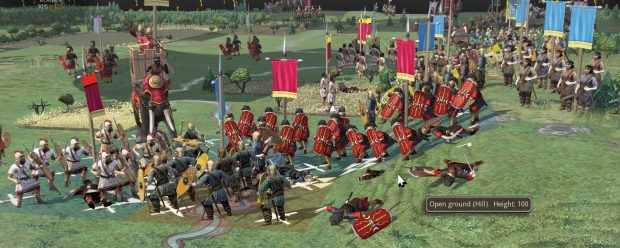
Byzantine's TacAI respects terrain, combines troop types cleverly and isn't easily distracted or exploited. It's extremely capable, but happily isn't completely machine-like. At the beginning of turn 11, my adversary, Sertorius Albanus, makes a miniature mistake. The first Roman unit to cross swords with a Celtic warband on the summit of Hill B is an oblong of relatively callow legionaries. Their inexperience and the difficult terrain tells. Bloodied and disrupted the greenhorns immediately break off what, in other circumstances, would have been a lengthy multi-turn melee, and retreat down the slope. Cat-calls and sling stones hurry them on their way.
Next-door on Hill A the situation is more worrying. Heavy Roman cavalry keen to participate in the peripatetic cavalry clashes on my right, have driven off two of my chariot units and are now pursuing the maneuvering conveyances through gaps in my line. If these infiltrators decide to clatter my hill defenders from the rear while said defenders are busy fending off frontal attacks, I could be in serious trouble.
Sometimes light troops aren't saved by their excellent mobility. My first routed unit is a cluster of slingers savaged on the front of Hill B by a block of general-led legionaries.
What a pillock. I've done it again. Tempted by a promising 'likely results' tooltip (you can get a feel for the results of attacks by hovering your cursor over a potential target) I order a charge from Hill A. The target escapes and once again I find myself contemplating a dangerously isolated unit. This time the marooned warband is quickly set upon by marauding heavy cavalry. I've two barbarian cavalry units close-by but neither are much of a threat to the hostile horsemen. Sorry chaps, you're on your own.
Turn 15 begins with foreseeable slaughter on my right (That wayward warband was swiftly cut to pieces by the Roman cavalry). Elsewhere the picture is murkier. Hill A appears to be fairly safe for the time being. Aided by a pair of chariots the two remaining warbands on the knoll are offering stiff resistance. Hill B I'm less confident about.
Although my men have managed to see off the initial assault, routing a Roman legion in the process...
...I've got a warband living on borrowed time on the extreme left of my line.
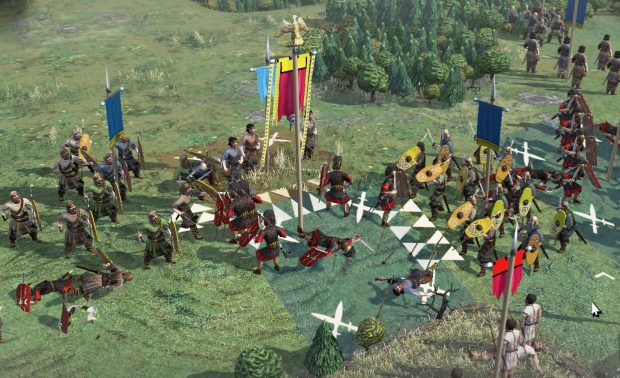
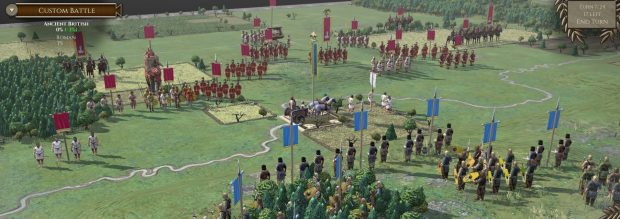
The crimson roller crashes against the British breakwater, recedes, then crashes again. Because the doomed heroes in the stream refuse to sell their lives cheaply, and a nearby chariot team continually harry the Roman right, the pressure on the front of Hill B isn't as intense as it might be; I have time and opportunity to isolate and smash a key Roman unit, the legion led by Sertorius Albanus himself. Chipped at from three sides simultaneously, the keystone of the Roman attack is loosened and dislodged, finally rolling back down the slope a turn before my warband in the brook disintegrates.
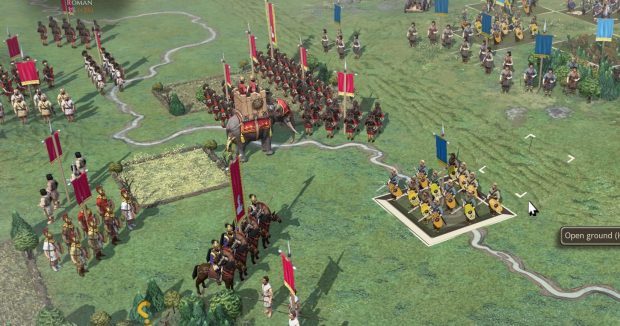
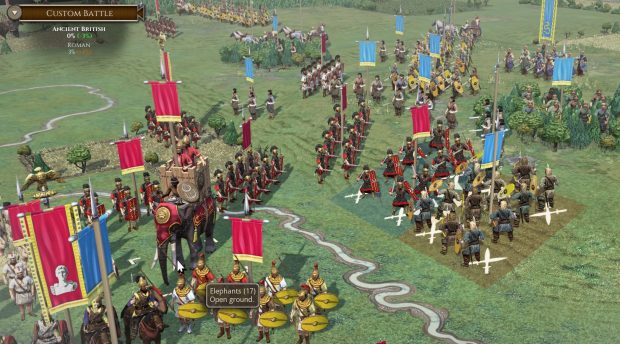
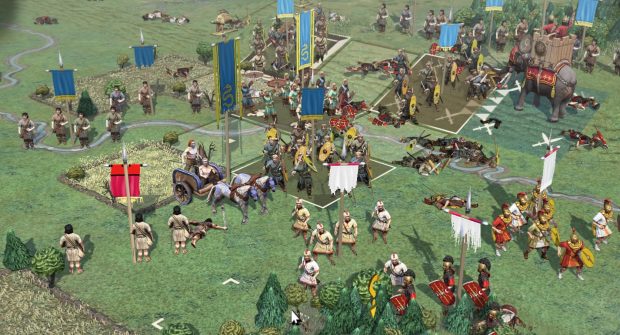
FoGII fights have a lovely habit of spawning satellite skirmishes and re-orientating as circumstances change. Around turn 20 just such an unscripted reorientation occurs as the core of the Roman infantry supported by a pachyderm whose contribution has been almost as slight as that of the ballistae thus far (odd because war elephants often cause havoc in engagements) re-align in an attempt to tackle the warbands on the slope behind them. If the foes above were medium or heavy infantry rather than fairly harmless slingers then I'm sure Roman tactics would have been quite different at this point.
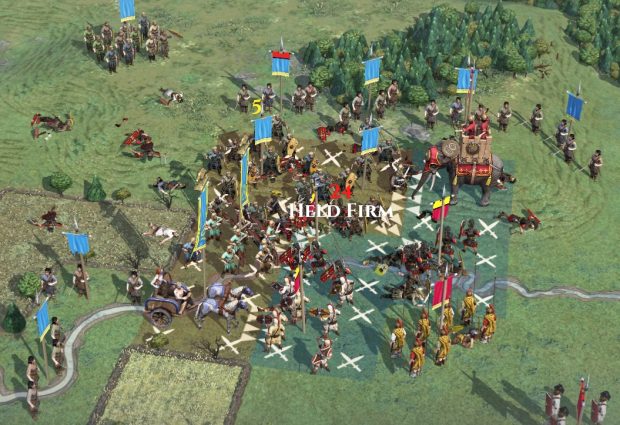
The pebble pelters on Hill B can do little but look on as the mass of soldiery below hack, slash, pummel and jab their way to a battle result. There are half a dozen smaller two- and three-unit skirmishes happening elsewhere on the map, but the outcome of today's tussle won't be decided by clumps of light cavalry or rallied routers in far-flung map corners.

Battered by baying infantry in its centre and grazed by speeding chariots at its periphery, the clot of Roman warriors eventually begins to distort. A routed unit unnerves neighbours and one of FoGII's utterly plausible 'cowardice cascades' finally sparks a local collapse, pushing the enemy routed total above the magic victory percentile.
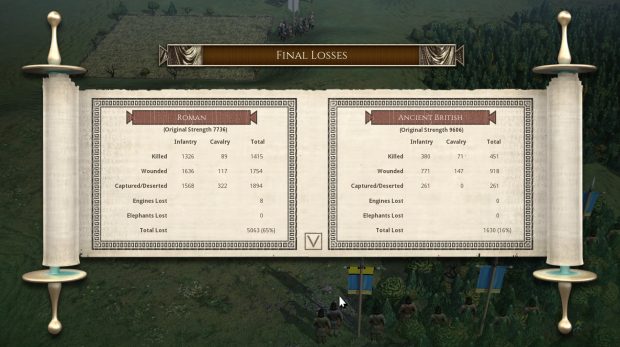
Thanks largely to some favourable randomly-generated terrain and some inspired chariot choreography, I've won a fairly convincing 'Legate' victory (Legate is the third of the game's six difficulty levels. The higher the level, the larger the enemy army you face). If I was a true Belgae warlord I'd now accept the offer to 'mop up' and busy myself running down routers, scavenging souvenirs and collecting heads until the turn limit expired. Being a sporting 21st Century wargamer with Italian ancestors and an insatiable appetite for FoGII's pacy, plausible violence what I'm actually planning to do is ramp up the difficulty and head to North Africa or the Middle East for some sunnier slaughter.
* * *