Anthem Tyrant Mine stronghold mission - defeating the Swarm Tyrant


The first of three Stronghold missions has you navigate some caverns to stop some relics and other nasty devices from going off. Should you make it to the bottom of the cave, you'll find a monstrously sized surprise in the form of the Swarm Tyrant. It's a fantastic place to farm loot at the endgame in Grandmaster level 1 difficulty. This guide will go through the entire mission, including strategies to defeat the boss.
Anthem Tyrant Mine guide
Looking for help with missions, or how to get to grips with navigation in Anthem? Be sure to check out our Anthem guide for everything you need to know about Bioware's latest space adventure. You can also get more detail on the missions in ourAnthem Missions guide, while the Anthem Strongholds guide has a more general overview on what Strongholds are. However you're probably here for tips for the Tyrant Swarm though.
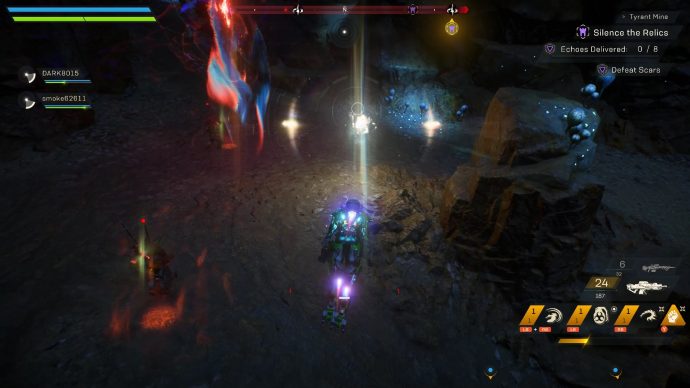
As soon as you begin, follow the directions to the waypoint and you'll be told that there are eight relics that need delivering to the relic that's currently active. Scars will be constantly attacking you the entire time and will be respawning as you progress. The best strategy is to stick together for the first portion, with the more nimble teammates seeking the echoes, while the tankier ones, such as the Colossus, draws enemy fire.
If you are one of the echo gatherers, don't go too far away from your teammates, since you may need reviving. Work your way through the defences, focusing on the towers primarily, and eventually you'll nab all eight of them. Once you have them all gathered and stopped the relic, kill the rest of the Scar to advance further into the mission.
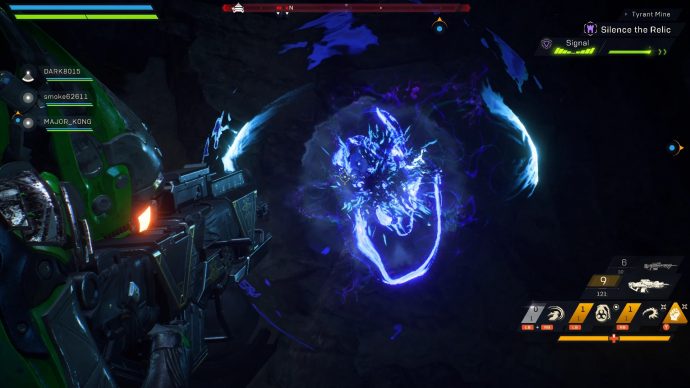
A little bit further on, you'll find another relic going berserk that needs sealing. This one will take 12 echoes to shut for good, however it's much the same strategy: Advance together when you can, with the more nimble Javelins breaking off a short distance to obtain the echoes. Some will be locked behind prisons, requiring you to kill the Scar forces nearby to unlock them. Deliver them to the relic and kill any remaining Scars to advance.
As you fly to the next objective, you may find that you stop suddenly. This is because you'll have flown into some spider webs. Spider webs instantly overheat your Javelin, but it also renders you immobile for a short time afterwards. Though it's not particularly dangerous for this to happen at this moment of time, it's a sign of things to come, so keep that in mind.
The next section has you try to obtain some fragments. They're all shown on the HUD, but require you to head to fragments that are surprisingly far away. You'll be attacked by Skorpions as you deliver them to the pedestal in the centre of the map. Once you've delivered all six though, some more Scar will appear via portals and Hives, in an attempt to disrupt your signal. As they attack, keep an eye out for the electrical elementals that will float into existence.
Tyrant Mine boss - Swarm Tyrant
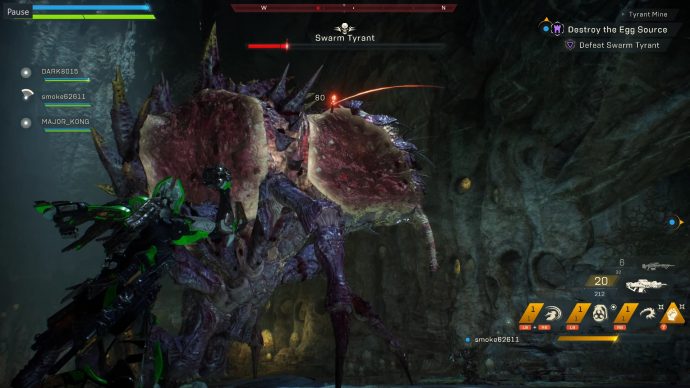
This Stronghold's boss is more than enough to give most players arachnophobia. It's a giant spider with two bulging sacs on either side, making for a total of four weak points. It'll begin the battle climbing to the top of the central mound, before making a big leap. This jump is incredibly painful, so try not to group together for minimal damage to the whole team. If someone is taken down by this attack, you can try to pick them back up at a later point in the fight when the Swarm Tyrant is not too close to the area.
The first phase isn't too bad in all honesty if you keep on your toes, but there are some things to watch out for. It can spit acid at a fair distance, but also webs that will instantly "overheat" your Javelin, while sticking you to the spot. This is as bad as it'll get for those attacking from afar, since it can close the distance and wipe out your health in an instant. Those up close are more at risk, as the tyrant can slam on the ground, crushing you underneath, or even leap towards you for a huge amount of damage.
It does however have four, very large, glowing weak points. Those sacs paint a massive target on the tyrant and will eventually explode if damaged enough. The tyrant also doesn't have a shield, meaning that primers and detonators will work against the boss in all of its forms. I'd highly recommend using ice-based attacks since they'll freeze the giant arachnid on the spot, giving your team some breathing room. When one of the sacs does explode, the boss will be momentarily stunned, allowing you to rain a hail of bullets on the other weak points.
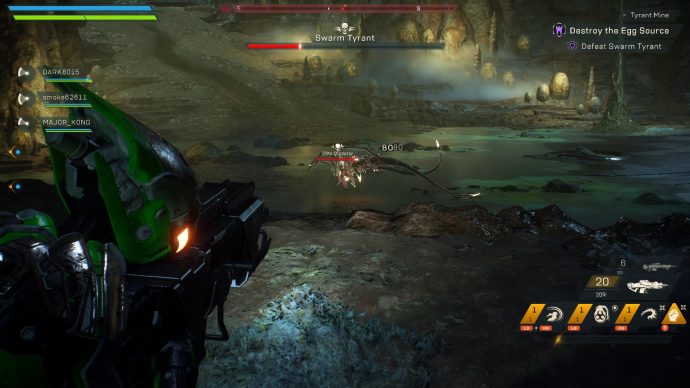
Once a sac is gone, it'll disappear back up the pipe. You'll then need to kill swarm upon swarm of Skorpions flooding in from outside the arena walls. Keep killing them until the tyrant returns, but don't stick too close to the edge: She can make a big leap out of one of the holes that's very hard to avoid. Clumping together at this point is just as risky as during the initial attack of the fight. Keep attacking the weak points, even once the sacs have all erupted, and you'll eventually take down this overgrown spider.
That's all on this Stronghold. If you want to learn more, our guides on Anthem Missions and Anthem Strongholds, and Anthem Endgame, as they include tips and information you may not know.