Colonel Croesus: Turn 13

Last turn the Comment Commanders flushed out a Tiger with a Sherman-tipped pitchfork. This turn they transform that pitchfork into a trident in an effort to finish the ferrous feline.
(Colonel Croesus is an open-to-all game of Combat Mission: Fortress Italy in which Allied forces are orchestrated by commenters while German units are computer controlled. Each daily turn covers one minute of WeGo action. For a scenario outline and accounts of earlier turns, click here).
While the central tine of the trident, the Achilles tank destroyer, is advancing, the right-hand tine, Crabmeat 1, is temporarily retracting. Before backpedalling, Crosbie's Sherman broadcasts a fan of smoke grenades and spits a second AP round at Steiner's mount. The shell passes close enough to the turret of the target to remove the haughty Hauptmann's cap with its slipstream. No other damage is caused.

By T+4 Crabmeat 1 has broken contact, and the commander of Crabmeat 2 is as dead as a door nail.
It's possible I was inadvertently responsible for Sergeant Nemchik's (Charles Bronson) demise (in my defence, CMFI's hatch controls are horrid). Then again, his premature unbuttoning may have been the deliberate act of a fearless TC keen to keep track of a barely visible quarry.

Uninterested in Nemchik's precise motivation, the MG 34 marksman in the pillbox plugs Crosbie's pal almost as soon as he appears. The last thing Crabmeat 2's craggy leader sees is his tank score a hit on the Panzer VI's right flank. The hit causes needles of red-hot spall to ricochet around the Tiger's interior.
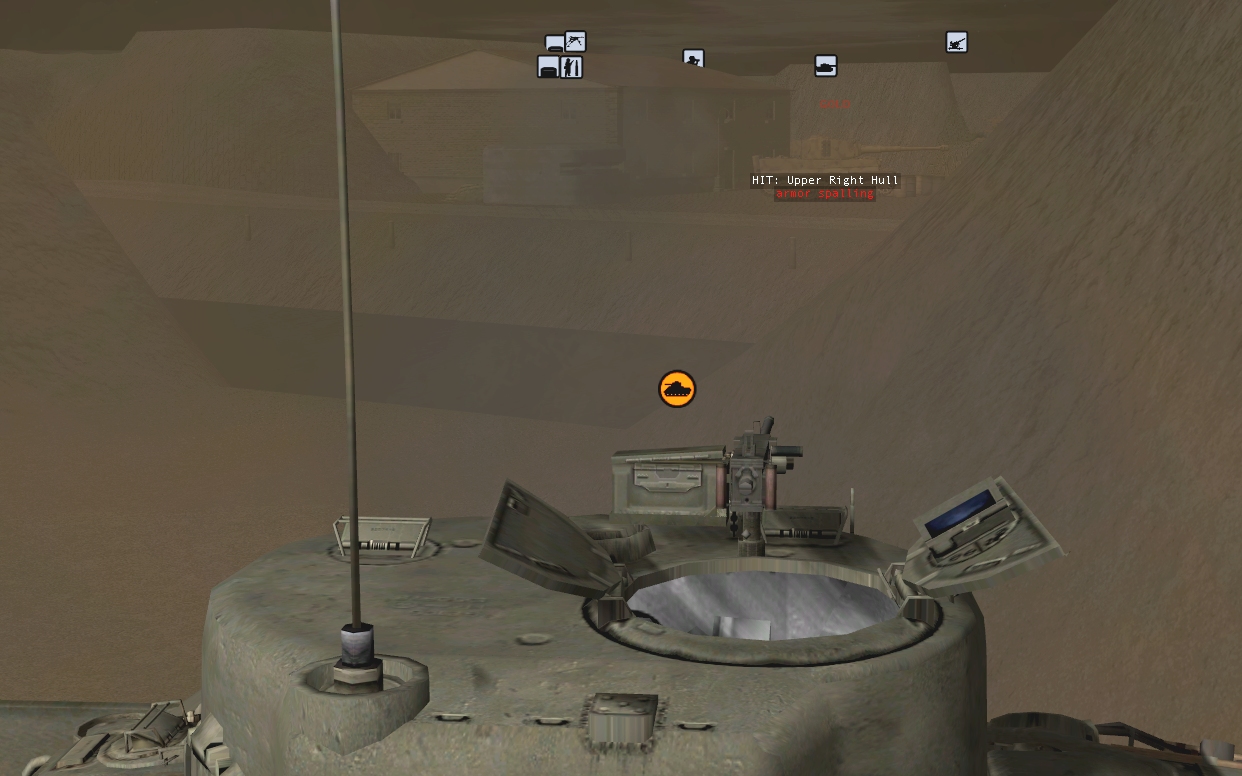
The pillbox crew seem to be out for Men of the Match awards. After nailing Nemchik, they turn their MG 34 on the TD emerging from SILVER's northern exit. Their reward is an inconsequential weapon mount hit and a 17lb HE shell in the kisser. One machinegunner slumps to the floor, clutching his throat, only to be replaced by another crewman moments later.

The middle third of Turn 13 is the truly decisive third. There are sideshows in BRASS (where Squires is felled by the armoured car while attempting to snipe a deck gun returnee)...

...and BRONZE (the Wasp incinerates a knot of aspiring ambushers)...

...but it's the events in GOLD during this hectic twenty-second passage of play that alter the balance of battle irrevocably.

As Crabmeat 1 reappears at S3 after her tricksy faux withdrawal, she draws fire from three German units almost simultaneously. The LMG and deck gun fusillades, she shrugs off with ease.

It's the shot from the patient Tiger (Steiner knows Crosbie too well to be taken in by his retreat ruse) that stops her in her tracks.

Flames licking at their heels, four of the Sherman's five crewmen manage to bail. The one casualty is a man with no name. In the credits he's listed simply as 'Sleepy Texan'.

Any smugness Steiner might be feeling after pedestrianising Crosbie, vanishes five seconds later when Crabmeat 2, third time lucky, partially penetrates the Panzer VI with another flank shot.
The 75mm diameter hole is still glowing, when the driver of the Achilles applies his brakes, and Lieutenant Ashbridge (Roger Moore) requests “One into the turret ring, if you please, Mr. Matthews”.
The resulting explosion is instantaneous and titanic, a fact that the writers of Colonel Croesus II chose to ignore (Wolf Kahler reprised his role in the disappointing sequel).


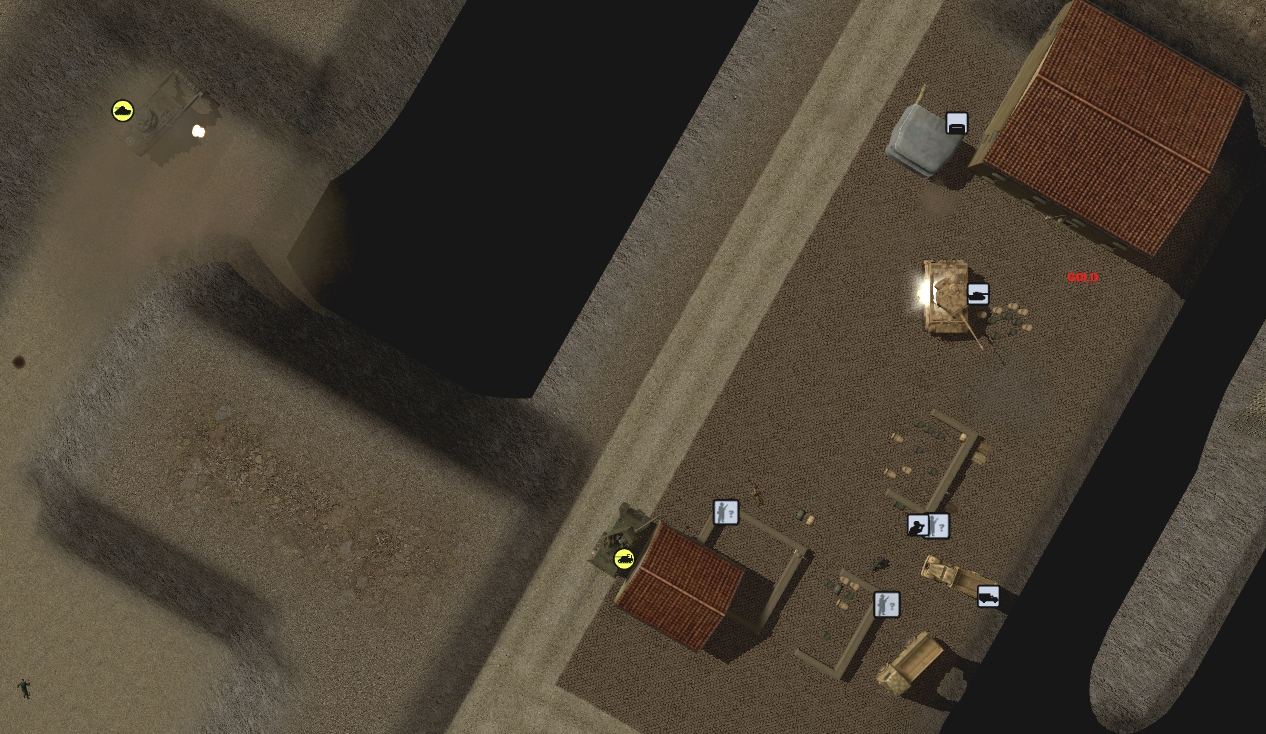
The situation at T+60:
Surviving enemy units include the pillbox at j16, the AC on the slipway, and, amazingly, the U-boat deck gun.

These two diehards seem to be making for the walls at o/p14.

3rd Squad's taxi is passing the Achilles when the clock stops.

Moffat's mate has yet to pick up the PIAT. 1st Squad and Rocca look to have recovered their composure. They may be willing to execute orders in Turn 14.


