Immortals Fenyx Rising ending: Vault of Typhon walkthrough
Learn how to complete the Vault of Typhon on Nightmare difficulty


Trying to beat the Vault of Typhon and reach the Immortals Fenyx Rising ending? It's been a very long journey to this point, but once you're ready, you can toss yourself into the volcano at the centre of the Golden Isle to tackle your final challenge: the Vault of Typhon, containing the evil titan himself.
The Vault of Typhon marks the true Immortals Fenyx Rising ending. It's a sprawling dungeon, filled with complex puzzles and brutal boss fights. But never fear - in this guide we'll walk you through the entire Vault of Typon, so that even on Nightmare difficulty you'll be able to clear this final ultimate challenge and sit back for the credits.
Note: Massive spoilers follow, obviously. You've been warned.
On this page:
- Immortals Fenyx Rising Vault of Typhon walkthrough video
- Preparing for the Vault of Typhon
- Typhon fight
- Vault of Typhon
- Near left path
- Far left path
- Near right path
- Far right path
- End of the Vault
- Second Typhon fight
Immortals Fenyx Rising Vault of Typhon walkthrough video

For those of you who need a bit of help in the Vault of Typhon and getting to the Immortals Fenyx Rising ending, above is a full video walkthrough covering everything from the moment I dive into the Gates of Tartaros. Everything in this video was done on Nightmare difficulty, so you can really see how to get things done with this walkthrough! If you'd rather read through step-by-step, you can find a full written walkthrough below.
Preparing for the Vault of Typhon
Once you drop into the volcano in the Gates of Tartaros, you won't be able to return to the Golden Isle again. A "Typhon Save" file will be made just beforehand, so that after the game is finished you can reload to this point and continue exploring the Golden Isle. But once you drop into Tartaros, there's no turning back.
For this reason, you'll need to make sure you're prepared to fight Typhon. If you haven't already, this would be a great time to consult our pages on finding the best weapons in Immortals Fenyx Rising and the best gear in Immortals Fenyx Rising to help get you equipped with the best loot the Golden Isle has to offer.
Typhon fight
Once you're ready, here's the first step: climb to the very top of the Gates of Tartaros and throw yourself into the volcano. Good? Good.
Now after a lengthy cutscene, you'll at long last get to face Typhon himself in single combat. He's really not that difficult, even on Nightmare difficulty, because all his moves are so telegraphed. There are three main moves to watch out for:
- He'll grab a chunk of rock from the ground, fly up and then slam back down, creating an unblockable damaging shockwave that you must jump over. This move also leaves behind an area around the slam that damages you over time if you're inside it, so stay at a distance and let him come to you.
- His foot will glow red and he'll stomp the ground, damaging in an area of effect about as big as him. It's an unblockable attack, so dodge through the damage at the right moment and continue attacking.
- He'll shove his tentacled arm into the ground, and then spin around 360 degrees to try and swipe you. This is a great move, because as long as you're directly under him, it won't hit you at all, so just keep attacking.

That's all there is to him. Drink your damage and defence potions, and just keep whaling at him with Hephaistos's Hammer and your most damaging attacks (whether they be light or heavy). If you're damaged, heal up and get back to taking his legs out from under him. He'll topple soon enough, triggering another even lengthier cutscene.
Vault of Typhon

Next time you regain control of Fenyx, you're in the Vault of Typhon, and it turns out that fight you just had... never happened. So that's great.
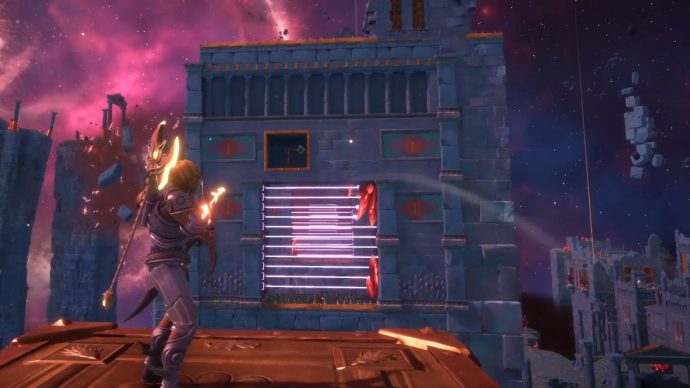
First step in the Vault of Typhon is to open the main doors in front of you by activating the four crystals. There's a line of four puzzles in front of the door:
- 1st puzzle: push the smaller cube until the larger cube activates the pressure plate.
- 2nd puzzle: reverse the air current so you can roll the ball forwards, then reverse the current again so you can roll it into the socket.
- 3rd puzzle: activate the Orichalcum cube and throw it over to the pressure plate, then follow it and deactivate the cube on top of the plate.
- 4th puzzle: Shoot an arrow through the flames and into the seed to remove it, then spawn the cube and push it onto the pressure plate.
As you can see, all the main mechanics from previous main-quest Vaults make a return in the Vault of Typhon, so you know what to expect heading forward. These puzzles done, the door will open into the main square, which is filled with enemies for you to kill.
Now there are four remaining puzzle sections in the Vault, and you must complete all four, and return to this main square and defeat the enemies that spawn in between each completed section.
Near left path

Run up the stairs to the immediate left after you enter the main square, and use the lift to get across. Press the button to spawn some cubes and a laser. Reversing the air current will cause the wooden cube to be pushed towards the far pressure plate, but it's intercepted by the laser every time. So you'll need to use the smaller linked cubes to move the heavy cube along so it blocks the laser, allowing the wooden cube past. After that's done, push the heavy cube onto the weighted pressure plate.
Now go to where the laser was, and you'll see to the left is a new moving platform that will take you to the next part of the puzzle. Reverse the air current at the top, then glide across and press the button at the end to spawn the parts of the next puzzle. Again, there's a wooden cube to the left which is getting intercepted by a laser, so use the linked cubes to push the heavy cube so it blocks the laser. This will get the first wooden cube into position on its pressure plate.
Now reverse the air current and you'll see that another laser is intercepting the other wooden cube, so push the heavy cube along to intercept the laser, allowing the wooden cube through. Once it lays to rest, reverse the air current again to get the second wooden cube onto its pressure plate. Finally, push the heavy cube onto the weighted pressure plate. The barrier on the left side will lower, allowing you through. Open that chest to the left of the barrier, then jump back down to the main square and defeat the new enemies.
Far left path
Now go to the far left path. These puzzles are all about riding Orichalcum cubes on air currents through lasers. Jump onto the first cube, reverse the air current, and activate the cube. Jump over the first lasers (just a single jump will do), then jump off just before the second lasers hit, and glide under them to the end. Deactivate the cube on the pressure plate at the end, then take the lift up to the next section.
The next bit is the same, but this time the first and third laser fields can be jumped over, while the second and fourth need to be turned off by using an Apollo's Arrow on the target above each laser field. You have to do this while riding the cube along, because the lasers will only be turned off for a short time. Once you're at the end, place the cube on the pressure plate, open the chest, and jump back down to the main square.
Near right path

It's time for the near right path now. Up the stairs and the lift, you'll see a button which spawns a rolling ball maze. Use the linked cubes to move the big cubes out of the way, and use Herakles's Strength to roll the ball to the end. Destroy the seed with the ball's flames, and place the ball in the socket where the seed had been placed.
For the second puzzle, the ball is thrown off the edge soon after being spawned by the air current. The solution to this is to push the cubes at the far end over so that they block the air flow, allowing the ball into the main puzzle area. Grab the ball and light it with the torch on the ground. Then pull it along so that it's resting against the cubes that you placed in the way of the air flow.
Now go to the other linked cubes, and push them so that they're in the gap between the ramp and the seed that must be destroyed. Now you can pull the ball over until it's in front of the ramp, and let the air current do the rest. The ball will incinerate the seed and be pushed down by various currents until it destroys another seed at the end of its pathway. Follow the ball down and roll it into the socket, open the chest, and fly down into the main square.
Far right path

Now take the far right path up. This is an interesting puzzle section. The main mechanic here is that you have an Orichalcum cube and an air current, as well as a bunch of rings and a torch for what is evidently an Apollo's Arrow challenge. But there is a wall of cubes in the way that you'll have to remove with the Orichalcum cube.
For this first one, you can either throw the cube at the wall, or use the cube to get to the wall yourself, and Hephaistos's Hammer it down before flying back. Whichever your preferred method, shoot an arrow through the flames and rings and into the seed behind the wall, then glide across. You may need to reverse the air current for this.
The second area has two such arrow challenges, and a wall blocking each. Throw the new Orichalcum cube into the walls to break them down, then fire Apollo's Arrows to complete both challenges and destroy both seeds. After that, lightly throw the cube at one of the walls and immediately jump after the cube and climb onto it, allowing passage to the next area. Reverse the air current that awaits you there, and glide across to the next section (if you lose height, use Ares's Wrath at the end). Then pull the lever, open the chest, and return to the main square.
End of the Vault
With all four sections of the Vault of Typhon complete, a new path has been formed at the end of the main square. After killing the final wave of enemies in the square, jump all the way up to the top using these new platforms, and you'll trigger yet another cutscene wherein Typhon abducts you, shows off Zeus and Ligyron in a cage, and prepares to fight you - for real, this time.
Second Typhon fight

Typhon has the same moves as before, but each phase of this fight brings new ones. And there are lots of phases in this fight. At the start of each phase, drink a new damage and defence potion, and set to cutting out Typhon's legs from under him, just like before. Use Hephaistos's Hammer as your primary Godly Power, because it has the highest ratio of damage to stun, and since Typhon can't be stunned, damage is all that matters.
The first new move you'll see is that Typhon can plunge his tentacled hand deep into the ground, and cause little tentacles to spring up all around. Stay away from these tentacles. That's all there is to that. He'll also pound his foot against the ground once while doing this, so be careful.

Other new moves at various phases include:
- Throwing out three lines of... energy... in a cone pattern, which leave behind trails of Corruption which damage your Stamina. Run out of the way when he throws, and continue hitting his legs.
- From the third phase onwards, Typhon starts summoning minions while creating a light bullet hell of slow-moving projectiles from his location, or disappearing altogether. Just kill the minions and let Typhon reappear so you can continue damaging him.
- If Typhon flies up and backwards, that means he's about to fire three laser beams across the ground at you. Get a bit of distance, and dodge the lasers as they arrive.
- If Typhon appears to bow, then quickly flies upwards, he's about to unleash a tide of evil red hail at you. It's a large cone area of effect which can be hard to avoid in time, but luckily it only deals minor damage unless you stay inside it.
There are a couple more moves, but they're weak sauce. Just dodge what needs dodging, focus his legs with your strongest attacks, and you'll be just fine.
After Typhon is fully defeated, sit back, relax, and watch the final very lengthy cutscene. You've just beaten Immortals Fenyx Rising!
That wraps up our Immortals Fenyx Rising Vault of Typhon walkthrough, and your first playthrough! The journey doesn't need to stop there, though! If you're considering extending the adventure and doing a new game plus, then take a look at our list of the best skills in Immortals Fenyx Rising so that you're ready for the battle ahead. If you want to complete your second playthrough a little faster, check out our Immortals Fenyx Rising map and our list of the best mounts in Immortals Fenyx Rising.