Immortals Fenyx Rising Midas Temple puzzle walkthrough: How to solve the four step puzzle
How to get inside the Midas Temple on Clashing Rocks
Looking for an Immortals Fenyx Rising Midas Temple walkthrough? The Midas Temple is an early puzzle in Immortals Fenyx Rising, but that doesn't make it easy. You'll find the temple while still on the prologue island of Clashing Rocks, but the entrance is sealed by four crystals that you need to activate. If you're struggling to find the four crystals and get into the Midas Temple, that's where we come in.
In this guide, we'll explain where to find the four crystals and how to get into the Midas Temple in Immortals Fenyx Rising.
How to solve the Midas Temple puzzle in Immortals Fenyx Rising
To solve the Midas Temple puzzle and lower the forcefield to get inside, you have to activate all four crystals around the main entrance. The first crystal is easy to activate, but the other three require a bit of work.

Step 1: activate the crystal by the main door (north-west)
Step 1 is incredibly simple: you just have to press the button right in front of the main entrance to the temple on the north-west side. This will activate the first crystal.
Incidentally, you'll also catch a glimpse at the large spear-wielding warrior waiting for you inside. More on him later.

Step 2: activate the pressure plate (south-east)
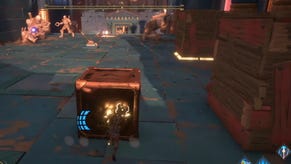
Now head to the opposite side of the temple (south-east side). Here you'll find a pressure plate next to the temple wall. Opposite the temple wall is a forcefield. Climb up above the forcefield and look back at the temple wall, and you'll see a little puzzle cube that you can grab using Herakles's Strength. Place it on the pressure plate and the forcefield next to you will open.
Head into the room behind the forcefield and drop down the hole in the floor. This lower section is flooded, and there's another hole in the floor where you can dive down below the water. Swim down, follow the path around and up, and you'll find a tiny hidden area with another button that activates the second crystal at the Midas Temple entrance.
Now head out via either one of the side-passages that open up and start working on the next step.

Step 3: Throw the rock above the forcefield (north-east)
Go to the north-east side this time, and you'll see a statue on a podium. Climb up there with him, and you'll see some small rocks at his feet. Now look at the temple wall, and you should see an area of weakened wall right above the forcefield there.
You thinkin' what I'm thinkin'?
Pick up and throw a rock at the weakened wall. The wall will break, revealing a target you can shoot with an arrow. This target, once hit, will deactivate the forcefield below, allowing you to run in and activate the third crystal.
Note: you can also break the weakened wall just by jumping at it and swinging your axe with a heavy attack. But then you won't get the satisfaction of hurling a boulder at a temple.

Step 4: Light the torch in the tree (south-west)
Finally, head to the south-west side of the temple, where you'll find a tree with a red (locked) torch in it. Lighting this torch will deactivate the forcefield in the temple wall next to the tree.
Behind the tree, in the cliff wall, there's an entrance you should follow until you find another forcefield across some jail cell bars. Climb the stairs and drop down the hole into the cell. Once inside, you'll see there's an adjacent cell with a pressure plate, and on a ledge next to the pressure plate is another puzzle cube. Use Herakles's Strength to remotely grab the cube and drop it onto the pressure plate.

Now face the cave entrance, and - without moving - fire an Apollo's Arrow (the kind you can control) through the cell bars. Move the arrow through the flames in front of you so it catches fire, and then hit the torch inside the tree.
Now run back to the side of the temple, and you'll see the forcefield there has dropped. Press the final button and you'll activate the final crystal, opening the entrance to the Midas Temple.
Inside the temple, you'll find a big spear dude that summons smaller soldier enemies. Ignore the spear dude until the other enemies are defeated, because after that point, the spear dude will be stunned, allowing you to whale on him until he dies.
Now you can feel free to open the Epic Chest you've worked so hard for, and listen to the Lyre melody so you can play it on the island's Big Lyre for even more tasty rewards.
That wraps up our Immortals Fenyx Rising Midas Temple walkthrough, but the adventure is only just beginning! To prepare for the journey ahead, make sure to check out our lists of the best weapons, best skills, and best gear in Immortals Fenyx Rising. Our Immortals Fenyx Rising map will also help you find any collectibles, while our list of the best mounts in Immortals Fenyx Rising should help you dart between them quickly.


