Risk of Rain 2 guide - how to play, Risk of Rain 2 tips and tricks
Singin' in the rain
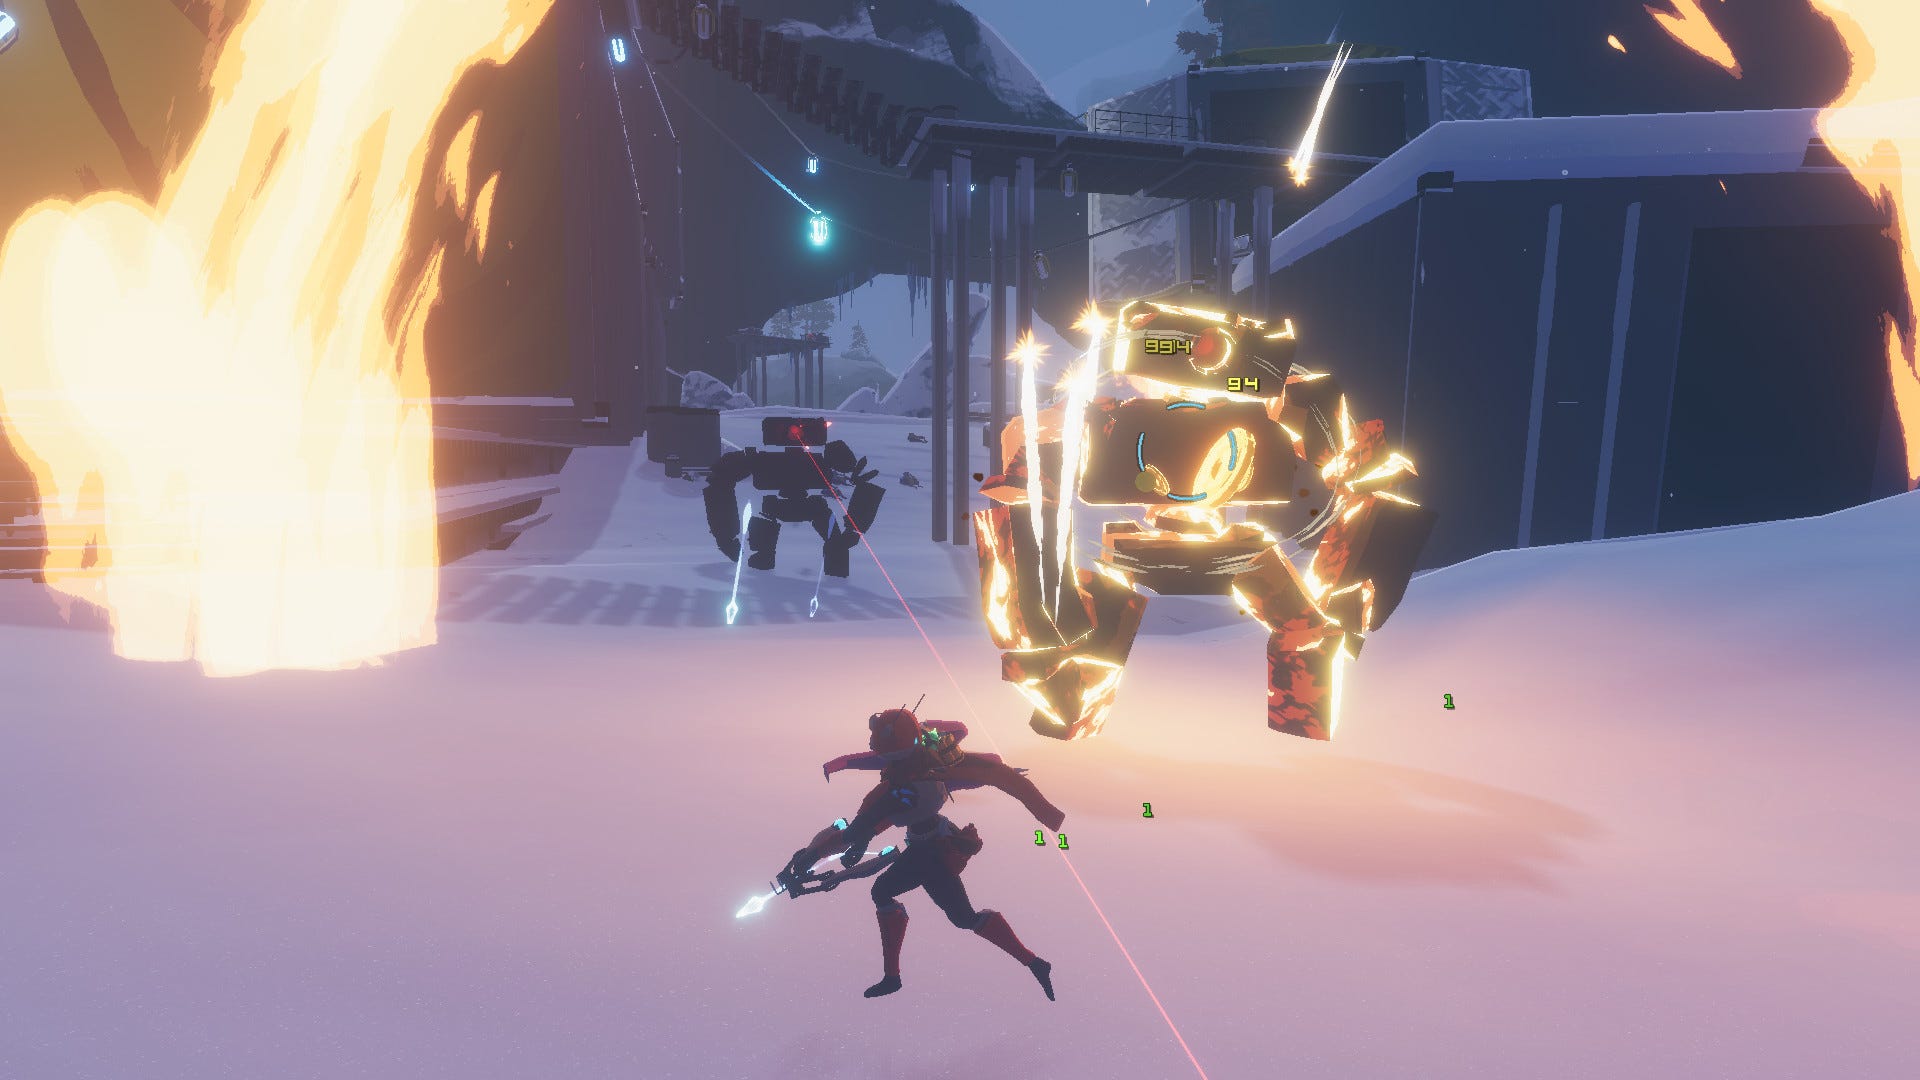

Oodles of enemies, crazy item builds, and punishing difficulty; yep, Risk of Rain 2 ticks all the boxes of its predecessor and more. Each run, no matter how overpowered your item build, no matter how low you set the initial difficulty, will nearly always end up with hundreds of horrible beasties one-shotting you into oblivion. The trick is surviving as long as possible until that point - and that's where our Risk of Rain 2 guide hopes to help you. Below we'll show the ropes to newcomers to the series while providing useful and practical tips for all skill levels, from enemies and bosses to characters and item builds.
Risk of Rain 2 guide - tips and tricks, how to play
Risk of Rain 2 does an admirable job of supplying you with a wide variety of items, enemies, characters, and Environments to get to grips with. So there's a fair amount to learn if you want to dive into this chaotic, frenetic third-person shooter roguelite; feel free to use the links below to skip ahead to a particular section. In each section we've provided a link to a focused guide on that aspect of Risk of Rain 2 if you're looking for more in-depth information.

Risk of Rain 2 guide contents

How to play Risk of Rain 2 - beginner's guide
Risk of Rain 2, like its predecessor, operates in many ways like the ever-escalating survival "horde" modes of other games. There's no actual win condition; your aim is always just to survive for as long as you possibly can, progressing through various stages while defeating (or escaping from) increasingly tough swarms of monsters.
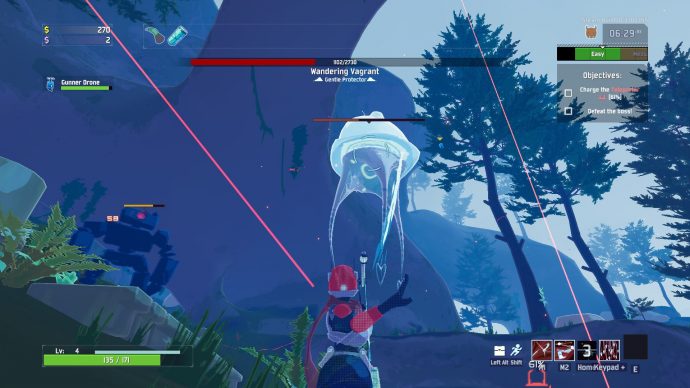
The pace of each run revolves around the timer and difficulty meter in the top-right corner of your screen. As time goes on, the difficulty will progress from Easy through Medium, Hard, Very Hard, and so on, with all the enemies being spawned in greater numbers and with greater Health and damage stats. You'll begin a run in a certain Environment, or map, and to get to the next Environment (in order to progress in gold, experience, and items) you'll need to find the Teleporter that is spawned somewhere on each map.

Activating the Teleporter in each stage will spawn a boss nearby, and create a field around the Teleporter which, if you're standing inside it, will slowly charge the Teleporter up to 100%. Once it is charged and the boss(es) defeated, you can use the Teleporter to proceed to the next Environment. For full details on all the different Environment types and stages, take a look at our Risk of Rain 2 stages/levels guide.
Each time you proceed to the next stage, or Environment, all your gold will be exchanged for experience, and the difficulty meter will jump forward. In order to survive as long as possible, your aim is to increase your character's survival and killing potential by purchasing or procuring different items, and by gaining experience to level up your character's stats.
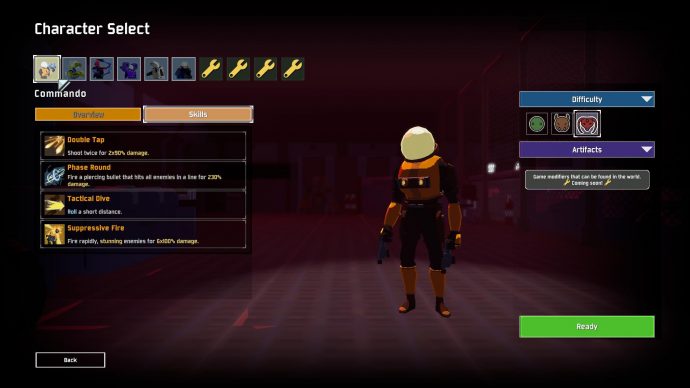
Beyond the increasing difficulty levels of a run, there is an overall difficulty setting that you can change before you start a new run, in the Character Select screen. There are three difficulty levels to choose between, each of which alters the health, damage, and quantity of enemies alongside other modifiers which increase or decrease your run's overall challenge rating:
- Drizzle (easy) - "Reduces difficulty for players new to the game. Weeping and gnashing is replaced by laughter and tickles."
- Rainstorm (normal) - "This is the way the game is meant to be played! Test your abilities and skills against formidable foes."
- Monsoon (hard) - "For hardcore players. Every bend introduces pain and horrors of the planet. You will die."
Risk of Rain 2 characters (Survivors)
There are currently six different characters, or Survivors, playable in Risk of Rain 2, though you'll start with just the Commando Survivor available, and must play and complete specific challenges in order to unlock the rest.
The current playable Survivors are as follows:
- Commando - "a jack-of-all-trades character that is reliable in all situations of the game."
- MUL-T - "an aggressive survivor who has the tools necessary for any job!"
- Huntress - "an extremely mobile but fragile survivor with a high damage output."
- Engineer - "a unique class that requires planning and positioning to be successful."
- Artificer - "a high burst damage survivor who excels in fighting large groups and bosses alike."
- Mercenary - "a high skill melee survivor that uses his many dodges to weave in and out of combat."
All of these characters have different attack types and skills to employ in-game, giving each one a very distinct flavour and style of play. For example, the Huntress is a quick and agile glass cannon (high damage but low health) that excels at longer ranges, while the Mercenary operates best in melee range, with extra armour and dodging capabilities to help him survive in close proximity to his enemies.
Hopoo are working to release at least four more Survivors at later points in Risk of Rain 2's journey through early access. But until then, there's still a lot to learn and master with the six characters currently in the game. For more detailed information and strategy guides on each of the six Survivors, take a look at our meaty Risk of Rain 2 characters guide.
Enemies, Bosses, and Elites
Risk of Rain 2 would have failed to live up to the expectations set by its predecessor if it didn't feature a wide variety of unique enemies, elite modifiers, and hardy death-dealing bosses. In the game's current state there are a grand total of 20 monsters currently in Risk of Rain 2 (12 regular enemies and 8 bosses), each of which behave in unique ways and present varying threats to the player.
There's also the possibility of the game spawning "Elite" varieties of both Bosses and regular monsters. These Elite enemies have 4.7 times the Health of their standard counterparts, and deal twice the usual amount of damage. They come in three varieties:
- Blazing Elites are coloured red, leave behind a fire trail behind them that damages players that come into contact with it, and their attacks can ignite the player for 4 ticks of the Elite's damage.
- Glacial Elites are coloured white, and their attacks significantly slow the player upon each hit. They will explode shortly after death, so make sure you are out of its range before that happens.
- Overloading Elites are coloured blue and have 50% of their Health converted into rapidly recharging Shields; and their attacks deal an electric explosion on each hit.
For full details on every enemy type's stats and behaviours, check out our Risk of Rain 2 enemies guide. If you're after information and strategies for each of the bosses, take a look at our Risk of Rain 2 bosses guide.
Items, Equipment, and Drones
Items are the cornerstone of your ability to survive and thrive in Risk of Rain 2. There are a great many different items already in the game, each of which will lend a helping hand, for example by increasing your attack speed or critical hit chance, or perhaps by adding an "on-hit" effect such as a chain lightening effect or the ability to spawn a sticky bomb on the target.
You can procure items mainly by opening different chests, buying them from Terminals, or defeating bosses. You'll also have the opportunity to trade in existing items for others at a 3D Printer. Some special items, called Lunar Items, must be bought using Lunar Coins, and generally have both a powerful positive and powerful negative effect.
Aside from this, you possess an equipment slot (two if you're playing as MUL-T) which starts off empty but which you can fill by picking up an Equipment item. These pieces of Equipment act like additional abilities, and must be activated in order to benefit from them. You can also spawn or fix broken Drones which will follow you and help you out by healing you or helping you kill enemies. Some Drones will even persist from stage to stage, allowing you to continue benefiting from them until they (or you) die.
For further information on all the items and equipment in the game, look no further than our Risk of Rain 2 items guide.
Risk of Rain 2 Shrines
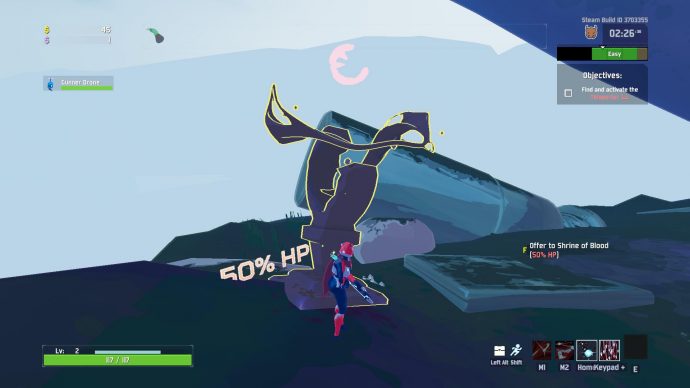
Aside from finding chests, Terminals, and other useful doodads across the map, another reason to fully explore each Environment is for the Shrines which can spawn across the stage. There are currently seven different Shrines in Risk of Rain 2, each of which works in a different way:
- Shrine of Blood: Costs a certain percentage of your Health to use, and gives you gold in return.
- Shrine of Chance: Chance of spawning an item of any rarity, but chance to spawn nothing. Costs gold, and increases in cost to activate each time.
- Shrine of Combat: Costs nothing. Spawns enemies around you, native to your current Environment.
- Shrine of Gold: Spawns a Gold Orb for the Gold Portal, which can take you to the secret Gilded Coast Environment. Costs a large amount of money.
- Shrine of the Mountain: Summons an additional boss when you activate the Teleporter for that stage. Each boss will drop the same item on death.
- Shrine of Order: Costs a Lunar Coin. Will replace all of your items of every rarity with random items of the same rarity. The stacking of these items remains unaffected.
- Shrine of the Woods: Costs gold. Creates a healing field around itself which will heal you and allies over time.
How to complete all Risk of Rain 2 Challenges
When you first create a profile in Risk of Rain 2, you'll only have a single Survivor and a portion of the item pool unlocked. Many of these barred pieces of content are unlocked by completing the game's myriad Challenges, all of which you can peruse in your Logbook from the Main Menu. For full details on each of the Challenges and how to unlock them, take a look at our Risk of Rain 2 challenges guide.
Risk of Rain 2 tips - general tips and tricks on how to survive
To finish up, we've collated some useful and practical Risk of Rain 2 tips and tricks below. Take a look through these tips if you're struggling to survive beyond the first few stages.
- Play proactively and remember the Teleporter. Your goal at the beginning of each stage should always be to find the Teleporter. That doesn't mean you should necessarily activate it right away (it's better to gain gold/experience/items for a while first), but you should always be aware of where it is so you can head to it as soon as you decide it's time.
- Don't be too quick to make up your mind about a Survivor. In a game like Risk of Rain 2, your run and your experience is defined not just by the character you play as but the items you receive. Don't be too quick to dismiss a certain Survivor as "underpowered" or "weak" simply because you had a bad run with them. Play multiple runs with each one, and you might find your new favourite character.
- You can pause in singleplayer but not multiplayer. Pause in singleplayer anytime you need a breather by hitting ESC and bringing up the menu. But don't be tempted to do this in a multiplayer session, because it doesn't work, not even if you're the host.
- Make good use of Risk of Rain 2's Ping tool. Yes, Risk of Rain 2 has a Ping tool, and it's very useful in a variety of situations. You can use it to highlight a tough enemy for your teammate, an item on the floor, or even the location of the Teleporter itself. This is even useful in singleplayer to ensure you don't forget your way to the Teleporter.
- If you go out of bounds, you'll start to take damage every second. Just putting this in here because this really confused me the first time it happened to me. Look for the ribbons around certain Environments which mark the boundaries of the playable area. If you go much beyond this threshold, dark tentacles of damage will lash at you from the ground, dealing damage each second until you return to the playable area.
- Stay on the move and sprint everywhere. Risk of Rain 2 can quickly devolve into chaotic bullet hell territory if you're not careful. The secret to staying alive is to always stay on the move, and don't get bogged down killing enemy after enemy. Make good use of your ability to Sprint - but be aware that sprinting does limit your aim sensitivity.
- Items trump experience and levels. This is important because when you use the Teleporter to proceed to the next stage, all your gold is transferred into experience. But items and item builds are always going to be more valuable than the level of your character, so make sure you spend as much gold as possible on chests, items, drones, and anything else you find before you go through the Teleporter.
- Lunar Coins persist between runs. You can always see how many Lunar Coins you have in the top-left, just beneath your gold. These Lunar Coins will carry over to future runs until you use them, so if you'd like you can save up a dozen or more Coins for a single "Super-Lunar Run".
- Activating the Teleporter will lock chests and other interactables. When you spawn the boss of each stage at the Teleporter, across the map all the chests and other interactable structures such as Terminals and Drones will be locked, preventing you from interacting with them until the Teleporter is fully charged.
- Focus on DPS above all else with your build. Your undoing will nearly always be failing to build up your damage to match the increasing difficulty of the run. As much as possible, focus on upgrading your attack speed with Soldier's Syringes and collecting a variety of on-hit and crit-based items.
And that concludes - for the time being, at least - our Risk of Rain 2 guide. Hopefully you've learned a thing or two about how to survive and strike the fear of death (and death itself) into the hearts of your innumerable enemies. Time for a new run, then, eh?