Mordhau shields guide [Patch #7] - shield stats & info, how to use and counter shields
Skillful cowardice


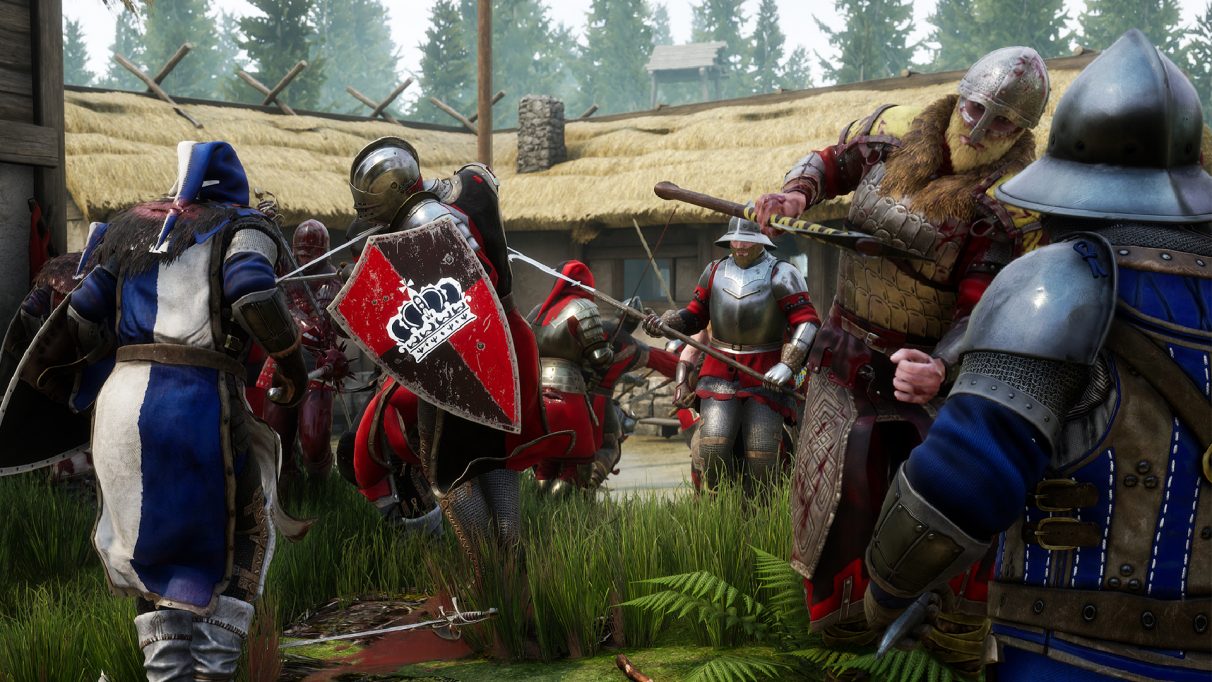
Mordhau's selection of shields is remarkably diverse both in size and in terms of their potential for completely shaking up Mordhau's magnificently elaborate combat system. And now, Patch #7 has released, giving shield-users some added mobility and quality of life tweaks, so it's a good time to get started on learning this side of Mordhau's combat. This Mordhau shields guide is, I think, a necessary addition to our Mordhau series, because not only have I seen many players asking what the point of shields is as they appear far too weak and cumbersome, but I've also heard the outcries of many a player who have come up against a seasoned shield-user and don't know what they could possibly have done to beat them.
This guide will walk you through each type of shield on offer in Mordhau and how they all operate, before moving onto some in-depth tips and techniques both for using shields to the best of your ability, and for countering shield-users and abusers.
One quick mention before we dive into the world of tolerance values, turn caps, and held blocks: if you're looking for more of an overview of this wonderful medieval brawler, then check out our Mordhau guide for explanations and tips on just about everything, alongside links to every other part of our Mordhau guides series, from stats and opinions on all of the Mordhau weapons to my in-depth and advanced Mordhau melee combat guide, and much more.
Mordhau shields guide (Patch #7) - shield stats, tips, behaviours
You may think shields are the simplest aspect of Mordhau's combat system, but in reality they're anything but - as you'll soon find out. We've a fair amount to cover here, so feel free to use the links below to skip ahead to a particular section.
Mordhau shields guide - contents
| Mordhau shields overview - how they work, how they help, how they hinder |
| Targe & Buckler |
| Heater Shield & Kite Shield |
| How to counter shields and shield users in Mordhau |
| Mordhau shield tips and tricks |
Mordhau shields overview - how they work, how they help, how they hinder
Let's start with the obvious question: why use a shield? It's a valid point; they cost extra points to pick up, so you should know exactly what you're getting out of it.
Shields can be equipped in your off-hand while you wield a one-handed weapon, which means you can use any kind of shield (except Pavise) alongside anything from a Dagger up to a Messer or Bastard Sword. There are five different shields currently in Mordhau, which can be broken into two types (and one outlier):
- Held Block - This type of shield is larger than the other, and - uniquely - allows you to hold down your block indefinitely, rather than having to time it as you would a normal weapon parry. The Kite Shield and Heater Shield are both shields of this type.
- Timed Block - This type of shield cannot hold its block, and therefore acts very much like a weapon in that you have to time your block/parry properly for it to be effective. The Buckler and Targe are both shields of this type.
- Pavise Shield - We won't be talking much about the Pavise Shield in this guide, because it isn't really a shield in the ordinary sense. You can't block with it at all, but you can click to place it down into the ground to provide some cover to hide behind. It's essentially a big mobile wall.
The pros and cons of using a shield differ depending on the type you're talking about, but some traits are universal. For one, they provide larger areas with which to block an attack than any weapon - and they also often feature very forgiving "Block View Tolerances", which means you don't have to be quite so precise with your shield placement to block an attack. Shields are also useful because they can block projectiles and sometimes even melee attacks even when you're not blocking with them - you can carry a large shield on your back and it'll often protect you from enemy archer fire and the like.
Held Block shields also have the massive benefit of - you guessed it - being able to hold your block. We'll go into this in more depth in a moment, but trust me: this completely changes the game, often in favour of the shield user. However, the larger your shield the more of your screen is obscured while you fight, which means you often need a good idea of your opponent's attack animations and positioning in order to maintain awareness of what's going on in a fight while you're blocking.
Targe & Buckler
We'll get the Timed Block shields out of the way now, because they don't actually change the game up all that much. The majority of this guide will focus on the Held Block shields and how to use and counter them - but that doesn't mean there isn't a place for the Targe or the Buckler in your character's build.
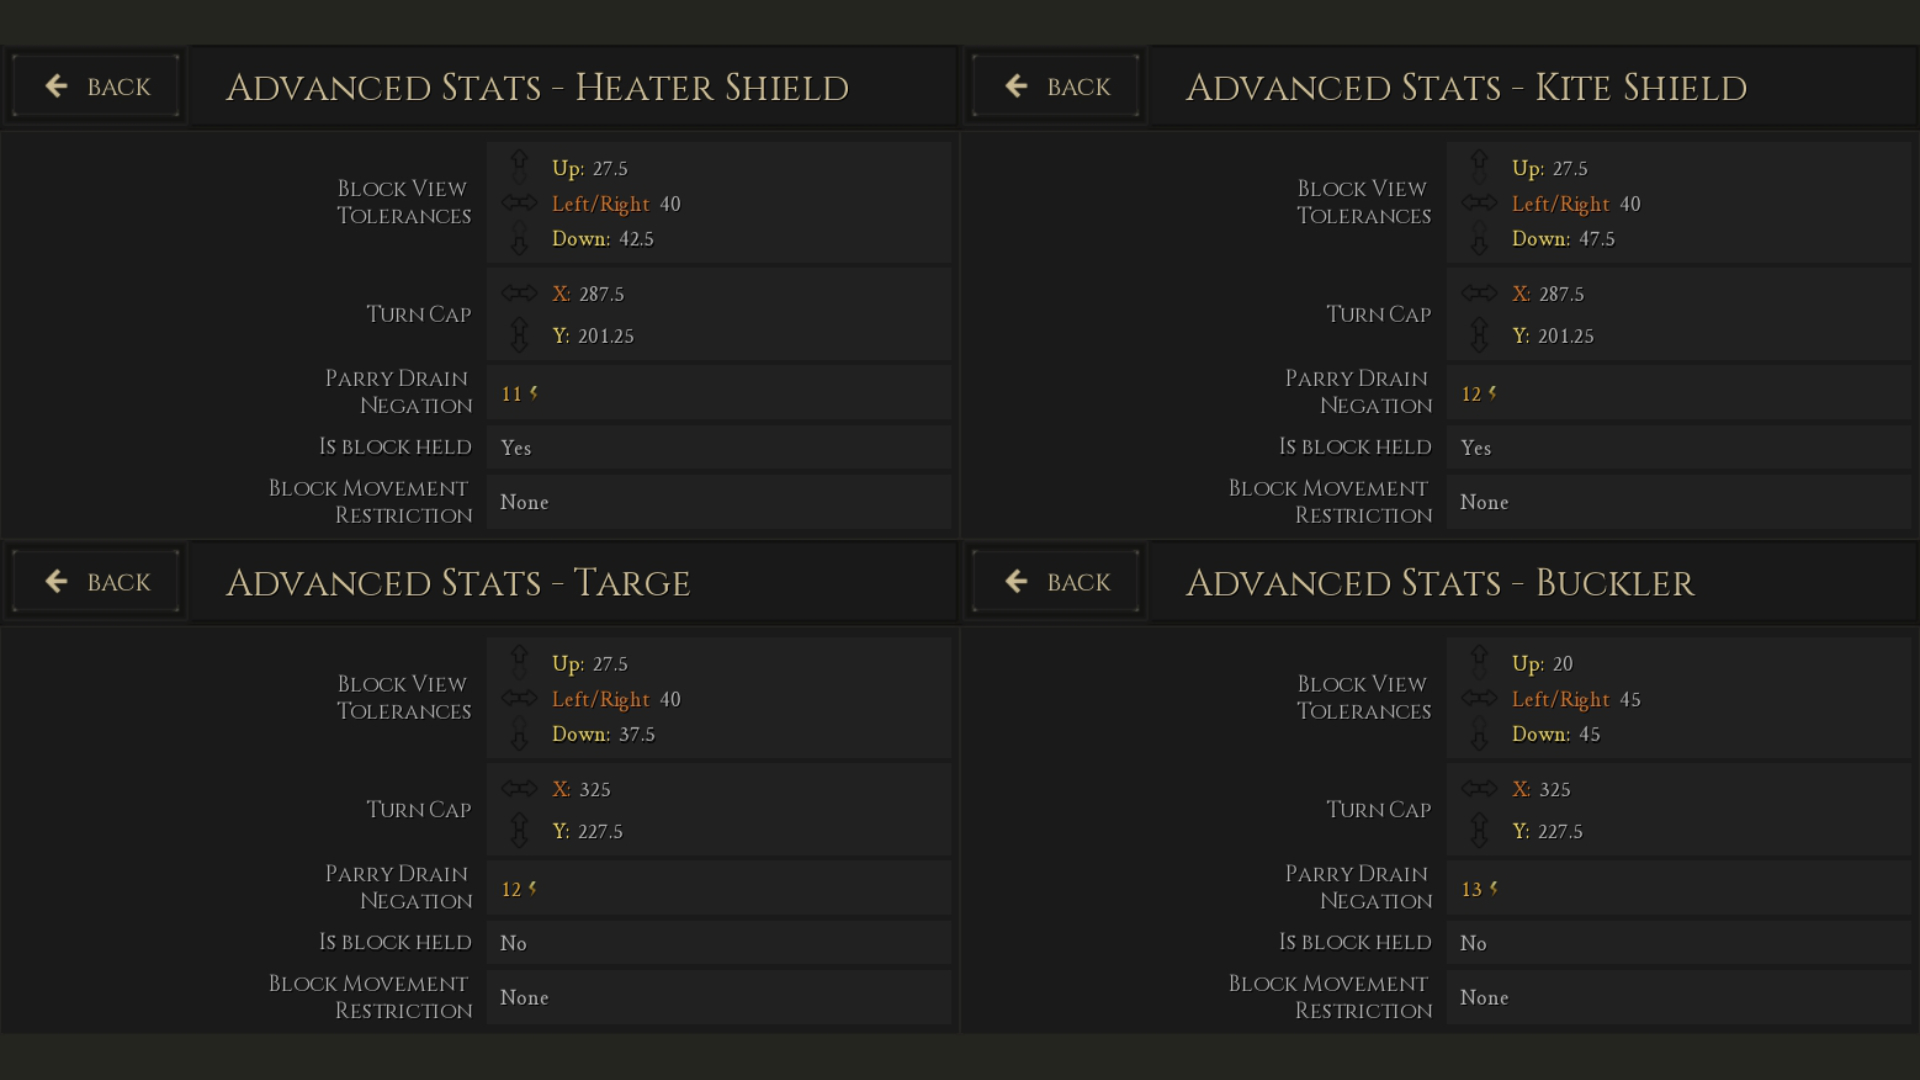
Both these shields work in more or less exactly the same way, but the Buckler is near-objectively superior to the Targe. The only benefits a Targe has over a Buckler are a lower cost, and a slightly larger area to block with. The Buckler is in fact the smallest shield on offer in Mordhau, but it enjoys several benefits, including a high "Turn Cap", and the best "Parry Drain Negation" of any shield (joint top of any weapon, too).
I should explain what those terms actually mean. "Turn Cap" means how freely you can turn the camera while you're blocking or attacking. All weapons have different Turn Cap values, and the same is true with Shields. The lower a Turn Cap, the more restrictive it is; which is why the Buckler's high Turn Cap is very useful and offsets the disadvantage of its relatively small area.
To understand "Parry Drain Negation", you also have to understand "Stamina Drain". When you block an enemy's attack, you lose a bit of Stamina. The amount of Stamina you lose is equal to the attacker's "Stamina Drain", minus your weapon's (or shield's) "Parry Drain Negation". For example, if you block a Zweihander's attack with your Dagger, you'll lose 20-6=14 Stamina (quite a lot), whereas if you block a Dagger's attack with your Zweihander, you'll lose 15-13=2 Stamina (not much at all).
All shields range from 11 to 13 "Parry Drain Negation", which makes them very good at absorbing stamina damage. And none is better than the Buckler, whose PDN of 13 outshines even the enormous Kite Shield and Heater Shield.
Heater Shield & Kite Shield
Now it gets interesting. There's an awful lot going on with the Heater Shield and the Kite Shield, so let's get stuck in.
First, their stats. The Heater Shield is the cheaper of the two, which means you can expect the Kite Shield to be the more effective shield - which it is. Not only is it larger in area, but it has a higher "Parry Drain Negation" value and makes it easier to block attacks directed at your legs and feet. Much like the Targe/Buckler debate, the only real reason to pick a Heater Shield over a Kite Shield is if you can't afford the latter.
Now, let's talk about how using these shields actually works. With such a shield equipped, you can hold down your block button in order to block indefinitely until either you are interrupted by something (a successful attack or kick, or getting disarmed), or you release block. Simple, right?
Not quite. You can't attack while you're holding down block, except when you riposte (attack just after you block your opponent's attack). Riposting also lowers your block, so remember to hold block again in time for your opponent's next attack. You'll also find that if you miss an attack, then you'll be locked out of blocking for a short time (much like normal: if you miss with a weapon, it's a little while before you can parry again, which is why missing an attack is so costly in Mordhau).
The other big thing worth noting is that, like any shield or any weapon, blocking will be completely ineffective against kicks. If someone kicks you, the only way to block it is to kick back (which extremely few players have the reactions or the wherewithal to do intentionally). This makes kicking very powerful against Heater Shield or Kite Shield users.

How to counter shields and shield users in Mordhau
I'm gonna do something a bit strange here, and start with how to counter shield users (by which I mean "Held Block" shields; the "Timed Block" shields aren't really worth talking about in such detail). Once you've read through all this, I'll give you some tips on mitigating these weaknesses.
But whether you're here to use shields or to counter them, the best idea will be to read both sections so you know what to expect from your opponent.
- Make good use of kicks. The most obvious counter to players who constantly hide behind their shields is to kick. This is very effective as it stuns them and almost always results in a free hit as long as you combo into a thrust (therefore this is best when you're using a weapon that favours thrusts, such as a Spear or Estoc). However, the kick has a short range even after its buff against held blocks in Patch 6 (Patch 7 brought the range down again; check out the details in our Mordhau patch notes/future content guide), and a decent enemy will be prepared for this.
- Chamber-morph-cancel-kick-thrust. Catchy name, right? Here's an effective and powerful way to make kicks work again once your enemy has adapted to them. Bait their attack (usually a thrust), chamber it, morph into a strike - this encourages them to block rather than to chamber with another thrust - but instead of following through with your chamber-morph, immediately cancel it and kick. Your enemy will nearly always still be in close proximity to you after their initial attack, and they will very rarely expect you to cancel your attack and kick instead. After you've stunned them, follow up with a stab to the face.
- Drags and good footwork can help get around the sides of shields. The other big thing to incorporate into your fights against shield abusers is careful combination of drags and footwork. If you've read my Mordhau melee combat guide, you'll know all about dragging your strikes in order to get around an opponent's parry. Not only can ordinary drags often best an inexperienced shield user, but certain types of drags will work well even against excellent shield users. One of the best examples is what is called the "waterfall" technique, where you perform and overhead strike, but through careful positioning of your blade and good footwork, you make the blow land on the other side of the opponent than where you started. Check out this page for examples.
- Exploit their misses. No, that isn't as morally questionable as saying it aloud makes it sound. What this means is doing everything you can to make them miss their attacks, because this is when they're at their most vulnerable due to the delay before they can block again. The Dodge perk is excellent for this; bait an attack from them, then simultaneously dodge backwards and wind up your own thrust. Most shield users don't know how to deal with this properly.
- Play the Stamina game. This depends on your weapon. You might think shield users have the advantage when it comes to "stamina-offs", but actually there are many weapons with a "Parry Drain Negation" that matches a Buckler's or Kite Shield's - and those weapons often have a higher "Stamina Drain" than what your opponent will have if they're limited to one-handed weapons. For example, a Maul has a Stamina Drain/PDN of 24/13, while a Kite Shield and Messer user will have a Stamina Drain/PDN of 19/13. In this case, if neither opponent lets themselves get hit, then the Maul user has the edge - but bear in mind you'll want to make use of parries and ripostes rather than chambers if you want this to work properly.
Mordhau shield tips and tricks
Now we'll go through some advanced shield techniques to help combat the obvious weaknesses that come with using shields.
- You can riposte with a kick. Something a large portion of Mordhau's playerbase doesn't actually know, because for whatever reason when you riposte-kick it doesn't turn your reticule hollow as usual with ripostes. But yes - you can indeed riposte with a kick instead of a weapon attack, which is very useful when you're using a shield, simply because it's not expected, and also because the enemy is usually trying to get as close to you as possible so they can kick you themselves. Beat them to the punch with this nifty technique.
- Learn to block at the last moment like you would with a weapon. Shields attract a great many newcomers at first because it's seen as a shortcut past the "Panic-Parry" stage that everyone goes through when learning the game. But what you're actually doing when you block, aside from everything else, is obscuring your vision. And the earlier you block, the less you can see what your opponent is doing, which means they might be winding up a perfect waterfall for all you know. Don't just block immediately after your attack; having eyes on the enemy is extremely important.
- Wait for the opponent's attack to land. If you stop blocking without waiting for the audio cue of the enemy's attack landing, then you'll likely get punished by drag-attacks. Listen out for the impact; only then is it your time to act.
- Pick up the Dodge perk to avoid predictability. Just as Dodge is useful against shield-users for its surprise factor and ability to break the flow of fights, so too does the perk benefit shield-users themselves. Not only can it be used in exactly the same way as mentioned above, but it's also a last-ditch escape if you've messed up your timing or attack, or you've been disarmed. It also just makes you less predictable, which means your opponent will be forced to exercise more caution.
- Choose your weapon very carefully. Many players pick the Short Spear for its reach and stabbing potential, but against a decent player you'll want something more than perpetual thrusts. Likewise with the Rapier, which doesn't even have the benefit of extended range. My weapon of choice is nearly always either the Bastard Sword (faster, cheaper) or the Messer (higher reach, more damage) because - for one-handed weapons - they have absolutely fantastic damage even against Heavy Armour, and because their Stamina Drain is very respectable, which helps you greatly in extended fights.
Aaaaaaaaaaand I think we'll stop there. That should be more than enough to be getting on with, and I don't want to overload you with information. The long and short of it is that a 1v1 with a Heater or Kite Shield involved is a completely different beast from a non-shield 1v1, and there is a whole new set of rules to consider in these situations; but, as always, the victor will go to those who can break the flow of the fight and avoid predictability.