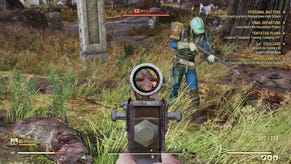
Fallout 76 Magazines: locations, what the magazines do
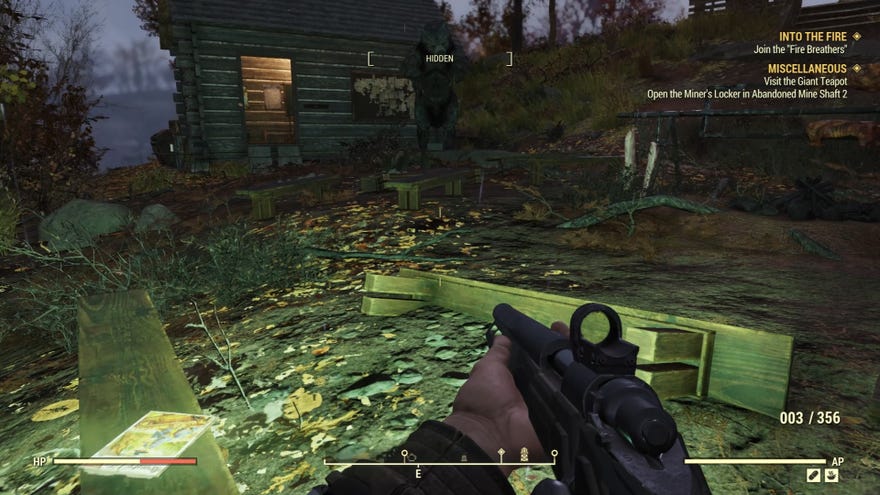
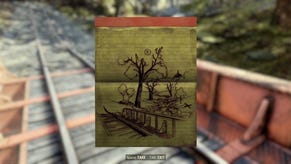
Fallout 76's magazines work in the same way that Bobbleheads do, but only in this game. Instead of being permanent upgrade, Magazines are now consumable temporary buffs that provide traits such as weapon specific boost or damage increased against certain enemies. Since they work slightly differently this time, there are more places that you can find them, this guide will have more on their locations, exactly how to obtain them, and when it is best to collect duplicates.
Fallout 76 Magazines guide
Those looking for a beginner's guide to get started with Fallout 76 when it comes out should have a look at our Fallout 76 guide hub. Each of the Magazines tend to have multiple areas in the same named location, so read on to find out where you need to go to find them.
How magazines work in Fallout 76
In yet another major difference to how Fallout 76 plays compared to just about any other Fallout game, Magazines are no longer permanent buffs. Instead they stay in your inventory as items until they are used, with a long ticking countdown until you exhaust their potential. Picking up your first one of each will complete challenges, of which there are many ways to obtain atom. Look at our Fallout 76 challenges guide for more on that. However, in terms of what they do, the table below has the full list of all the magazines that you can find in the game, as well as what they can do.
| Magazine | Buff | Duration |
|---|---|---|
| Astonishing Tales #1 | +15% damage against Mothmen | 2 hours |
| Astonishing Tales #2 | +15% damage against Grafton monsters. | 2 hours |
| Astonishing Tales #3 | +15% damage against Snallygasters | 2 hours |
| Astonishing Tales #4 | +15% damage against Flatwoods Aliens | 2 hours |
| Astonishing Tales #5 | +15% damage against Wendigos. | 2 hours |
| Astonishingly Awesome Tales #1 | +15% damage against Mirelurks. | 2 hours |
| Astonishingly Awesome Tales #2 | +15% damage against Super Mutants. | 2 hours |
| Astonishingly Awesome Tales #3 | Swim twice as fast. | 2 hours |
| Astonishingly Awesome Tales #4 | +25% more damage from the Alien Blaster. | 2 hours |
| Astonishingly Awesome Tales #5 | +25% more damage from the Cryolator. | 2 hours |
| Astonishingly Awesome Tales #6 | Regenerate 20 health points per minute. | 2 hours |
| Astonishingly Awesome Tales #7 | +5 Max AP | 2 hours |
| Astonishingly Awesome Tales #8 | Take 25% less damage from robots. | 2 hours |
| Astonishingly Awesome Tales #9 | +15 Poison Resistance. | 2 hours |
| Astonishingly Awesome Tales #10 | 30% less likely to catch diseases. | 2 hours |
| Astonishingly Awesome Tales #11 | +15% more damage to Ghouls. | 2 hours |
| Astonishingly Awesome Tales #12 | 30% less likely to catch diseases. | 2 hours |
| Astonishingly Awesome Tales #13 | +30% increase to Radiation healing with RadAway. | 2 hours |
| Backwoodsman #1 | Collect extra meat when searching dead animals. | 2 hours |
| Backwoodsman #2 | 25% more damage with Tomahawks | 2 hours |
| Backwoodsman #3 | Crafting weapons costs fewer materials. | 2 hours |
| Backwoodsman #4 | 50% chance to get twice the items when harvesting plants. | 2 hours |
| Backwoodsman #5 | 15% more damage to animals. | 2 hours |
| Backwoodsman #6 | 50% more healing when eating cooked food. | 2 hours |
| Backwoodsman #7 | 50% less likely to contract a disease when eating/drinking. | 2 hours |
| Backwoodsman #8 | 30% increase in satisfaction when eating/drinking. | 2 hours |
| Backwoodsman #9 | 50% reduced cost to repairing buildings. | 2 hours |
| Backwoodsman #10 | Turrets in your CAMP/Workshop deal +50% damage. | 2 hours |
| Grognak the Barbarian #1 | +15% melee damage. | 2 hours |
| Grognak the Barbarian #2 | +20% harder to be detected while sneaking. | 2 hours |
| Grognak the Barbarian #3 | +15 Poison Resistance. | 2 hours |
| Grognak the Barbarian #4 | +30% VATS critical damage with melee weapons. | 2 hours |
| Grognak the Barbarian #5 | +15% damage to Scorched damage. | 2 hours |
| Grognak the Barbarian #6 | Melee weapons weigh 75% of their default weight. | 2 hours |
| Grognak the Barbarian #7 | Melee weapons degrade half as fast. | 2 hours |
| Grognak the Barbarian #8 | 2 damage resistance for every point in Charisma. | 2 hours |
| Grognak the Barbarian #9 | +10 carrying capacity. | 2 hours |
| Grognak the Barbarian #10 | +15 energy resistance. | 2 hours |
| Guns and Bullets #1 | +15% more damage to robots. | 2 hours |
| Guns and Bullets #2 | +30% VATS critical damage with laser weapons. | 2 hours |
| Guns and Bullets #3 | 30% VATS critical damage with ballistic guns. | 2 hours |
| Guns and Bullets #4 | +6 AP regeneration. | 2 hours |
| Guns and Bullets #5 | +50% more materials salvaged when scrapping weapons. | 2 hours |
| Guns and Bullets #6 | +10 damage resistance at night. | 2 hours |
| Guns and Bullets #7 | +10% damage with guns without scopes. | 2 hours |
| Guns and Bullets #8 | +15% more damage to Yao Guai. | 2 hours |
| Guns and Bullets #9 | +30% VATS critical damage with plasma weapons. | 2 hours |
| Guns and Bullets #10 | +15% more damage to Liberator Bots. | 2 hours |
| Live and Love #1 | +10 maximum health when on a team. | 2 hours |
| Live and Love #2 | +5 more damage inflicted on enemies when part of a team. | 2 hours |
| Live and Love #3 | +50% healing when eating fruit/veg. | 2 hours |
| Live and Love #4 | +10 AP regeneration when on a team. | 2 hours |
| Live and Love #5 | +2 Luck when drinking alcohol. | 2 hours |
| Live and Love #6 | +10 damage resistance when part of a team. | 2 hours |
| Live and Love #7 | +10 max AP when on a team. | 2 hours |
| Live and Love #8 | +5% more experience gained when on a team. | 2 hours |
| Live and Love #9 | +25% less damage taken from robots. | 2 hours |
| Scout's Life #1 | Rad ingestion -30% when eating/drinking. | 2 hours |
| Scout's Life #2 | 25% less damage from insects. | 2 hours |
| Scout's Life #3 | +10 carrying capacity. | 2 hours |
| Scout's Life #4 | Double the bleed out time when HP is reduced to 0. | 2 hours |
| Scout's Life #5 | 80% less likely to contract diseases when hit by creatures. | 2 hours |
| Scout's Life #6 | 30% slower rate reduction to hunger/thirst. | 2 hours |
| Scout's Life #7 | 25% less damage from animals. | 2 hours |
| Scout's Life #8 | AP cost reduced by 20% while sprinting. | 2 hours |
| Scout's Life #9 | Placing a CAMP cost in caps is reduced by 80%. | 2 hours |
| Scout's Life #10 | Item degradation -30%. | 2 hours |
| Tesla Science #1 | 25% reduced damage from robots. | 2 hours |
| Tesla Science #2 | 25% reduced damage from plasma weapons, grenades, and mines. | 2 hours |
| Tesla Science #3 | Explosive attacks have a 30% bigger radius. | 2 hours |
| Tesla Science #4 | Power Armor consumes a Fusion Core's power 15% slower. | 2 hours |
| Tesla Science #5 | Heavy guns consume ammunition 20% slower. | 2 hours |
| Tesla Science #6 | +15 Raditation Resistance (environmental) | 2 hours |
| Tesla Science #7 | +30% VATS critical damage with energy weapons. | 2 hours |
| Tesla Science #8 | +15% VATS critical damage with all weapons. | 2 hours |
| Tesla Science #9 | +30% VATS critical damage with heavy guns. | 2 hours |
| The Unstoppables #1 | 5% chance to take no damage when attacked. | 2 hours |
| The Unstoppables #2 | 20% chance to take no damage from Scorched enemies. | 2 hours |
| The Unstoppables #3 | 30% chance to take no damage from explosions. | 2 hours |
| The Unstoppables #4 | 30% chance to take no damage from melee attacks. | 2 hours |
| The Unstoppables #5 | 20% chance to take no damage from energy weapons. | 2 hours |
| Tumbler's Today #1 | 20% wider sweet spot when lockpicking. | 2 hours |
| Tumbler's Today #2 | Find extra bobby pins when picking up bobby pin boxes. | 2 hours |
| Tumbler's Today #3 | +1 lockpicking skill. | 2 hours |
| Tumbler's Today #4 | Bobby pins don't break when lockpicking. | 2 hours |
| Tumbler's Today #5 | 20% wider sweet spot when lockpicking. | 2 hours |
| U.S. Covert Operations Manual #1 | +10 damage resistance while sneaking. | 2 hours |
| U.S. Covert Operations Manual #2 | 50% better hiding capability. Works in bright lights. | 2 hours |
| U.S. Covert Operations Manual #3 | Take -10% damage from other players. | 2 hours |
| U.S. Covert Operations manual #4 | +1 Perception | 2 hours |
| U.S. Covert Operations Manual #5 | +1 Perception | 2 hours |
| U.S. Covert Operations Manual #6 | Make 50% less noise when sneaking. | 2 hours |
| U.S. Covert Operations Manual #7 | Hostile player's VATS accuracy when targeting you is reduced by 50%. | 2 hours |
| U.S. Covert Operations Manual #8 | 25% more damage with knives and unarmed attacks. | 2 hours |
| U.S. Covert Operations Manual #9 | 50% Stealth Boy duration. | 2 hours |
| U.S. Covert Operations Manual #10 | +1 Agility | 2 hours |
| Atomic Command | Unlocks minigame. | Permanent |
| Automatron | Unlocks minigame | Permanent |
| Grognak & the Ruby Ruins | Unlocks minigame | Permanent |
| Nuka Tapper | Unlocks minigame | Permanent |
| Pipfall | Unlocks minigame | Permanent |
| Red Menace | Unlocks minigame | Permanent |
| Wastelad | Unlocks minigame | Permanent |
| Zeta Invaders | Unlocks minigame | Permanent |
Can I stack multiple Magazines?
If you want to extend how long a particular Magazine lasts, you only need to find a second copy of the same Magazine and then use it as the time runs out. The perk rather aptly named "Pannapictagraphist" can make magazines easier to detect for those looking out for them. One thing you should probably be aware of however is that you should pick up every magazine in front of you that's a duplicate of one that's currently active, but then only use it once you've checked to see how much time that perk has left. It's inefficient to use these items immediately.
Magazine locations
In a similar fashion to Bobbleheads, it seems that while the locations for where to find the magazines may be fixed, the magazines themselves are different depending on which one the server spawns. The tables below will go over each and every location where you can find them we have found in the game. With all of our locations, just search for the location you are in and see if there are magazines to be found. Some of these, such as the Poseidon Power Plant WV-06 have a ton of potential locations for you to find magazines.
Region 1: The Forest
| Location | Directions to Magazine |
|---|---|
| Vault 76 | This one is on the bedside computer table, and can be missed. This contains the Nuka Tapper Holotape game. |
| Twin Pine Cabins | Look between the two metal barrels at the entrance corner of the cabin with the green trunk for this magazine. |
| Landview Whitehouse | There are two magazines to be found here. One is on the picnic table south of the lighthouse, while the second is on the dining table inside the lightkeeper's house. |
| Alpine River Cabins | Two more issues to be found here, which are on the bottom bunk bed next to the bear rug and in the treehouse south of the cabins that has a terminal with some spooky sound effects. |
| Wixon Homestead | Go to the farmhouse and in the bedroom, look to the east wall. It should be on the table. |
| Vault-Tec Agricultural Center | There are a total of four magazines here. Pay particular attention to the cardboard boxes sitting on the sofa by the bag in the office with Macfadden's terminal. There's another one in the hole in the wall leading from the conference room to the filing room, while a third is on the desk with the destoryed terminal and phone in said filing office. Finally the washroom area of the basement lab has a magazine on the large sink and wire shelf on the south-western corner. |
| WV Lumber Co. | There are two issues here, the first of which is in the large inner chamber of the lumber mill with the table saw on the dining table next to the stairs. The second is on the metal desk in the raised area of the metal garage east of the yard. This has a bunch of skeleton parts on it too. |
| Darling Sister's Lab | Look to the picture frame that's leaning against the wall right of the bed. It's inside the cabin on the western side by the cliff with a weather vane on the roof. |
| Groves Family Cabin | On the side of the cabin near the allotment, there's a bunk bed outside. It's either on or bellow the bottom bunk. |
| Deathclaw Island | There's a muddy Deathclaw burrow hole in the middle of the island with a Caps Stash, however there's also a Deathclaw that doesn't take too kindly to treasure hunters. |
| Hunter's Ridge | Under the sofa in the north-east treehouse shack near the tree trunk. This one can fall through the floor so look around the hole too. |
| Marigold Pavilion | In the attic between the dirty bed and the toy truck. |
| Transmission Station 1-AT-U03 | Unlock the transmission hut and you'll find it on metal shelving next to the red trunk. |
| Aaronholt Homestead | There's two to be found here. One is in the master bedroom on the top shelf of the bookcase, while the other is in the enamel bucket by a red wheelbarrow in the metal silo barn. It's also close to a Power Armor station and weapon's workbench. |
| Tyler County Fairgrounds | Two more to be found here. One is close to the "Apples, Hotdogs" stall inside the second outhouse toilet, while the other is on top of the two wood barrels in the hay barn with metal audience chairs laid out. |
| Ranger District Office | In the room with the fireplace, on the floor. |
| Morgantown Trainyard | There are just two here, one on a wooden box in the tower and another around the wood crates stored in the upstairs gantry of the warehouse. There's a balcony with the bed above the main warehouse to act as a marker. |
| Camp Adams | On a bench near the campfire towards the middle of the location. There's a shack with a bear statue near it. |
| Morgantown Airport | Two more here. The first can be found inside the terminal building on the north wall. It's opposite the kitchen and food stall near some benches. The second one is on the counter at the top of the control tower. |
| Morgantown High School | Look at the locker on the left that has a door propped up against it near the girls toilets to find the first of two magazines. The second one can be found on a desk with the level 2 terminal in the middle of the upstairs corridor. The office that has it has a red door with "Happy Halloween" plastered on it. |
| Portside Pub | Look behind the wooden board against the north-eastern wall of the pub. It's right of the hat stand on the upper balcony dining area. |
| Mama Dolce's Food Processing | There are four magazines which are all found inside the Fujiniya Intelligence Base. They are dotted around the facility in much the same places as the bobbleheads. One is by the door in the north-eastern corner of the dorms on a cabinet shelf. A second can be found in the laboratory chamber between a ladder and Protectron pod on a shelf. The third is on the linked computer/phone terminals in the south-western corner; there's a Chinese flag on the floor. Lastly, the final one is in the main processing chamber, on top of the mainframe computer. |
| Vault-Tec University | A total of three magazines here. One is in Room 204 on the circular wooden table, while the second is on the teacher's desk in the classroom inside the simulation Vault (it has a globe on it). The final one is in the cafeteria in the simulation Vault, on a square table by the counter. |
| Grafton Dam | The magazine is outside the large pipe that's been retrofitted to be a camp, which is below the gantry maintenance huts. |
| Gauley Mine | Two here, one is on a table left of the level 1 locked safe on the roof of the entrance area, while the second is around the open locker inside the large platform and generator room inside the mine. |
| Arktos Pharma | Even corrupt medical professionals read it seems. Two magazines are here, with one near the Cargobot Control Chamber and the other by some wooden crates on top of a large rusting shelf under the fallen concrete ceiling in the loading bay. |
| Greg's Mine Supply | This one's on the coffee table in the living room of the house with a rusted van parked outside. It's close to the Mine Supply store. |
| Bolton Greens | Three to be found in this resort. One is near the phone in the main resort reception area as you enter, the second is by the golf course reception that's accessed by the kitchen, and the third is on a bunk bed close to a sofa and fireplace in the upstairs bedroom. |
| Sutton | Two here. Inside the Overseer's childhood home, there's one wedged under the baseboard between the sink and toilet in the bathroom of the Tinkerer's basement. A second is between three cardboard boxes and a plunger on top of a Pharmacy building north of a church. It has a tree-trunk access point from the railroad tracks east of it. |
| Horizon's Rest | Three here. One is on the TV cabinet inside the fuselage of the cockpit of the plane, while a second is behind three dark red plane seats on the kitchen platform attached to the pylon. A third is on a metal shelf of an airplane seat found on the north side of the pylon platforms. It's close to a covered fuselage walkway on the cliff face. |
| Relay Tower HN-B1-12 | One is on top of the mainframe computer northeast of the interior concrete hut. |
| Tygart Water Treatment | In the eastern corner of the Raider construction area, and is right of the Overseer's cache. |
| Camp McClintock | Below the "Support Our Troops!" poster on the north wall of the ground level of the military building. |
| Ohio River Adventures | One here that's on the wooden counter with the blue scales by the door and "Radioactive Roundup" poster. It's close to the Weapon's Workbench. |
| Kanawha County Cemetary | Head in the churc and look at the left-hand set of pews, specifically the one that's third from the front. |
| Silva Homestead | Two here. One is between the two Weapons Workbenches in the storage barn, while the second is in the farmhouse in the dining room. Look for the green lamp. |
| Lewis & Sons Farming Supply | Three here. One is on the metal counter on the balcony of the tractor barn, while a second is in the red barn on a green counter. The last one is on the L-shaped counter inside the greenhouse. |
| Kanawha Nuka-Cola Plant | Three to be found in this location. The first is through the level 2 lock security gate in the generator room and inside the security walled area. It should have a green work counter and drawers with two fusion cores in it. Another is inside the security corridor near the ladder to the roof, behind a white mainframe computer bank, while the third is accessed by climbing the crate lifting machine in the sunken loading bay, up to the gantry where you'll find a wooden crate next to the tool chest. |
| Camp Adams | Look for this one on the bench by the campfire next to the lodge with the bear statue. |
| The Giant Teapot | Two to be found here. One is inside the giant teapot and around the blue fridge, while the second is inside the blue container at the foot of the shelving. Use the door to the right of the Nuka-Cola machine to access it and turn left for the magazine. |
| Poseidon Energy Plant WV-06 | There's frankly loads to be found here. One is by the Teddy Bear's Picnic scene on the north-western edge of the plant's roof. While a second is on the gantry platforms and stairs facing the cooling towers. Look for the broken terminal and filing cabinet. Your third one is on the roof above the front entrance near the two giant fans, while the courth is between the consoles and machines in the maintenance room of Cooling tower #1. Another is in the manager's office, and another two are in the Reactor room, one behind some boxes on the bottom shelf of the locker room nearby and a second on the top-most platform. Finally there's one on the shelf near the overturned cart in the basement locker room. |
Region 2: Toxic Valley
| Location | Directions to Magazine |
|---|---|
| The Crosshair | Tow here, one on the sheet above the defensive platform where the Chems are by the entrance to the camp, while the seocond is near the Weapon's Workbench at the end of the Raider Camp under the lookout tower. |
| Clancy Manor | Next to the level 1 locked safe, this one is west of the wall of the upper living area in the room with the wooden walls. |
| Cobbleton Farm | Close to the level 1 locked cabinet in the middle of the north-western wall. It's to the right of the wood steps. |
| Lady Janet's Soft Serve | Behind the locked safe in the north-western corner of the trailer. |
| Becker Farm | In the white farmhouse with no roof, look at the table between the two dressers on the ground level. |
| Eastern Regional Penitentiary | One is in Cell Block B Security office, while a second is in the Intake room on the L-Shaped counter. Look at the bedside table of Warden Brennan's bedroom for a third, while the lectern in the chapel inside the prison yard houses a fourth. Behind said chapel there's an outhouse that has a fith, while there's a sixth in the laundry room that's slipped between the concrete pillar and a dryer. |
| Wavy Willard's Water Park | Two here, one in the mouth of the crocodile on a circular table, and a second in the flooded basement chambers on a small metal table by a step ladder. |
| Willard Corporate Housing | This one is on the golf cart that's buried in the roundabout. |
| Kiddie Corner Cabins | Two here, one is in the small bedroom with the green door on the bunk bed, while the second is in the outhouse between the two cabins. |
| Black Bear Lodge | Jump through the hole in the roof at the end of the lodge near the bed with two mattresses to reach an alcove in the ruined section of the lodge. It should be by a wooden crate. |
| Pioneer Scout Camp | One is by the outhouse next to the Weapons Workbench, while the second is at the south-eastern corner of cabin A02 by a green bunk bed. |
| Philippi Battlefield Cemetary | Southwestern corner of the Civil War museum, head upstairs and it's by the display cabinet. |
| Knife Edge | Look for a green card table on the top platform of the central tower for this one. |
Region 3: The Ash Heap
| Location | Directions to Magazine |
|---|---|
| Camden Park | Three to be found here. Two are by the Widow Maker ride, one is in the green outhouse and one on the ride itself by the horizontal stalled train. There's a third under the boarded-up ice cream stall south of the Sugar Heaps trading post. Look by the metal magazine carousel for the magazine. |
| Relay Tower HG-B7-09 | Just the one and it's by the locker against the northern wall of the hut, left of the doorway. |
| Belching Betty | A whopping four here, one is on the mainframe computer in the maintenance office by the mine tracks inside. A second is below the orange tool case that's on the mainframe computer that's opposite the Chemistry staation above the rail tracks and main shaft. A third is near the bin and two filing cabinets in the maintenance hut with the Garrahan Mining logo on it. It's just after the shaft stairway. Finally there's one behind the boiler machine with the Tinker's Workbench in the room with the fusion generator. |
| The Rusty Pick | Two here. One is in the middle stall of the women's toilets in the tavern, while the second is left of te rope-rocks southwest of the cavern with a dead end at the end of the tunnel. Look halfway under the yellow machine with the levers. |
| Beckley | Two more here. One is on the toilet behind the locked toilets on the northern side of the petrol station and store to the east of the town. The second is near the sofa and cooler on the ruined rooftop. Access this by climbing the debris on the building with the Nuka-Cola Cherry sign close to the water tower. |
| Sal's Grinders | In the men's restroom across from the kitchen on the ground floor, look right of the sink in the southern corner. |
| Nicholson's End | Another magazine can be found in the trailer with the roof platform attached to it. It has a Super Mutant cauldron hanging from the platform. |
| Mount Blair Trainyard | Three more here. One is on the small green chair on the wooden platform of the roof east of the two concrete structures, while another is between two filing cabinets in the office up the gantry steps, south of the eastern concrete yard with the yellow fan. A final one is behind the green work cabinet with the Mini Nuke on top of it in the large metal storage warehouse balcony. |
| Mount Blair | Two to be found, one is in the wrecked trailer northwest of the main excavator, on top of a toilet that's largely unscathed. The second is in the basement of the bulldozer garage through the barred door. This needs an ID card to access it. |
| Rollins Work Camp | This one is at the very back on the roof of the big bucket excavator. You access this via the rusted gantry. |
| The Burning Mine | Four more up for grabs in the Burning Mine. Look in the sink of the eastern rock wall of the blue piston conveyer belts for the first one. A second is on the passenger seat of the buried yellow mine-buddy across from the sloping conveyer belt below the Tinkerer's workbench. A third is close to the yellow forklift at the bottom of the cavern where the conveyer belt ends, on a low wooden crate. Finally, one more is against the rock wall on a wooden table just left of two half-buried white generators in the large cavern to the south. |
| Widow's Perch | Behind a cinder block near the broom and protest sign across from the mattress and blue-framed painting in the lower shack. It's just before you exit to the billboard. |
| Uncanny Caverns | Yet another four to look for here. Look by the sleeping bag and corpse that's close to the cooking station by audio tour #4 for the first one. Another is by audio tour #8 between the two sleeping backs and a radio, while the third is under the Uncanny Caverns poster behind the curved reception and transaction desk by the main entrance structure across the bridge. Finally there's one more on the magazine carousel in the gift shop, just left of the hole in the wall. |
| Bastion Park | Two more here. One is in the school bus parked between the playground and fountain, while the other is on the rear passenger seat of the rusting car near a second school bus in the rear of the park on the eastern side. |
| Pleasant Hills Cemetery | There's a large safe housing that's burned out, with a small level 3 locked safe within it, in the small mausoleum. The magazine is around that. |
| Lewisburg | Two more here. One is inside the restaurant on the diner counter, while the second is in the storage attic of the visitor centre, accessed via the rooftop garden near the greenhouse of the south-east corner. Look on the table by the green trunk. |
| Big Bend Tunnel West | This one is accessed by locked double doors in the main maintenance centre of the tunnel. Head for the metal desk in the window alcove across from the orange tool case in the cabins above the train tracks. |
| AMS Testing Sidte | In the maintenance warehouse, there is a cabinet counter by a trunk in the west alcove. It's behind that. |
| Red Rocket Filling Station | In the maintenance garage, there is a couple of green cabinets with a drawer on the raised concrete part. It's between that. |
| Striker Row | Two more here. There's a speaker with a "Danger" sign on it right of the microphone that's on the wooden stage close to the amplifier and below the sealed mine entrance. Another one can be found by the cooking station next to the military vehicle surrounded by tents. |
| Garrahan Mining HQ | Head for the Testing Control and Assessment area and look for the counter between the two Power Armor stations. |
With that, our guide for Magazines is done, but there's also the Bobbleheads that are also littered around the place like a small child's overturned toy box Head to our Fallout 76 Bobbleheads guide for all the locations found thus far for the Bobbleheads. Do check back as we spend more time with the game, but in the meantime you can head over to our Fallout 76 perk cards guide for more on how different perks work to just about any other Fallout game. There are also brand new mutations that you can find out more about in our Fallout 76 mutations guide.
