Valorant Raze guide - 40 tips and tricks that every Raze main should know
How does Raze fare after her nerf?

Out of all the agents available in Valorant, Raze is perhaps the most rage-inducing to contend against. Her skillset is focused almost entirely on dealing direct damage, setting her well apart from the rest of the agents in Valorant. But while her abilities are fairly easy to get to grips with, there's an awful lot more to them - and her - than meets the eye. Our Valorant Raze guide will walk you through some top-tier tips and tricks for getting the most out of this bombastic demo expert.
Valorant Raze guide
- Raze abilities overview
- Raze tips - Paint Shells
- Raze tips - Boom Bot
- Raze tips - Blast Pack
- Raze ultimate tips - Showstopper
- Some additional Raze tips
Raze abilities overview
Seeing as you're here, I can reasonably assume that you already know a little about Raze and her skillset. But there's merit in just quickly cycling through her abilities again before we dive into our in-depth tips and tricks - particularly if you haven't yet caught up on the recent changes to her Paint Shells ability:

| Paint Shells | Signature | 1 charge | Recharge mid-round by earning 2 kills |
| Equip a cluster grenade. Fire to throw the grenade, which does damage and creates sub-munitions, each doing damage to anyone in their range. | |

| Boom Bot | Purchasable | 1 charge | Costs 200c |
| Equip a Boom Bot. Fire will deploy the bot, causing it to travel in a straight line on the ground, bouncing off walls. The Boom Bot will lock on to any enemies in its frontal cone and chase them, exploding for heavy damage if it reaches them. | |

| Blast Pack | Purchasable | 2 charges | Costs 100c each |
| Instantly throw a Blast Pack that will stick to surfaces. Reuse the ability after deployment to detonate, damaging and moving anything hit. | |

| Showstopper | Ultimate | 6 charges |
| Equip a rocket launcher. Fire shoots a rocket that does massive area damage on contact with anything. |
Good? Good. Now let's talk about how you can become a top-tier Raze player in Valorant.
Raze tips - Paint Shells (Grenades)
- Paint Shells is an excellent ability for punishing enemies who are caught in bad or predictable positions, but it's also very useful for zoning or buying time. You can throw it into a doorway, and enemies will be dissuaded from pushing you until after the grenade and each of its four sub-munitions have detonated.
- Pre-patch, Raze could one-shot a full-health full-armor enemy with Paint Shells, provided they were hit by multiple munitions. But post-patch, Paint Shells can only deal a maximum of 90 damage if all five explosions hit.
- The initial grenade explodes after 3 seconds no matter what, but the timer for the sub-munitions only begins after they've settled on a surface. This means you can throw your grenade high into the air (including over the tops of buildings) where it will explode, raining the sub-munitions over a much larger area and spreading out the damage and zoning potential of the ability.
- There is a delay of over a second after throwing the grenade before you can shoot with your weapon again. So be careful, because enemies can hear the sound of you pulling the pin, and will know to push you at that moment.
- Paint Shells is an extremely powerful technique for punishing enemies who push from behind a Sage barrier. A common example is when the attackers push through B long on Split, and wall off against B tower (heaven) in the process. If you can get a grenade over that barrier while they're rushing towards the site, the confined space will often deal massive damage to multiple enemies at once.
- Paint Shells is a great tool for making noise and diverting the opposing team's attention. Useful for faking a push to a certain site while the rest of your team head elsewhere.
- Throw roughly 30 degrees upwards from eye level for the furthest possible throw that results in the initial munition exploding at ground level instead of in the air.
- Right-clicking to throw Paint Shells will result in an underhand throw rather than the usual overhand throw. This is situationally useful for very close quarters combat, but it'll only travel a maximum of around 10 metres, while the overhand throw will easily cover two or three times that distance.
Raze tips - Boom Bot
- If Boom Bot manages to detonate on an enemy, it will deal 125 damage - enough to kill a full-health enemy with light armor.
- Boom Bot causes considerable noise, both in its initial release and its subsequent travelling. This tells everyone where you are, so try to limit how much you expose yourself in order to release the Boom Bot.
- In most cases, Boom Bot will never get a chance to deliver the massive damage it promises. But it can be very useful as a distraction if you time it right. Peek around the corner while the enemy is shooting the Boom Bot, and you may be able to get a free kill.
- Boom Bot can be propelled along quite a distance by detonating a Blast Pack near it. You can coerce it over lips and ledges, or just give it an unexpected burst of speed to potentially catch an enemy off-guard.
- Boom Bot has a wider view cone than you might think. It's far from uncommon for the bot to weed out enemies that are hiding around corners.
- As mentioned, Boom Bot is more useful as a zoning or distraction tool than for actual damage-dealing - but when combined with smokes or other vision-limiting abilities, you can potentially get a free kill from the bot.
- In most cases, it's far better to angle Boom Bot so that it gives no space for enemies to remain undetected, rather than to cover the most distance. If you provide enemies with a space where they can avoid the Boom Bot's view cone, they can get the jump on you with ease.
- Boom Bot's hitbox doesn't extend to its wheels, so you can clip slightly through walls with the Boom Bot. This is useful for limiting your exposure while placing the bot.
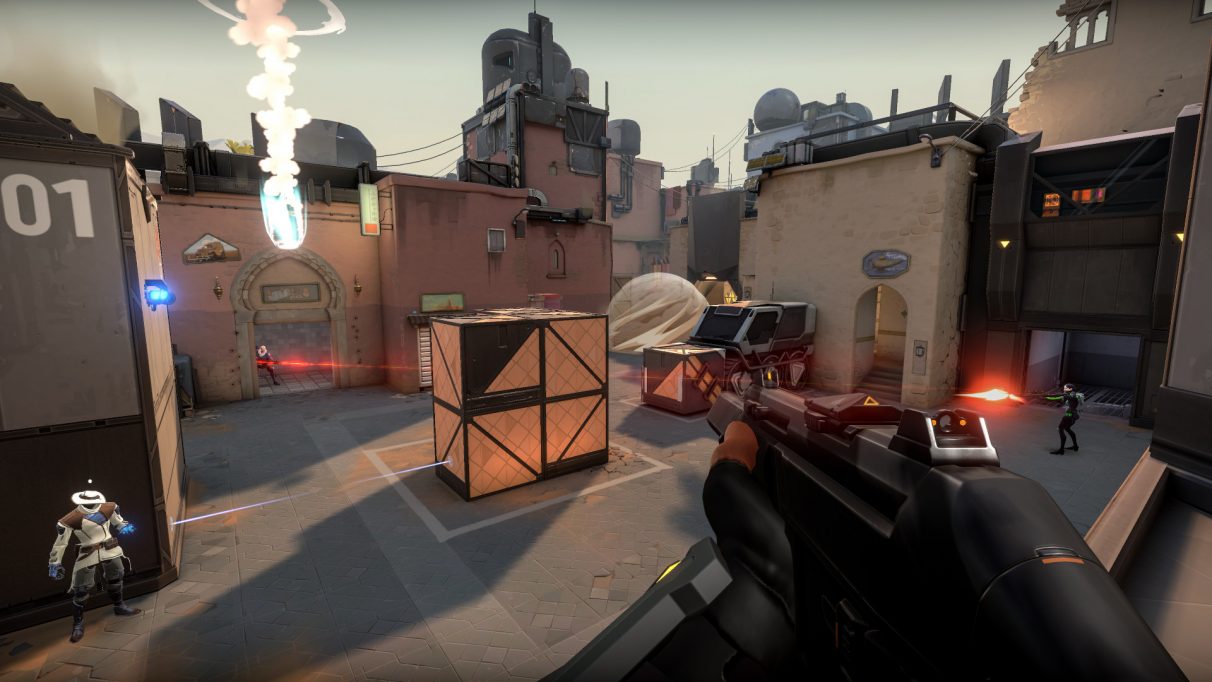
Above: an example of the unexpected acrobatic feats you can pull off with Raze by chaining together her Blast Packs and her Showstopper. Definitely worth hopping into a custom game to practice this.
Raze tips - Blast Pack
- With a perfect hit (i.e. if you stick the Blast Pack to an enemy), the detonation will deal 75 damage.
- Just like Paint Shells, Blast Pack deals friendly fire damage. So be careful when using Blast Pack around allies. But unlike Paint Shells, Blast Pack deals no damage to yourself, so you can feel free to use it to boost yourself to otherwise inaccessible areas.
- For those struggling to consistently boost yourself upwards with a Blast Pack, the trick is to attach the pack to the bottom of the wall itself, then jump above it and detonate.
- You can detonate Blast Pack almost immediately after throwing it. It doesn't need to have landed for you to detonate it.
- As with Paint Shells, there's a significant delay of at least a second after throwing a Blast Pack before you can shoot again, so be careful you don't expose yourself too much when using it.
- You can't shoot a Blast Pack to destroy it, but you can destroy it with abilities such as Paint Shells. Destroying the pack in this way doesn't trigger the detonation.
- Practice using both Blast Packs in quick succession to catapult yourself extreme distances. This is also very useful for momentarily propelling yourself so high in the air that you can briefly see over buildings, allowing you to gain intel on enemy whereabouts.
- You can detonate a Blast Pack without it interrupting anything else you do. So you can continue shooting with your main weapon while you detonate a pack.
- If using the Blast Pack to propel yourself forwards for a surprise attack, wait until you regain use of your weapon before you detonate - or else you'll be extremely vulnerable while flying through the air.
- Alternatively, if you want extreme speed more than anything (for example, relocating to a different area), the best thing to do is throw your first pack on the ground, wait until the throw animation is complete, then click the ability button three more times. This will explode the first pack, then immediately throw and explode the second pack too. Angling yourself correctly while you do this will result in an incredible burst of speed.
- The timer on a Blast Pack starts from the moment you throw it; it doesn't wait until the pack lands. However, the beeps only start after the pack lands. So if you throw the pack a long way through the air, it'll explode long before the beeps begin to get faster, which may surprise your opponents.
Raze ultimate tips - Showstopper
- Showstopper deals between 20 and 150+ damage depending on the target's proximity to the very centre of the blast. A direct hit is a guaranteed kill.
- As with Paint Shells, you can deal self-damage with Showstopper, so be careful.
- Firing the rocket propels yourself backwards, and you can use this momentum to bunny-hop away.
- You can chain together Blast Packs and the Showstopper to fly through the air and fire the rocket from above. There's no movement inaccuracy with the rocket, so it will go exactly where you point it.
- The Showstopper rocket fires completely straight; there's no bullet drop at all. However, the velocity of the rocket is rather slow, so don't expect instant kills over longer distances. In some cases it may be better (and safer) to opt for your regular hitscan weapon.
- The moment you first hit your ultimate button, the timer begins. And if the timer runs out, you won't fire anything but you'll still use up the ability. Likewise, if you die before you get to fire the rocket, the ability will still be depleted.
- For this reason, it's best to use your ultimate even if you're not sure you'll hit anyone. Don't concern yourself with lining up the perfect hit; it's often a good idea to shoot at the wall or floor where an enemy might be, just in case.
- While the timer is counting down, you can switch weapons and fight as normal, and it won't cancel the ability. However, you'll have to go through the ultimate prep animation again if you want to reequip it.
- You can bait players by prepping Showstopper and then immediately switching over to your regular weapon. An enemy who recognises the windup time of the ultimate might peek, expecting to get an easy kill while you're still caught in the windup animation. Little do they know that you'll already have your gun out and aimed at their head.
- While switching from Showstopper to weapon and back will incur a reequip penalty, switching from Showstopper to another ability and back will not. So after throwing a Paint Shell or Blast Pack, you'll be able to reequip your Showstopper surprisingly quickly.
Some additional Raze tips
- With such a damage-oriented toolkit, you need to make sure you use it responsibly. Friendly fire is a very real threat with Raze, and you won't be making any friends by using your abilities with reckless abandon.
- People generally don't think of Raze as one of the most mobile agents in Valorant, but the truth is a good Raze can use her abilities to match even Jett's penchant for extreme speed. Take advantage of this.
- With Raze in particular, it's very viable to spend on your abilities during econ rounds. It's often better overall to buy a Boom Bot and a couple of Blast Packs than to pick up a Ghost on the first round.
With that, we'll conclude this Valorant Raze guide. But we've got plenty more to offer for any Valorant player looking to increase their skill and knowledge! Click any of the links below to head over to a different Valorant guide.
| Valorant basics (start here if you're new!) | ||||
| Valorant weapons | Valorant crosshair | |||
| Valorant characters | ||||
| Valorant characters | Valorant team comps | |||
| Breach | Brimstone | Cypher | Jett | Omen |
| Phoenix | Raze | Sage | Sova | Viper |
| Reyna | ||||
| Valorant maps & callouts | ||||
| Valorant Ascent map | Valorant Bind map | |||
| Valorant Haven map | Valorant Split map | |||
| Miscellanious Valorant guides | ||||
| Valorant Store & Valorant Points | Valorant ranks | |||
| Valorant error codes | How to report in Valorant |