Valorant Brimstone guide - 28 tips and tricks covering all Brimstone abilities
Control the map with the master of smokes

Brimstone is widely considered one of the most valuable Valorant agents to have on your team. His ability to control the map is second to none, and his Incendiary grenades and Orbital Strikes offer a rare amount of damage potential. And lucky for you, our Valorant Brimstone guide is packed with numerous top tips on perfecting your use of all four Brimstone abilities.
Valorant Brimstone guide
- Brimstone abilities overview
- Brimstone tips - Sky Smoke
- Brimstone tips - Incendiary
- Brimstone tips - Stim Beacon
- Brimstone ultimate tips - Orbital Strike
- Some additional Brimstone tips
Brimstone abilities overview
It's always good to quickly run through the abilities of an agent before we start properly discussing how to play them. So to that end, here are all the abilities Brimstone can use in a Valorant match:

| Sky Smoke | Signature | 3 charges | Purchase 2nd & 3rd charges for 100c each |
| Equip a tactical map. Fire to set locations where Brimstone's smoke clouds will land. Alternate Fire to confirm, launching long-lasting smoke clouds that block vision in the selected area. | |

| Incendiary | Purchasable | 1 charge | Costs 200c |
| Equip an Incendiary grenade launcher. Fire to launch a grenade that detonates as it comes to a rest on the floor, creating a lingering fire zone that damages players within the zone. | |
|
| Stim Beacon | Purchasable | 2 charges | Costs 100c each |
| Equip a Stim Beacon. Fire to toss the stim beacon in front of Brimstone. Upon landing, the stim beacon will create a field that grants players RapidFire. | |

| Orbital Strike | Ultimate | 6 charges |
| Equip a tactical map. Fire to launch a lingering orbital strike laser at the selected location dealing high damage over-time to players caught in the selected area. |
Now that we've a firm grasp of Brimstone's powers, let's talk about each one in turn and how we can use them properly to give our team the greatest possible advantage.
Brimstone tips - Sky Smoke
- Sky Smokes are the longest-lasting uninterrupted smokes in the game, with each smoke lasting 14 seconds. This, combined with the fact that Brimstone can drop up to three in quick succession, is the bulk of what makes Brimstone such a powerful agent.
- The downside to Sky Smoke is that it's the most costly signature ability in the game. Brimstone only starts the round with one smoke, and must purchase the others for 100 credits in the shop. But considering the value these smokes add to the team, it's almost always worth the money.
- If you're on the periphery of a Sky Smoke, you are completely blind. If you're in the middle of the smoke, then you aren't completely blind, but you are Nearsighted - and of course you cannot see anything outside of the smoke. This makes Sky Smoke one of the most potent smokes available, as well as the longest-lasting.
- Most Brimstone players use their Sky Smokes at the very start of a round (and this is very viable), but the key to this ability is to use it with intention. Don't just slap them down on the first three chokepoints you see. Think about the team play, and where your smokes would be most useful to the team.
- Don't use multiple Sky Smokes where one will do. I've seen so many Brimstones pepper the same location with all three smokes, just to be extra sure they've blocked all possible lines of sight. But this is often unnecessary, and wasteful. If you can block a choke with a single smoke, don't use multiple smokes.
- If you hold onto your Sky Smokes, they can be very useful for blocking off all entrances and exits to a site, to provide extra safety while pushing for a spike plant.
- Another common tactic is to fake a push to a different site than where the spike is actually headed. If all three Smokes land on a certain site, odds are the enemies there will ready themselves for an attack, whether or not it ever arrives.
- Given the limited range of Brimstone's tactical map for placing Sky Smokes, you can sometimes figure out where an enemy Brimstone is by the placement of their smokes. If multiple smokes land across the map simultaneously, they must be near the centre of the map.
Brimstone tips - Incendiary
- Brimstone's Incendiary deals less damage than Phoenix's Hot Hands, but it lasts longer - around 8 seconds.
- Because of its extended duration, this is a good ability for zoning out areas, delaying pushes, and flushing enemies out from around corners. Don't expect to get many kills with Brimstone's Incendiary, but use it in the right ways and you'll play a prominent role in winning rounds.
- Another key departure from Phoenix's Hot Hands is that the Incendiary canister bounces before exploding into the flame area, rather than spreading immediately on contact with a surface. This means you can bounce it off walls and around corners with ease - but if you want to use it in close quarters, remember to point near your feet and allow the canister to skim along the floor, or else it will sail past where you wanted it to detonate.
- The Incendiary canister has a low travel velocity but a surprisingly high range. You can quite easily fire an Incendiary across the map, as long as you learn exactly where to fire from to make sure it lands where you wanted, rather than exploding harmlessly on a rooftop.
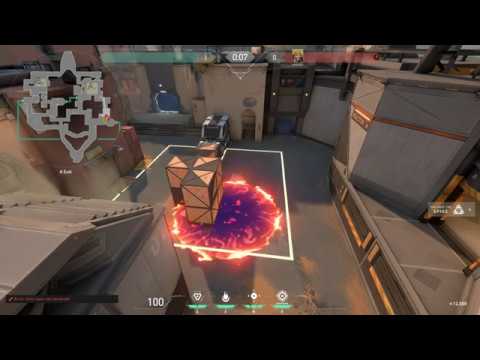
- Speaking of learning exactly where to fire from, take a look at the below video from YouTube user Mute, which showcases some powerful Incendiary placements for Bind A Site.
Brimstone tips - Stim Beacon
- Stim Beacon lasts a total of 12 seconds, but the RapidFire stays with you for 4 seconds after the Beacon disappears (or after you leave the area of effect).
- While the Beacon is still active, you can move back into the area of effect in order to refresh the 4-second duration of the RapidFire.
- RapidFire is in essence a 10% increase to your rate of fire with all weapons and all firing modes. The difference is most obvious (and probably most effective) with slow-firing weapons like the Operator and Marshal.
- Enemies that enter your Stim Beacon will gain RapidFire - so the placement of your Beacon is important. If in doubt, place the Beacon slightly behind where your team are pushing, so that allies can go back and touch it if needed, and enemies are deprived of the Rapidfire effect.
- Though you can have up to 2 charges of Stim Beacon, you cannot place your second Beacon until the first has expired. Stim Beacons cannot stack.
- In its current state, Stim Beacon really isn't that useful at all. My top tip for Stim Beacon is that in most cases you should forego buying charges for it, if it means you can keep other more important abilities (such as Sky Smoke) well-stocked.
Brimstone ultimate tips - Orbital Strike
- Brimstone's tactical map when deploying an Orbital Strike is quite a bit larger (i.e. more zoomed out) than when placing Sky Smokes. You can, for example, see almost the entirety of Haven on the tac map if you stand in front of Site B.
- Orbital Strike deals very high damage in a short space of time - around 39 damage per second, to be more specific. This is enough to kill any player that cannot exit the area of effect within 4 seconds (less if they aren't at 150 HP). But be careful you don't turn this awesome power on your own team, because friendly fire is very much enabled with Orbital Strike.
- There's a 2-second windup after deploying the strike before it starts to deal damage, which is enough for many players to avoid damage - or at least avoid death. Having said that, it can be very difficult to avoid if you're caught at a bad time near the centre of the blast.
- Not only does Orbital Strike deal lots of damage, but it also completely blinds anyone in the area of effect (including friendlies). All players will receive a large red warning circle around the centre of the screen if they are within the radius of the Orbital Strike.
- Orbital Strike pays not the slightest attention to rooftops. It will treat indoor areas exactly like outdoor areas, so you can hit any portion of the map you like with Brimstone's ult.
- Orbital Strike is a phenomenal ability for preventing both spike plants and spike defuses. If you stay in the blast radius, you're dead, so it forces players to give up the plant/defuse and move out of position. A powerful advanced tactic for more coordinated teams is to let the enemy take a site, wait for the plant, then Orbital Strike and move in for the kill.
- Some areas of the three Valorant maps are hit more frequently by Orbital Strikes than others. To name a few: B Window and Garage in Haven; Hookah and Teleporters in Bind; B Tower in Split; and pretty much any Heaven area on any site across all three maps.
Some additional Brimstone tips
- In the same way that a single push should revolve around Breach's or Phoenix's initiation abilities, your strategy for the entire round should revolve around Brimstone's map control abilities. Any talk of strategy for the round should involve placement of Brimstone's Sky Smokes. Otherwise, you're doing it wrong.
- Brimstone is the caretaker of the team, in some ways even more so than Sage. As Brimstone, your job to keep an eye on your entire team across the map, and across the round. Smoke to support allies who need it, and use the information passed by team members to ensure your ultimate is well-placed. As with everything in Valorant, communication is paramount.

With that, we'll conclude this Valorant Brimstone guide. But we've got plenty more to offer for any Valorant player looking to increase their skill and knowledge! Click any of the links below to head over to a different Valorant guide.
| Valorant basics (start here if you're new!) | ||||
| Valorant weapons | Valorant crosshair | |||
| Valorant characters | ||||
| Valorant characters | Valorant team comps | |||
| Breach | Brimstone | Cypher | Jett | Omen |
| Phoenix | Raze | Sage | Sova | Viper |
| Reyna | ||||
| Valorant maps & callouts | ||||
| Valorant Ascent map | Valorant Bind map | |||
| Valorant Haven map | Valorant Split map | |||
| Miscellanious Valorant guides | ||||
| Valorant Store & Valorant Points | Valorant ranks | |||
| Valorant error codes | How to report in Valorant |