The best field equipment in Modern Warfare 3
Here is the best field equipment to use in Modern Warfare 3
What is the best field equipment in Modern Warfare 3? The field equipment you acquire in Call Of Duty: Modern Warfare 3 can turn the tide in battle by providing additional tools to run alongside your tactical and lethal equipment. With limited use, it's up to you which Field Upgrades you choose and when you decide to deploy them.
Luckily, in our guide below, we help to inform your decision with details on what each of the Field Upgrades are capable of, how to use them, and how they suit different playstyles in Modern Warfare 3. Without further ado, let's get going.
18. Tactical Insertion
Description: Marks a location as your next spawn point. Tactical Insertion doesn't have an effect in one-life modes, such as Search & Destroy
First seen in the original Modern Warfare 2, the Tactical Inserton is a handy tool to bring you back into the game from a location of your choosing. It's especially useful in Ground War when the deployable zones can be far from the objective. Or, if you fancy popping up in a place your enemies don't expect you, then it's great for that too.
17. Inflatable Decoy
Description: Proximity activated decoy mine. Upon activation the reinforced fiber target is violently deployed to confuse and distract. Press the Tactical and Lethal buttons together a second time for manual activation.
As with most of the field equipment, the name of this one is fairly self-explanatory. It's a decoy that inflates, either automatically or manually, to fool enemies into attacking it, instead of you. It's useful to deploy this one when you're being pursued as it'll hopefully throw your enemy off and help you gain back valuable seconds. Or, just throw it out to have a laugh with your allies.
16. Deployable Cover
Description: Portable, rapidly deployable ballistic cover
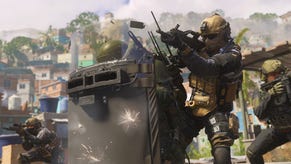
Best suited for when you're hiding in a small space or in an area with limited cover, the Deployable Cover can be rapidly released to provide you with an instant spot to duck behind. It's also helpful as a blockade for open doors when you're guarding a particular objective and want to build up your defenses.
15. Anti-Armor Rounds
Description: Gives weapon ammo that applies bonus damage against armored targets; this includes vehicles, equipment, body armor, and targets behind penetrable cover.
The Anti-Armor Rounds work against armored cover like vehicles, equipment, body armor, and targets hiding behind penetrable cover. It'll increase your weapon ammo damage against these items making them easier to destroy. This piece of field equipment works well in Ground War due to how many vehicles you'll come across.
14. A.C.S.
Description: An Automated Computer Spike slowly captures points and temporarily hacks nearby enemy devices. Point capturing applies in the following modes: Domination, Hardpoint, Control, Ground War.
When activated, the A.C.S. slowly captures points and temporarily hacks nearby enemy devices. This makes it a useful tool in Domination, War, and Hardpoint as you can leave it placed on an objective to take the point while you're not there. It'll also turn enemy devices like claymores against opponents for a limited amount of time.
13. Tactical Camera
Description: Remote-controlled camera that marks enemies. Press the Tactical and Lethal buttons to throw it, and press again to connect to it. When left on its own, the camera will monitor the area and warn players of nearby enemies by sound.
After throwing down the Tactical Camera with the tactical and lethal buttons, players press again to connect to it and then off to work it goes scoping out the area, marking enemies, and providing valuable insight for your gameplay. If left unmanned, the camera will still monitor the area and warn you of nearby enemies with a sound instead.
12. Recon Drone
Description: Remote-controlled drone that has manual and auto marking capabilities.
Send it up and mark those enemies. The Recon Drone is a manually controlled drone that will automatically, or by your hand, mark enemies in the area you're flying it around. It's that bit better than the Tactical Camera as its mobility allows coverage of a larger area or specific area you have your eyes on and so, you can send up the Recon Drone to get a better view.
11. Munitions Box
Description: Deploy a box of ammo and equipment for you and your teammates.
It's always a nice and easy choice to drop a Munitions Box and call your teammates to gather round to reload on ammo and equipment. It's a quick piece of field equipment to use and highly effective for helping not only you, but your allies too.
10. Med Box
Description: Deploy a box of medical supplies for you and your teammates to reduce healing delay.
Like the Munitions Box, the Med Box supplies healing equipment for you and your teammates when dropped on the floor. A helpful field upgrade if you're running low on heals that are less easy to come by.
9. Trophy System
Description: Deployable autonomous defense system that destroys up to three nearby pieces of equipment and projectiles. Some larger targets may take multiple shots.
This defensive piece of field equipment deploys an autonomous system that will destroy up to three pieces of nearby lethal and tactical equipment. The Trophy System is helpful in game modes like Demolition or Domination as it can protect you while you secure an objective, but it's also well-suited to Drop Zone due to how much explosive weaponry it can deflect. Remember, it'll only do three though, so play smart.
8. Heartbeat Sensor
Description: A limited used tablet that displays rough information about nearby enemies.
In Modern Warfare 2, the Heartbeat Sensor became limited use. Now, equipped with a limited battery charge, it will run out eventually so you haven't got forever to play around with it. Alas, you can still whip it out and use it to give rough at-time-of-use capture of nearby enemies' location.
7. Loadout Drop
Description: Call in a team-based loadout crate with limited uses. Each player can only use it once.
Calling in the team loadout crate that each member of the team can interact with is a solid piece of support field equipment. It's limited use though, so swap out that loadout wisely.
6. Comm Scrambler
Description: Disables communication with intel within its radius. Enemies will not be able to activate killstreaks. Enemy UAV and intel systems will not detect you and your teammates. Location of the scrambler is visible in the enemy minimap.
While each item of field equipment on our list can change up gameplay, we're getting to the crux of it here as the rest of our ranked upgrades can really determine whether you win or lose. In previous Call of Duty titles, you'll know the Comm Scrambler as just the Scrambler, but it's been renovated and upgraded for Modern Warfare 3.
It'll disable comms with intel within its radius, stop enemies for activating killstreaks, and keep you and your team of enemy UAV and intel systems. Unfortunately though, the enemy team will be able to see where the scrambler is on their minimap, so they can come and destroy it.
5. Suppression Mine
Description: Trip mine that when triggered, emits a constant sound wave that disrupts enemy vision and slows their movement.
When triggered by enemies stepping over it, the Suppression Mine will emit a constant sound wave that disrupts enemy vision and slows their movement. A pretty handy one to drop down if you're being pursued by an enemy team and want to get a quick upperhand. What's not to love about ensuring you have better vision and quicker feet than your enemies?
4. Smoke Airdrop
Description: Call in a line of drones to deploy a smoke wall at a targeted location.
Perk turned field upgrade, the smoke airdrop is a smoke grenade evolution. next The line of drones fly in and deploy a smoke wall at a targeted location. This field upgrade works well if you need cover to get away, or you're trying to avoid any sneaky snipers. That is, of course, if they don't have means of finding you regardless.
3. DDoS
Description: Activates a device that deactivates electronics, and disrupts enemy sensors in the immediate area for a short time.
A classic cyberattack, the DDoS will deactivate electronics and enemy sensors in the immediate area for a limited time. It's a piece of field equipment that works well in game modes where there's key zones to attack, like Domination and Hardpoint, as there will no doubt be lots of field upgrades to counter with this DDoS.
2. Portable Radar
Description: Emits a periodic radar ping to detect nearby enemies.
Like the Dead Silence below, the Portable Radar is a true gameplay advantage. Emitting a radar ping to detect enemies located nearby is always going to be helpful, in every single game mode and situation. To know where your enemies are before they see or hear you is a top-tier piece of field equipment.
1. Dead Silence
Description: Temporarily makes your footsteps silent. Gun, melee, and throwing knife kills refresh duration.
Top of our list, for a limited duration, your footsteps are silent. Keeping it quiet means you can stealth and sneak your way around any map. Plus, if you secure yourself a gun, melee, or throwing knife kill, the Dead Silence will get a duration refresh to keep the good times rollin'. Pair this one with the best MW3 gear, the Bone Conduction Headset, and your footsteps are off the map, and your enemies are very, very much on it.
That's everything we've got on the best field equipment in Modern Warfare 3. They're great tools to use alongside the best lethal and best tactical equipment, so be sure to check out our guides on those to ensure you're fully equipped for battle.


