Dauntless Nayzaga - how to kill it


The Nayzaga in Dauntless is one of the tougher early Behemoths in the game. The shards they shoot out of their backs are electrically charged and unless you manage them, you'll be overwhelmed by electric balls that shoot out of them after a while. Naturally, you don't want that, so we'll give you the tips you need to beat this boss.
Those new to hunting Behemoths should brush up on the basics. Head over to our Dauntless Behemoths guide to find the rest of the bosses, or head back to our Dauntless guide & tips for more tips and tricks.
Dauntless Nayzaga guide
This guide has the full tips and tricks to killing the Nayzaga boss in Dauntless. It also has the resource table for the Behemoth and how to obtain the resources for each part.
Nayzaga Stats
- Nayzaga: Threat Level: 5 (Recommended power: 200)
- Shockjaw Nayzaga: Threat Level: 11 (Recommended power: 375)
- Shockjaw Nayzaga Heroic: Threat Level: 15 (Recommended power: 475)
Nayzaga Elements
- Strong: Shock
- Weak: Terra
How to kill the Nayzaga
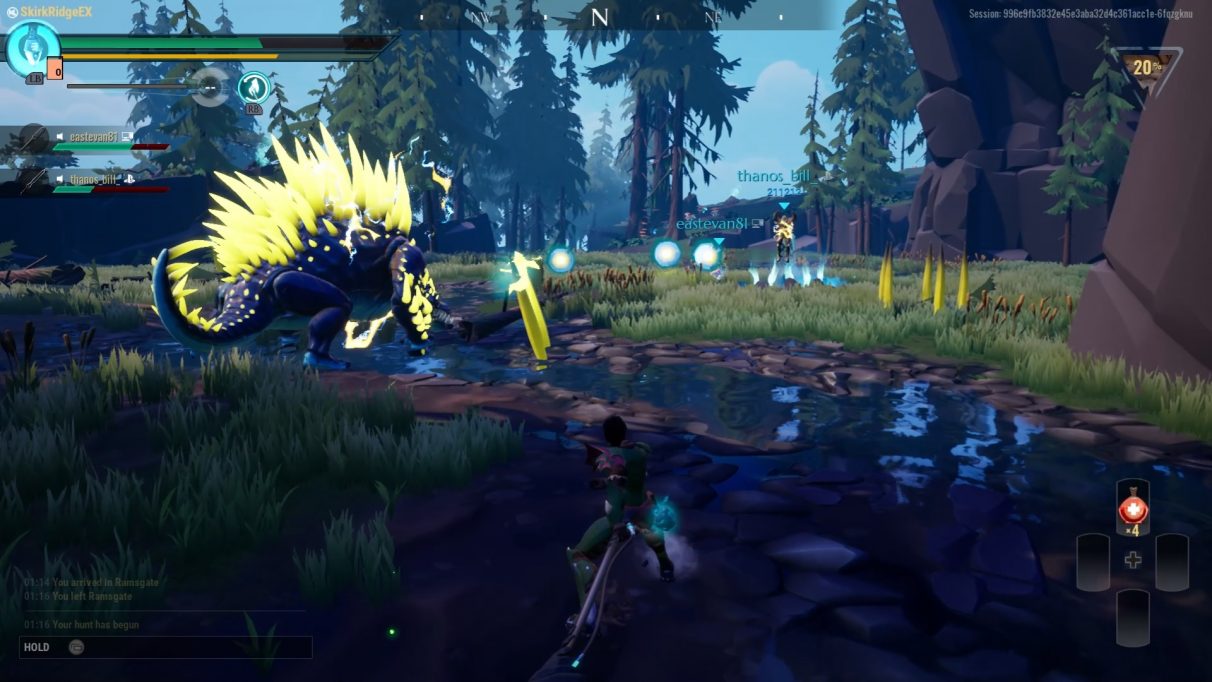
This one can be a tough lizard to take down if you don't work together. Make sure you have worked out your roles between your team of four. If you're able to party up for this one, I'd recommend it as it will save you a few headaches. Two should have weapons that have a good area of effect, such as the Chain Sickles or Sword, while the other two should have weapons that focus on doing as much to the Nayzaga. When you're hit by any of its electrical attacks, back off and start dodging until the status condition subsides. This is because you won't be able to heal until it goes away, so mitigate that risk and back off.
So the thing about Nayzaga is that it shoots out shards. These shards will charge up electrical blasts that you can reflect back at the shards by hitting them. The problem is that it fires out multiple shards and they can fire at different time sequences. You'll ideally want two to focus on clearing these shards away so that the other two can focus on the Nayzaga. Those focusing on the Behemoth should keep an ear out for when the shards fire their charges, so that you can avoid getting hit by them.
Aside from firing shards, the Nayzaga has access to a bunch of attacks that are melee based, such as tail and claw swipes swipes and slams with the fist. One other attack you should definitely be aware of is when it begins to charge up. It'll swipe with its tail, which also sends some lightning in a straight line and you really don't want to be hit by that. As long as you have at least a couple of you micromanaging the shards, you should have a relatively easy time.
Nayzaga resources
Before we go, here are the resources you can obtain for slaying and damaging the Nayzaga. These are a 100% chance to obtain an item, as long as you break specific parts, but there are rarities for each one as explained below:
| Resource | How to get resource | Variants |
|---|---|---|
| Nayzaga Chitin | Slay the Nayzaga | Nayzaga |
| Shocktooth | Break its head | Nayzaga |
| Static Spine (Rare) | Break its head | Nayzaga |
| Sparkclaw Splinter | Break its legs | Nayzaga |
| Sparkclaw Chunk (Rare) | Break its legs | Nayzaga |
| Sparkspine | Break its tail | Nayzaga |
| Electric Tailspike | Break its tail | Nayzaga |
| Shockjaw Hide | Slay the Nayzaga | Shockjaw Nayzaga |
| Charged Shockjaw Hide (Rare) | Slay the Nayzaga | Shockjaw Nayzaga |
| Dull Tooth Fragment | Break its head | Shockjaw Nayzaga |
| Charged Spine (Rare) | Break its head | Shockjaw Nayzaga |
| Sparking Spine (Epic) | Break its head | Shockjaw Nayzaga |
| Dull Sparkclaw | Break its legs | Shockjaw Nayzaga |
| Greater Sparkclaw (Rare) | Break its legs | Shockjaw Nayzaga |
| Sparking Claw (Epic) | Break its legs | Shockjaw Nayzaga |
| Tailspike Fragment | Break its tail | Shockjaw Nayzaga |
| Charged Tailspike (Rare) | Break its tail | Shockjaw Nayzaga |
| Sparking Tailspike (Epic) | Break its tail | Shockjaw Nayzaga |
| Rockstar | Slay the Nayzaga | Shockjaw Nayzaga Heroic |
That's it for our Nayzaga guide, but we'll have more boss guides coming soon. For more on what you can build with the Nayzaga resources, go to our Dauntless weapons and or Dauntless armor guides respectively.