Jedi Survivor Holotactics guide: How to beat Tulakt, Skoova, Tulli, and the rest
How to beat every round of Holotactics
Looking to beat every round of Holotactics in Jedi: Survivor? Holotactics has absolutely no right to be as fun as it is, but whoever thought up the idea of creating an autobattling minigame out of enemy units you've scanned throughout Star Wars Jedi: Survivor is a genius.
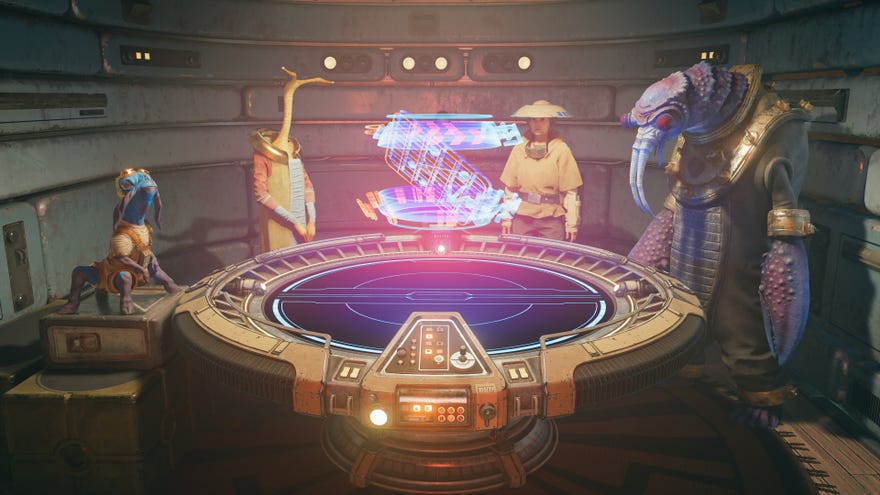
Holotactics can be played at Pyloon's Saloon once it's unlocked, and there are eight opponents of varying difficulty to compete against. Be warned though: Holotactics can get very tricky on some rounds, and victory can sometimes feel like an impossibility. That's why we've put together this Jedi: Survivor Holotactics guide, which will explain how to unlock the game and all its units, and how to beat every single opponent in the game, including Tulakt, Skoova, D-1N8, and even the mighty Tulli.
How to unlock Holotactics in Jedi Survivor
You can unlock the Holotactics game in Jedi: Survivor by completing the "Locate The Odd Pair" rumor side quest on Koboh. Talk to Moran in Pyloon's Saloon after completing the Forest Array section of the main story. He'll tell you about the titular odd pair that he saw in the Boiling Bluffs in Rambler's Reach.
Head to the Boiling Bluffs by following the rumor marker on the holomap, and up the cliffs at the end beyond the Mogu you'll hear voices. Follow the voices to find Bhima and Tulli, and after talking to them they'll agree to return to Pyloon's Saloon.
Next time you're back at Pyloon's Saloon, head upstairs and go through the door next to the aquarium to find Bhima and Tulli around their newly set up Holotactics table. Interact with the table to start playing Holotactics!
Jedi Survivor Holotactics guide
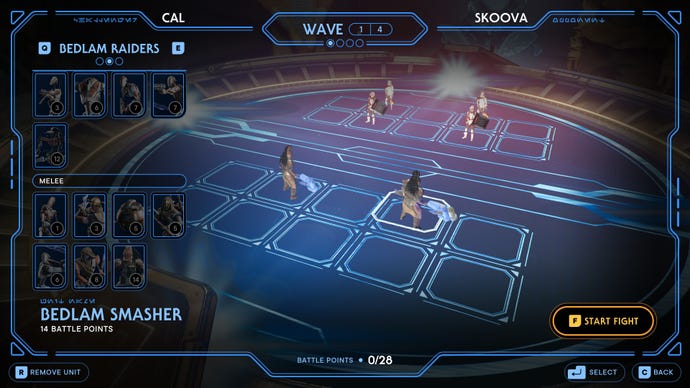
To beat an opponent at Holotactics, you need to survive every round of the match - if you lose a single round, then you lose the match. Each round you'll see which units you're up against, and you get to spend points to place your own units on the board from a list of enemies that you've scanned throughout your travels in Jedi: Survivor.
How to unlock units in Holotactics
You unlock units to use in Holotactics by beating them in Jedi: Survivor, and then having BD-1 scan their corpse to unlock their databank entry. In other words: any enemy unit you have a databank entry on, you can use in Holotactics. Aside from bosses and other special units, of course.
Here are some easy places to find each of the Holotactics units to scan in Jedi: Survivor:
| Unit Name | Faction | Cost | Location |
|---|---|---|---|
| Stormtrooper | Empire | 2 | Coruscant (Rooftops) |
| Stormtrooper Commander | Empire | 3 | Coruscant (Skylane Regulation Station) |
| Flametrooper | Empire | 5 | Jedha (Monastery Walls) |
| Heavy Assault Trooper | Empire | 6 | Coruscant (Rooftops) |
| Rocket Launcher Trooper | Empire | 6 | Jedha (Penitent Chambers) |
| Purge Trooper Commander | Empire | 10 | Coruscant (Freight Handling Depot) |
| DT Sentry Droid (Staff + Blaster) | Empire | 10 | Jedha (Trailhead Pantheon) |
| DT Sentry Droid (Hammer + Missiles) | Empire | 10 | Jedha (Trailhead Pantheon) |
| AT-ST | Empire | 25 | Jedha (Sandblasted Vestiges) |
| Scout Trooper | Empire | 2 | Coruscant (Rooftops) |
| Scout Trooper Commander | Empire | 3 | Coruscant (Renovation Site 4733) |
| Electrostaff Purge Trooper | Empire | 4 | Jedha (Desert Passages) |
| Electrobaton Purge Trooper | Empire | 5 | Coruscant (Undercity Meats) |
| Shield Trooper | Empire | 6 | Koboh (Basalt Rift) |
| Security Droid | Empire | 9 | Coruscant (Undercity Meats) |
| Security Droid (Baton) | Empire | 10 | Coruscant (Rooftops) |
| DT Sentry Droid (Hammer + Staff) | Empire | 10 | Jedha (Trailhead Pantheon) |
| B1 Droid | Bedlam Raiders | 3 | Koboh (Gorge Crash Site) |
| B2 Droid | Bedlam Raiders | 6 | Koboh (Gorge Crash Site) |
| BX Droid (Rifle) | Bedlam Raiders | 7 | Koboh (Southern Reach) |
| BX Droid (Hybrid) | Bedlam Raiders | 7 | Koboh (Fort Kah'lin) |
| Droideka | Bedlam Raiders | 12 | Koboh (Loading Gantry) |
| B1 Droid (Melee) | Bedlam Raiders | 1 | Koboh (Swindler's Wash) |
| Raider Grunt | Bedlam Raiders | 3 | Koboh (Gorge Crash Site) |
| Roller Mine | Bedlam Raiders | 5 | Koboh (Gorge Crash Site) |
| Raider Veteran | Bedlam Raiders | 5 | Koboh (Rambler's Reach Outpost) |
| BX Droid | Bedlam Raiders | 6 | Koboh (Derelict Dam) |
| Magnaguard | Bedlam Raiders | 8 | Shattered Moon (Automated Forge) |
| Bedlam Smasher | Bedlam Raiders | 14 | Koboh (Fort Kah'lin) |
| Gorger | Fauna | 2 | Koboh (Southern Reach) |
| Hardshell | Fauna | 3 | Jedha (Ruins Landing Site) |
| Shiverpede | Fauna | 4 | Koboh (Gorge Crash Site) |
| Rawka | Fauna | 5 | Koboh (Riverbed Wash) |
| Bramlik | Fauna | 5 | Koboh (Southern Reach) |
| Sutaban Alpha | Fauna | 10 | Jedha (Monastery Walls) |
| Bilemaw | Fauna | 12 | Koboh (Swindler's Wash) |
| Gorocco | Fauna | 14 | Koboh (Gorge Crash Site) |
| Mogu | Fauna | 16 | Koboh (Forest Array) |
| Skriton | Fauna | 20 | Jedha (Monastery Walls) |
How to beat Holotactics
To do well at Holotactics you need to adapt your strategy for each opponent and each round. Units like the Bedlam Smasher, Sutaban Alpha, Skriton, and Droideka are extremely powerful in the right situations (and indeed we use each of them a lot below), but use them in the wrong fight and they'll lose you the match.
It's important to realise that there is a lot of randomness involved in Holotactics. As soon as you start the fight, units decide what they will or will not do, and you have no control over them. The units' choices will also differ from round to round, so a unit composition that won in a first attempt may lose on a second attempt.
The key to victory is to try to minimise the amount of randomness and chaos in each round. One of the biggest causes of chaos in Holotactics is explosives. Roller Mines are very strong if they get to explode on the enemy, but often they'll backfire and destroy your own troops. The same goes for rocket launchers and grenades. So be very mindful of your explosive usage while you play.
You can watch the below video to see me beat all eight opponents in quick succession. For a more in-depth look at the strategies I used for each round, keep reading.
Below you'll find out exactly how to win each round and beat every Holotactics opponent in Star Wars Jedi: Survivor:
- How to beat Turgle
- How to beat Greez
- How to beat Tulakt
- How to beat Merrin
- How to beat Caij
- How to beat Skoova
- How to beat T-1N8
- How to beat Tulli
How to beat Turgle
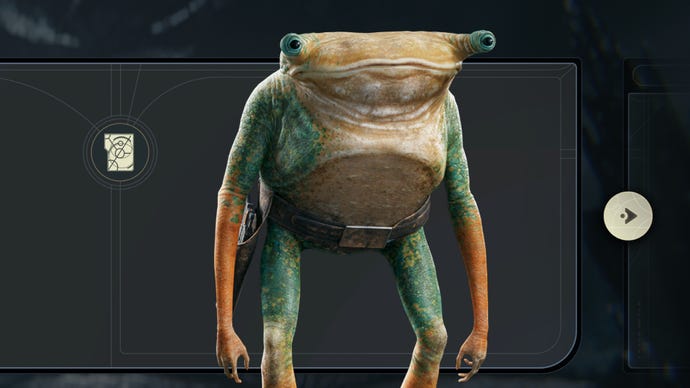
Turgle is the first adversary you'll face in Holotactics, and he's a bit of a pushover. You only need to beat two rounds against him to win, and his small groups of Scout Troopers won't do much against a well-chosen selection of units.
To beat Turgle in Holotactics, here are the units you should use in each round:
| Round | Units to use |
|---|---|
| 1 | Electrostaff Purge Trooper + Stormtrooper |
| 2 | Sutaban Alpha + Stormtrooper |
The positioning of these troops is very straightforward - just put the melee unit in the centre of the front row, and the Stormtrooper behind it. The two Scout Troopers are clearly outmatched by your Purge Trooper in Round 1, and the Sutaban Alpha is far too aggressive for Turgle's own Purge Trooper in Round 2.
How to beat Greez
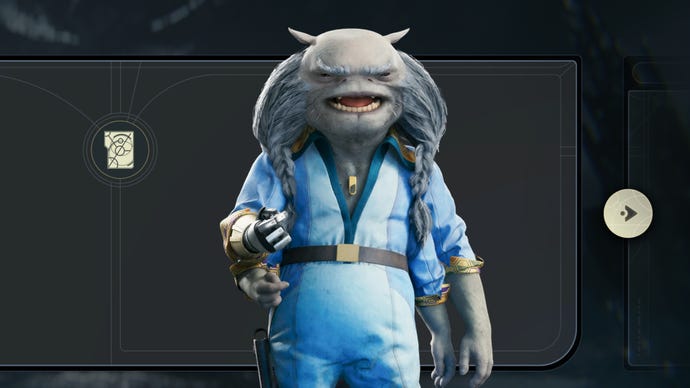
Greez is an immediate jump up in difficulty from Turgle, mainly thanks to his love of Stormtrooper Commanders who like to throw grenades at your foes. Whenever grenades are involved in a round, things can get chaotic and unpredictable very quickly. Fortunately, there's an easy way around this issue.
To beat Greez in Holotactics, here are the units you should use in each round:
| Round | Units to use |
|---|---|
| 1 | Droideka + 2x Gorger |
| 2 | Bedlam Smasher + 2x Stormtrooper |
| 3 | Bedlam Smasher + Stormtrooper |
Distract those pesky Rawkas in Round 1 with a couple of front-line Gorgers, while your Droideka picks everything off from the backline. Round 2 is easy: just put a Bedlam Smasher on the front row, with one or two Stormtroopers behind him. And then repeat the strategy for Round 3. Not even the Security Droid in the final round has an answer to the immense damage output of that Bedlam Smasher.
How to beat Tulakt
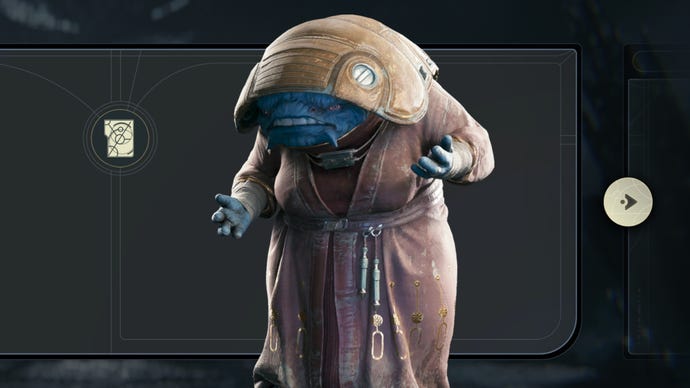
Tulakt is actually one of the toughest opponents in Holotactics if you don't know what you're doing. Her foot soldier unit composition is very simple but effective at dealing with lots of different types of attacks.
To beat Tulakt in Holotactics, here are the units you should use in each round:
| Round | Units to use |
|---|---|
| 1 | Sutaban Alpha + Rawka + B1 Droid (Melee) |
| 2 | 5x Stormtrooper Commander + Hardshell |
| 3 | 2x Stormtrooper Commander + 2x Rawka |
A Sutaban Alpha on the frontline will do the heavy lifting in Round 1, but back it up with a Rawka to take out one of the Stormtrooper Commanders as quickly as possible, and a B1 Droid if you like. In Round 2 I like to lean into the foot soldier meta by lining up 5 Stormtrooper Commanders on the backline to lay waste to the Raiders and B1 Droids as they get close. Pop a Hardshell in front to tank those first few hits, and you'll be fine.
Finally, in Round 3, put two Stormtrooper Commanders on the backline and shield them with two Rawkas. The Rawkas will almost always immediately kill off the Raider Veterans, and the combined force of the Rawkas and Troopers will make short work of the remaining BX Droid.
How to beat Merrin
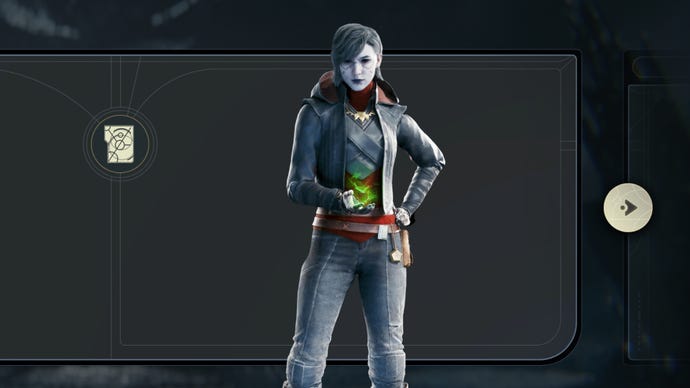
The lovely Merrin is up next, and she's actually one of the easiest fights in the game thanks to the game's leniency with point-spending. To beat her units, you just need to think big.
To beat Merrin in Holotactics, here are the units you should use in each round:
| Round | Units to use |
|---|---|
| 1 | AT-ST |
| 2 | 2x Sutaban Alpha + Heavy Assault Trooper |
| 3 | 3x Sutaban Alpha |
It's always fun to plop down an AT-ST in Round 1 of a Holotactics match, and it'll make very short work of Merrin's Bramliks and DT Sentry Droid. To win Round 2, place down two Sutaban Alphas on the frontline and back them up with a Heavy Assault Trooper to soften up Merrin's own Sutaban on the other side.
For Round 3, the trick is to go for heavy melee attacks against the Skriton. 3 Sutaban Alphas will nearly always make mincemeat of the Skriton, winning you the match with ease.
How to beat Caij
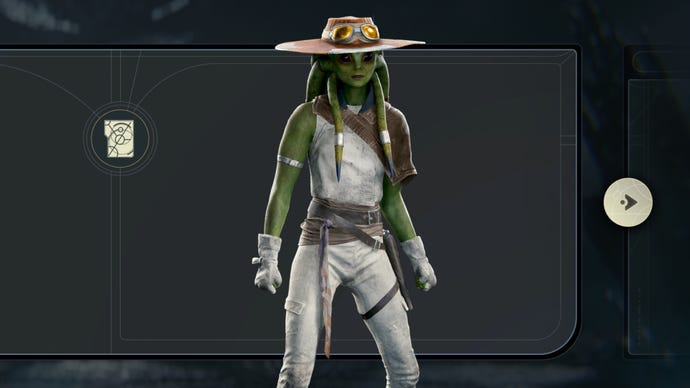
Caij is another foot soldier-heavy opponent who can pose quite a threat to improperly chosen unit compositions. The key is to pick aggressive melee units who will close the distance and end the fight fast, so that Caij's ranged troops don't have time to react.
To beat Caij in Holotactics, here are the units you should use in each round:
| Round | Units to use |
|---|---|
| 1 | 2x Sutaban Alpha + Magnaguard |
| 2 | Bedlam Smasher + 2x Stormtrooper |
| 3 | 5x Rawka |
In Round 1, simply line up your 2 Sutaban Alphas and your Magnaguard on the frontline, and there's not much Caij's units can do to them. To best the tricky pairing of Shield Trooper and DT Sentry Droid in Round 2, put down a Bedlam Smasher right in their face, and then far off to each side place a Stormtrooper to provide backup fire.
Round 3 seems like it could pose a threat, until you realise that not even a Purge Trooper Commander and 2 Magnaguards stand a chance against a group of Murder Chickens. Line up 5 Rawkas on the front row and the fight will be over in seconds.
How to beat Skoova
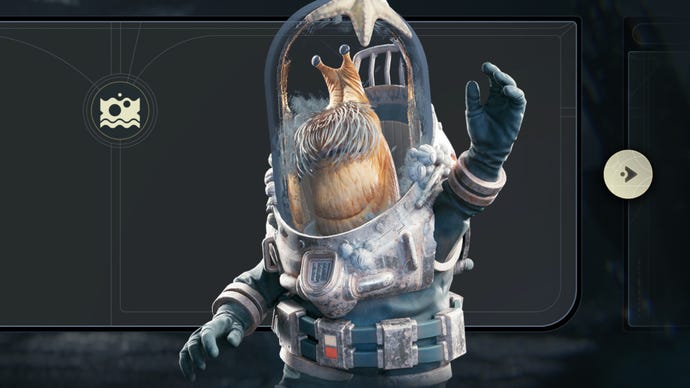
Skoova is possibly the toughest opponent in all of Holotactics. He uses a variety of powerful units and shakes up his strategy with each round, so you'll need to have a solid plan to reliably defeat him and take his mustache.
To beat Skoova in Holotactics, here are the units you should use in each round:
| Round | Units to use |
|---|---|
| 1 | 2x Bedlam Smasher |
| 2 | Bedlam Smasher + Heavy Assault Trooper |
| 3 | 2x Sutaban Alpha + Stormtrooper Commander |
| 4 | Skriton + Stormtrooper Commander + Stormtrooper |
2 Bedlam Smashers are a near-guaranteed win on Round 1. They usually make short work of the Shield Troopers with their AOE slam attack, and they're hardy enough to eat an entire clip from Skoova's Heavy Assault Troopers before going down. For Round 2, replace one of those Bedlam Smashers with a Heavy Assault Trooper and pop it in a back corner. That way, even if your Smasher gets bullied by Skoova's Rocket Trooper, your Heavy Assault Trooper will end up killing them all while they're distracted.
Round 3 can be sorted out with 2 Sutaban Alphas on the frontline, backed up by a Stormtrooper Commander. Sometimes it's a close-run thing, but I've never seen this team comp fail. And finally, to defeat the highly dangerous trio of Shield Trooper, Droideka, and B2 Droid in Round 4, place down a Skriton to soak up the bullets on the frontline, and a couple of ranged troopers behind it to help out.
How to beat T-1N8
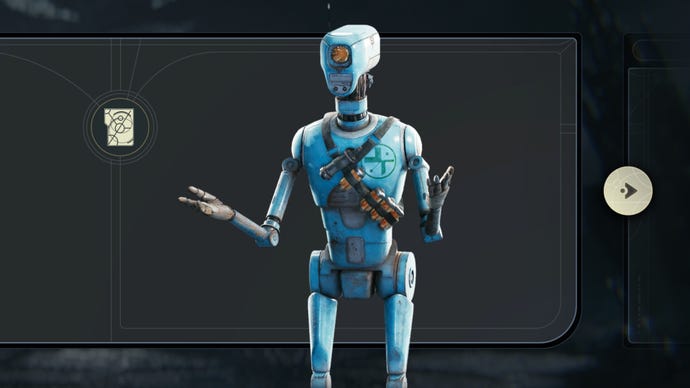
The secret to dealing with T-1N8's massive creatures is a huge amount of firepower. You know what that means: Droidekas.
To beat T-1N8 in Holotactics, here are the units you should use in each round:
| Round | Units to use |
|---|---|
| 1 | Droideka + Gorger |
| 2 | 2x Droideka + Gorger |
| 3 | Skriton + Heavy Assault Trooper |
| 4 | 2x Droideka + Shield Trooper + Stormtrooper |
In Round 1, place a Droideka in the back corner and put a Gorger in the enemy Gorocco's face. One clip from the Droideka should finish it off, so the Gorger is just there as fodder. For Round 2, do exactly the same thing, but put two Droidekas in the same back corner and they'll tear through both the Bilemaw and the Gorocco in no time. Droidekas really are that strong.
With Round 3 you need to contend with T-1N8's own Droideka, so bring out the bullet-resistant Skriton again and back it up with a Heavy Assault Trooper on the backline to help the Skriton deal with those two Sutaban Alphas. And in Round 4, use the points you've saved in previous rounds to place down a Droideka in each back corner, and then a Shield Trooper front-and-centre and a Stormtrooper behind it. That Shield Trooper will save your life, distracting the Rawkas and the Bedlam Smasher long enough for the Droidekas to do what they do best.
How to beat Tulli

The very last Holotactics opponent you'll face is Tulli, the game-runner herself. She makes use of some very powerful units, but she's actually easier than Skoova and even Tulakt thanks to just how many points you're given to set up your own units. Tulli simply doesn't have an answer to the heavy-hitters you can bring out with so many points.
To beat Tulli in Holotactics, here are the units you should use in each round:
| Round | Units to use |
|---|---|
| 1 | 2x Bilemaw |
| 2 | 2x Skriton |
| 3 | 2x Skriton + Purge Trooper Commander |
| 4 | 2x Droideka + Roller Mine |
Two Bilemaws will handily clean up all 7 foot soldiers in Round 1, even with the Stormtrooper Commanders throwing grenades from the back. In Round 2, replace those Bilemaws with 2 Skritons, and watch them stomp right through Sulli's troopers.
Round 3 is the hardest round in Tulli's match, but thanks to your incredible wealth in points, you can purchase 2 Skritons again, and back them up with a Purge Trooper Commander who can pick off the Bedlam Smasher and the BX Droid with those devastating charged shots. And in Round 4, the AT-ST may appear scary, but it turns out all you need are a couple of Droidekas in the back corners and something (a chose a Roller Mine) to tank those first shots and prompt the AT-AT's defensive mine-drop attack instead of going straight for the Droidekas.
And that's how to reliably beat every opponent in Holotactics in Jedi: Survivor! If you're gearing up to go scan some new creatures and enemies for your Holotactics fighting, then make sure you go prepared with our guide on the best stance in Jedi: Survivor and the best perks in Jedi: Survivor. We also have guides on collectible locations in Koboh, Jedha, Coruscant, Shattered Moon, and Nova Garon if you're in a completionist mood.
