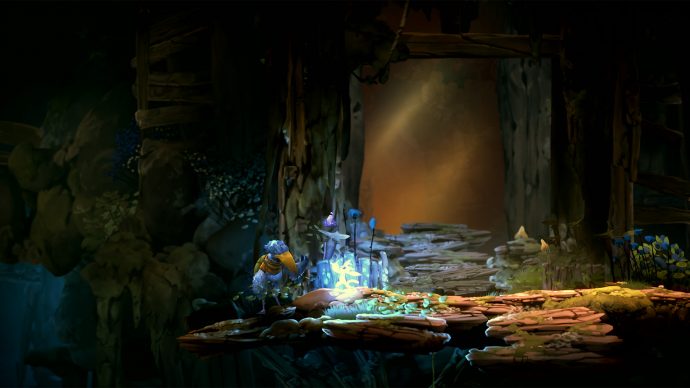
Ori And The Will Of The Wisps Life Cell fragment locations: how to get more health
Staying healthy


Staying alive in Ori And The Will Of The Wisps is going to be difficult with low health, so you'll want to find Life Cell fragments. When you get two of them, you'll get extra maximum health. As one of the big collectables in the game, you may wish to find all of them, so we have been on the hunt for these fragments.
Contents
What are Life Cell fragments?
Life Cell fragments are collectables that you will need to get two copies to make an extra chunk of maximum health. While life can be restored with certain skills or by hitting green things, you'll only have three life cells to begin the game with. Some enemies can hit really, really hard at later stages of the game, so having more overall life cells can make these harder trials little easier.
It's worth noting at this point that spikes and the dark water will always deal the same percentage of damage to your overall health. Therefore, having more life cells doesn't mean you'll survive longer in spikes or dark water.
Ori And The Will Of The Wisps Life Cell fragment locations
From some early game footage that we've seen, there could be as many as 34 Life Cell fragments to find. We've so far found a couple of them. We'll be separating them into areas, just so you can easily tell if you have found all of the fragments for the area you are in. We'll be adding to the list once we've confirmed every Life Cell fragment's location.
Life Cell fragment location areas
- After obtaining both the Keystone fragments in Howl's Den, head left and look for a shining point in the wall. Knock it down with your Spirit Edge attack and follow the path upwards. You'll see a small gap towards the top left littered with spikes. Carefully jump between them and you'll eventually see the life cell fragment.
- Once you have found Mokk the Brave (after the Howl boss fight), head back and drop downwards. You’ll see some twigs blocking a path to the right between some spikes. Hit them multiple times to destroy them and continue to the wall on the right. Hit that wall a few times too and you’ll reveal the fragment.
- After getting the double jump, head back to the starting area to the north-west. Keep heading left and jump across the platforms and climb walls until you get to the waypoint stones. Underneath this is a rock. Pull it out of the way to find the life cell.
- Shortly after getting the Bash ability, head up until you see projectiles being fired from a turret horizontally. Fling yourself through the small log covered gap above you and towards the turret. Pull the lever and head through the doorway that opens. Use the enemy projectiles to head up until you grab the life cell fragment.
- When exploring the interior of the first door, destroying the third orb will activate two cogs. Backtrack to find a third cog spinning that wasn't before. Launch upwards and pull the lever to reduce the water level. Go down the new hole and head to the left past the half-spike, half-moss stationary cog to find the life cell fragment.
- Just before you enter through the second door to the interior of the Wellspring, there is a half-spike cog above and to your left. You can barely latch onto it using the grapple ability. Head left, defeating the enemy here, then jump off the ledge. Use the grapple on the lantern to head towards the spikes and the hidden area with the life cell fragment.
- After the tentacle monster chase scene, head back towards Wellspring Glade until you see the first purple plant. Use the grapple to get to the combat shrine. From here, use the grapple on the blue slug thing on the far right of this room. Carefully jump and dash across the walls until you reach the life cell fragment. This will take several attempts, so keep at it until you get there.
- After delivering the Blue Moon seed to Tuley in Wellspring Glades and building the first Moki huts, grapple upwards from the left of the village. Go through the wooden bridge and grapple up the lanterns to find the Life Cell fragment.
- After finding the burrow ability, head back to the lower levels. Close to the red leaping enemy, there is a ledge to the right with a sand platform. Burrow through the sand platform, aiming up to launch Ori towards the ceiling. Here you'll find the life cell fragment.
- From the wooden bridge on the lower level, drop down and go to the right. Latch onto the grapple point to your left and drop down into the gap. There's a life cell fragment in this small room.
- From the eastern Spirit Well, head left and dig into the sand below. About halfway up the upper left path, there's a gap in the spikes on the left-hand wall, which contains the fragment.
- As you progress, you'll come across a burrowing section where you lead missiles to open up walls. After pulling the lever, head to the right, then down, leading a missile into the wall on the left. Blowing it up will give you access to the life cell fragment.
- After getting the ability to burst through water at speed, carry on until you reach a room with four switches. Solve the puzzle but don't drop down yet. There is a missile launcher to the bottom right. Lure a missile out and through the gap to the right. There is a big drop and a crumbling wall to your right. Carefully aim the missile with the bash ability so that the arrow is just above the door. The cell is just beyond the wall.
- Return here once you have the flash ability. From the Spirit Well, head up and to the left to the room underneath the life cell. The door will lock behind you. Use melee skills to defeat the crabs and the underwater dash/flash ability to defeat the underwater enemies. The water will drop once more, but the hatch will open. Bounce on the bubble and climb the wall to reach the cell fragment.
- At some point, you'll use the light burst to knock down a log, causing a snowball to crash into a wall. This will make a gap you can dig through with the burrow ability and find the life cell fragment.
- Get the Flash ability and head to the middle of the area. You likely saw this one earlier when following fireflies. Climb up to the cocoon then glide to the left. Climb up the wall on the left and jump to the overhang, before gliding to the life cell fragment.
Ori And The Will Of The Wisps guides series
These are all the Ori And The Will Of The Wisps Life Cell fragment locations that we know of so far, but there are plenty of other collectables to find. We have a bunch of guides readily prepared below that cover all sorts of things, from the locations of Gorlek Ores and energy cell fragments, builds for Ori's skills, and boss fight/chase sequence strategies.
- Ori And The Will Of The Wisps guide - Our hub area for all of our guides for Ori And The Will Of The Wisps.
- Ori And The Will Of The Wisps Gorlek Ore locations - Every location of the Gorlek Ore locations to rebuild the village.
- Ori And The Will Of The Wisps energy cell fragment locations - All the places you can find energy cell fragments to raise your energy bar.
- Ori And The Will Of The Wisps map locations - All of Lupo's locations in the game.
- Ori And The Will Of The Wisps Spirit Shard locations - Places to find all the Spirit Shards in the game.
- Ori And The Will Of The Wisps quests - Every side-quest detailed from where to begin, the item you need, and the rewards you get for completing them.
- Ori And The Will Of The Wisps Hand To Hand quest - Steps to finish the longest side quest.
- Ori And The Will Of The Wisps Regrowing The Glades - Find all the seeds and replant them.
- Ori And The Will Of The Wisps boss guide - Our central bosses guides hub will walk you through each of the bosses, with some general top tips for fighting them.
- How to solve Midnight Burrows bell puzzles - Unlock the secret area by solving the bell puzzles.