Biomutant best class and breed: character creation explained
Choose the best class and breed in Biomutant's character creation system


Biomutant's character creation system offers you a lot of choice when it comes to designing your character. We'll cover all of them below, but particularly we'll focus on the question of which is the best class and breed in Biomutant, because your choice here also gives you a unique set of perks which you only learn about after beginning the game.
Best class in Biomutant
The best class in Biomutant is the Saboteur. They gain a huge bonus to critical hit chance (the equivalent of several level-ups and luck stat increases), which is great for fast-hitting melee and ranged weapons; and the Saboteur's unique perks make you much more agile and able to dodge attacks, which really helps make you feel like an untouchable badass in battles.
However, all the classes have their benefits and drawbacks. Here's what you need to know from the start, and I'll go into more depth with each class below:
- Dead Eye - Ranged damage prowess, high crit chance
- Commando - Close-range prowess, good with melee and shotguns
- Psi-Freak - Focuses on damaging with abilities rather than weapons
- Saboteur - Highest crit chance, ideal for fast weapons and dual wielding
- Sentinel - Tanking prowess, very balanced and versatile class
If you're unsure what picking a class really does: the 5 different classes in Biomutant each give you a different set of starting weapons; a slightly different chance to land critical hits for increased damage; and most importantly, a unique set of 5 perks which you can slowly unlock over the course of a playthrough.
- Biomutant tips and tricks
- Biomutant Upgrade Bench locations
- Biomutant Porky Puff boss fight
- How to turn off narrator
- How to change difficulty
- Biomutant New Game Plus
- Biomutant DLC
- Biomutant Photo Mode
- Biomutant Transmog
- How to fast travel
All the Biomutant classes can become extremely powerful over time, so you don't have to pick the Saboteur if it doesn't fit your playstyle. Below you can peruse the 5 classes and their perk lists so you can see which is the best class for you.

Dead-Eye
The Dead-Eye comes equipped with a two-handed sword and a pistol, and gets a small bonus to critical hit chance. They also start with the Perfect Reload perk (a perk available to all character classes), which does the following:
Perfect Reload: Your ranged weapons are reloaded instantly and your next magazine is granted +20% damage.
The Dead-Eye specific perks cover various different ranged combat styles, making it very flexible but less able to really hone one particular skillset.
Dead-Eye perks:
- Crackshot (costs 1): +20% damage with non-automatic rifles.
- Quickload (costs 1): -25% reload time for ranged weapons.
- Sniper (costs 2, requires level 7): +10% crit chance with non-automatic weapons.
- Gunslinger (costs 2, requires level 7): +20% fire rate with dual-wielded ranged weapons.
- Sharpshooter (costs 3, requires level 15): Two-handed Guns inflict double damage.
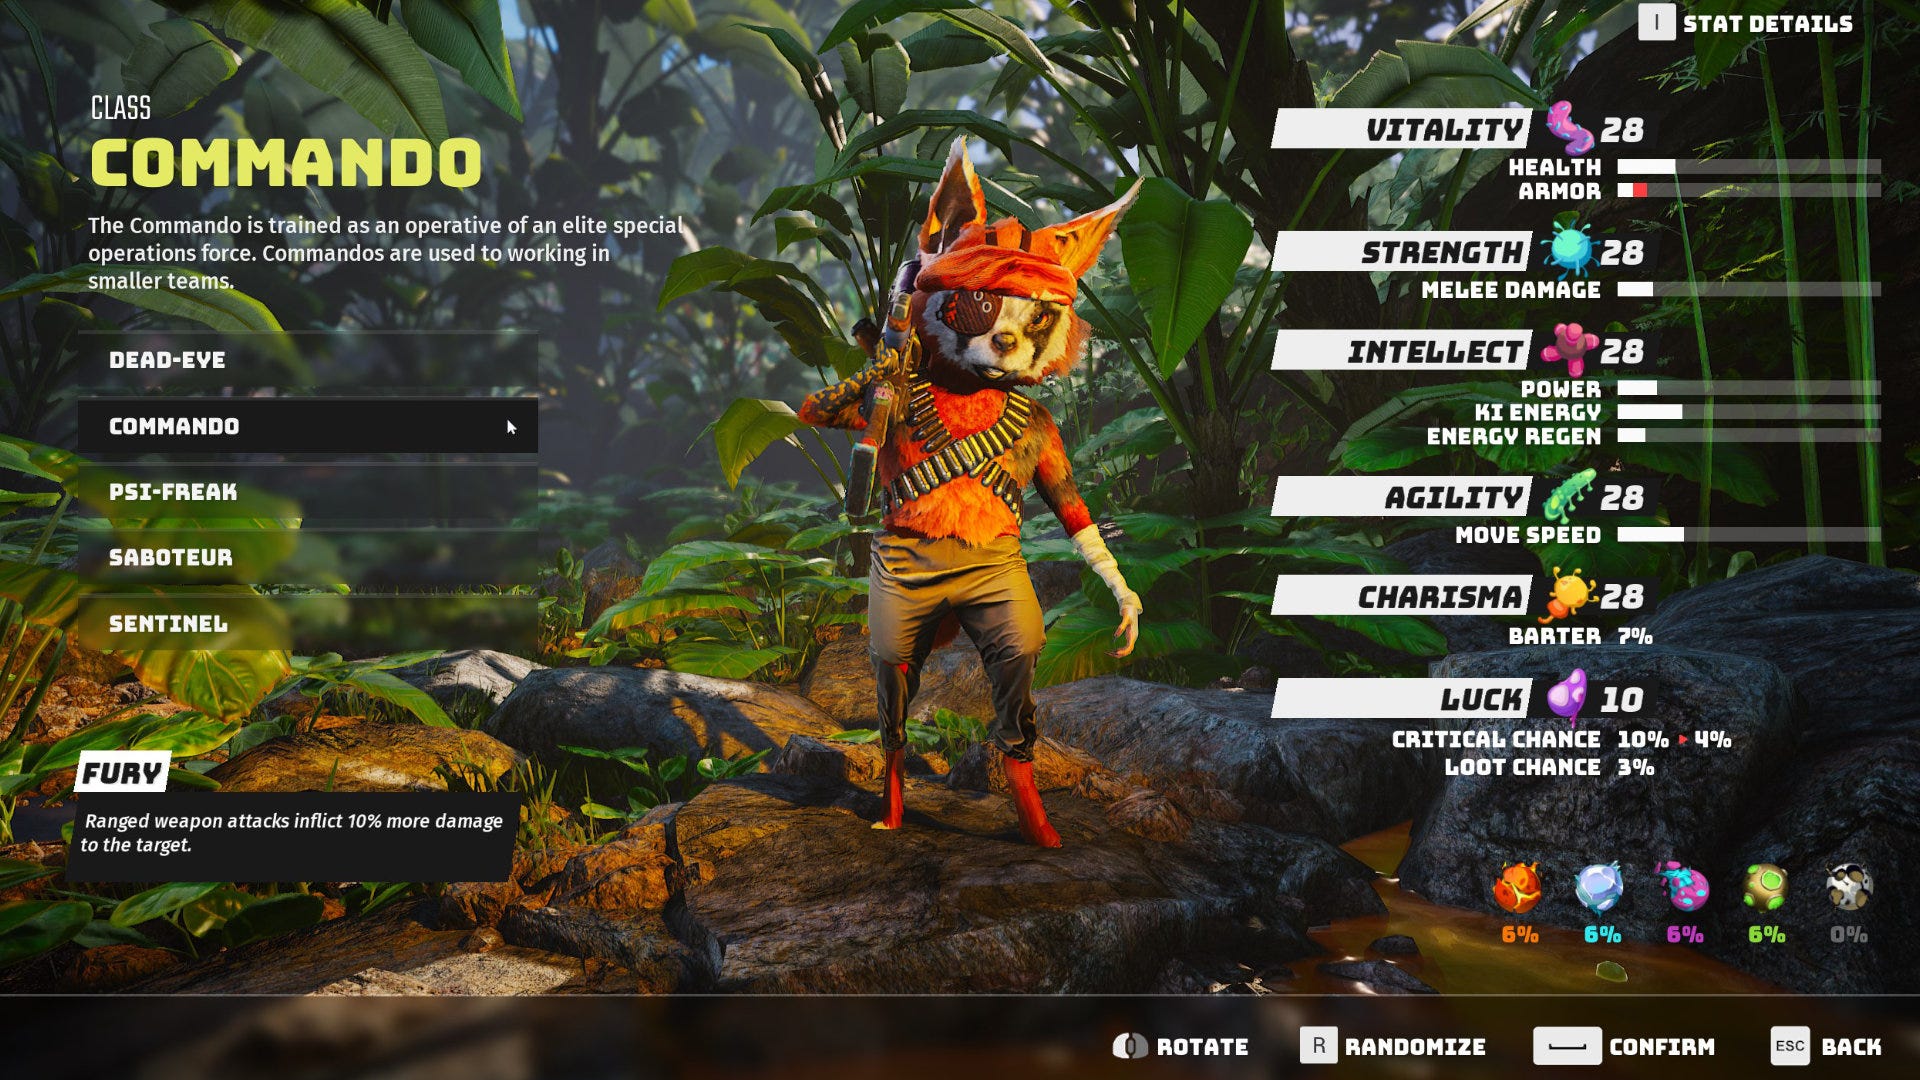
Commando
The Commando starts with an automatic rifle and a one-handed melee weapon. They enjoy no bonus to their critical hit chance, giving them the joint lowest base critical hit chance alongside the Psi-Freak.
The Commando perk tree is fairly balanced but leans slightly towards close-range combat, with increased damage and survivability particularly when you're low on Health.
Commando perks:
- Fury (starting perk): Ranged weapon attacks inflict 10% more damage to the target.
- Stimulus (costs 1): +20% melee damage and armor while below 20% health.
- Adrenaline (costs 1): +10% melee attack speed while below 20% health.
- Shock (costs 2, requires level 7): Shotgun hits have a 5% chance to Stun a small enemy per hit inflicted.
- Brutality (costs 3, requires level 15): +10% critical damage with ranged attacks.

Psi-Freak
The Psi-Freak starts with the base pistol and a pair of Spark Gloves, which are categorised as a two-handed weapon but really act like two one-handed weapons that can chain together fast, electrified attacks. They also have access to the Spark Ball ability from the start, which allows you to throw a ball of damaging electric energy at an enemy.
However, like the Commando, the Psi-Freak has the lowest base critical hit damage of all classes.
The Psi-Freak perks place much emphasis on your ability attacks that deal power damage, allowing you to increase their strength and even heal yourself when you damage enemies with them.
Psi-Freak perks:
- Megamind (starting perk): +20% Ki-Energy regen.
- Nocturnal (costs 1): +10 Intellect at night.
- Mind Melt (costs 1): +10% critical hit chance with Power Damage ability attacks.
- Psi Spikes (costs 2, requires level 7): +10% damage with Power Damage attacks.
- Brain Drain (costs 3, requires level 15): Attacks that inflict Power Damage regenerate your Health by 20%.

Saboteur
The Saboteur class equips you initially with two one-handed melee weapons, along with a starting ability to dual-wield melee weapons. You also get the usual starting pistol, and the highest possible bonus to critical hit chance, which works well with fast-hitting weapons such as the Jagni Tribe's unique Staff tribe weapon.
The Saboteur perks focus heavily on agility and dodging, making it harder for enemies to land hits on you.
Saboteur perks:
- Hypergenetic (starting perk): -20% dodge energy cost.
- Reflexes (costs 1): 10% chance to dodge enemy weapon based ranged attacks.
- Agile (costs 2, requires level 7): +20% dodge distance.
- Moving Target (costs 2, requires level 7): +5% move speed while in combat.
- Evasive (costs 3, requires level 15): +20% armor while dodging or in the air.

Sentinel
The Sentinel starts with a two-handed "crush" class melee weapon and a pistol, and enjoys a medium bonus to critical hit chance which puts them in 2nd place behind the Saboteur for that stat.
The Sentinel's perk tree gives you plenty of options for staying alive and strong even while engaged in melee with multiple enemies at once.
Sentinel perks:
- Toughness (starting perk): +10 armor.
- Medic (costs 1): +10% health regen.
- Ricochet (costs 2, requires level 7): 10% chance for enemy weapon-based ranged attack to ricochet back and damage the attacker.
- Invincibility (costs 2, requires level 7): +20% melee damage and armor while at full health.
- Knock (costs 3, requires level 15): Dodging "into" a smaller enemy makes them stumble and fall.
Best Biomutant breed and other character creation choices
In Biomutant's character creation system, the class is actually the last thing you pick. Before that, you have to select your breed, genetic code (i.e. your starting stats and physique), your resistances, and your fur type and colour.
Your breed in Biomutant is not as important as your class; it just gives you a slightly different set of starting stats. They also inform the look of your character (i.e. your face type) and this is something that you cannot change later on.
Here is what you need to know about the different Biomutant breeds:
- Primal - Bonus to energy regen and crit chance
- Dumdon - Bonus to melee damage and health
- Rex - Bonus to health and max energy
- Hyla - Bonus to health and armor
- Fip - Bonus to energy and ability damage
- Murgel - Bonus to bartering/persuasion, loot chance, and crit chance
The best breed in my opinion is the Murgel, but really the benefits become obsolete so quickly that you should just pick the breed that you like the look of the most.
Likewise, changing your genetic structure has a big impact on your overall body type - but this appearance aspect you can change later on. More importantly the genetic structure modifies the weight placed on the following 5 stats:
- Vitality: your max health and armor.
- Strength: your melee damage.
- Intellect: your ability power and energy regen.
- Agility: your move speed.
- Charisma: your persuasion and shop discount rate.
Overall I'd say the most important stats here are Strength and Agility, but it's also good to have a fairly healthy mix so I wouldn't recommend pushing the dot too far in any direction here.

Your resistances indicate how resilient you are to certain types of damage. They also allow you to survive for longer inside the relevant hazard zones on the map. But if you're a first-time player I wouldn't recommend fiddling too much with this.
Finally there's your fur style and colour. You can pick between multiple different fur styles and also select a primary and secondary fur colour to finalise your look. But don't worry if you're not totally happy with your choice! Just read our page on how to change your appearance in Biomutant during a playthrough.
That covers more or less everything we know about the various classes and choices in Biomutant's character creation system. While you're here, be sure to check out our page on how to glide in Biomutant to explore the map more easily!